The Herringbone Stitch Summerbag
Posted on May 18, 2022
13 minutes
2733 words
Everyone has that moment occasionally, when you are so excited to get started that you do not want to read everything about it. If that is you, Click here to go to directly to the pattern.
The seasons are moving fast now, and before you know it the time comes to take off jackets and enjoy the warmth of the sun. Did I already tell you that I absolutely love the sun? My day gets so much better by it. Seeing the clouds disappear and some sunbeams start to shine through gives me so much energy and sets my mood for the day. I think a lot of people can relate with this feeling, especially after having a long cold winter.

I used to not be a bag person at all and my keys were always in my jacket. Why would you need to bring a full on bag if you just wanted to bring your phone and your keys? But when the weather starts to get better, you start switching jackets, and sometimes you forget your keys. Well that has been my story way too many times. It has happened in the past that it was one of those days. My keys were inside the house, and I was locked out. Of course that day my brother, who I shared and apartment with at that moment, just passed the border on vacation and would be away for a week. Just my luck! What to do?! I was lucky enough that my dad was working in the area and had some tools in his car. In the end I got in with the use of some tools, agility and thinking outside the box… or should I say window? While I am reliving this moment with a smile on my face, I am happy that in Sweden this would never be the case, because you need your key to lock the door from the outside. But, at that moment it would have been handy to have a small bag where my keys were in, so I could always have it with me.
I decided to create a bag especially for these moments. Just a small side bag where your phone and keys would fit in, and you basically have everything you need to go quickly out to enjoy the sun.
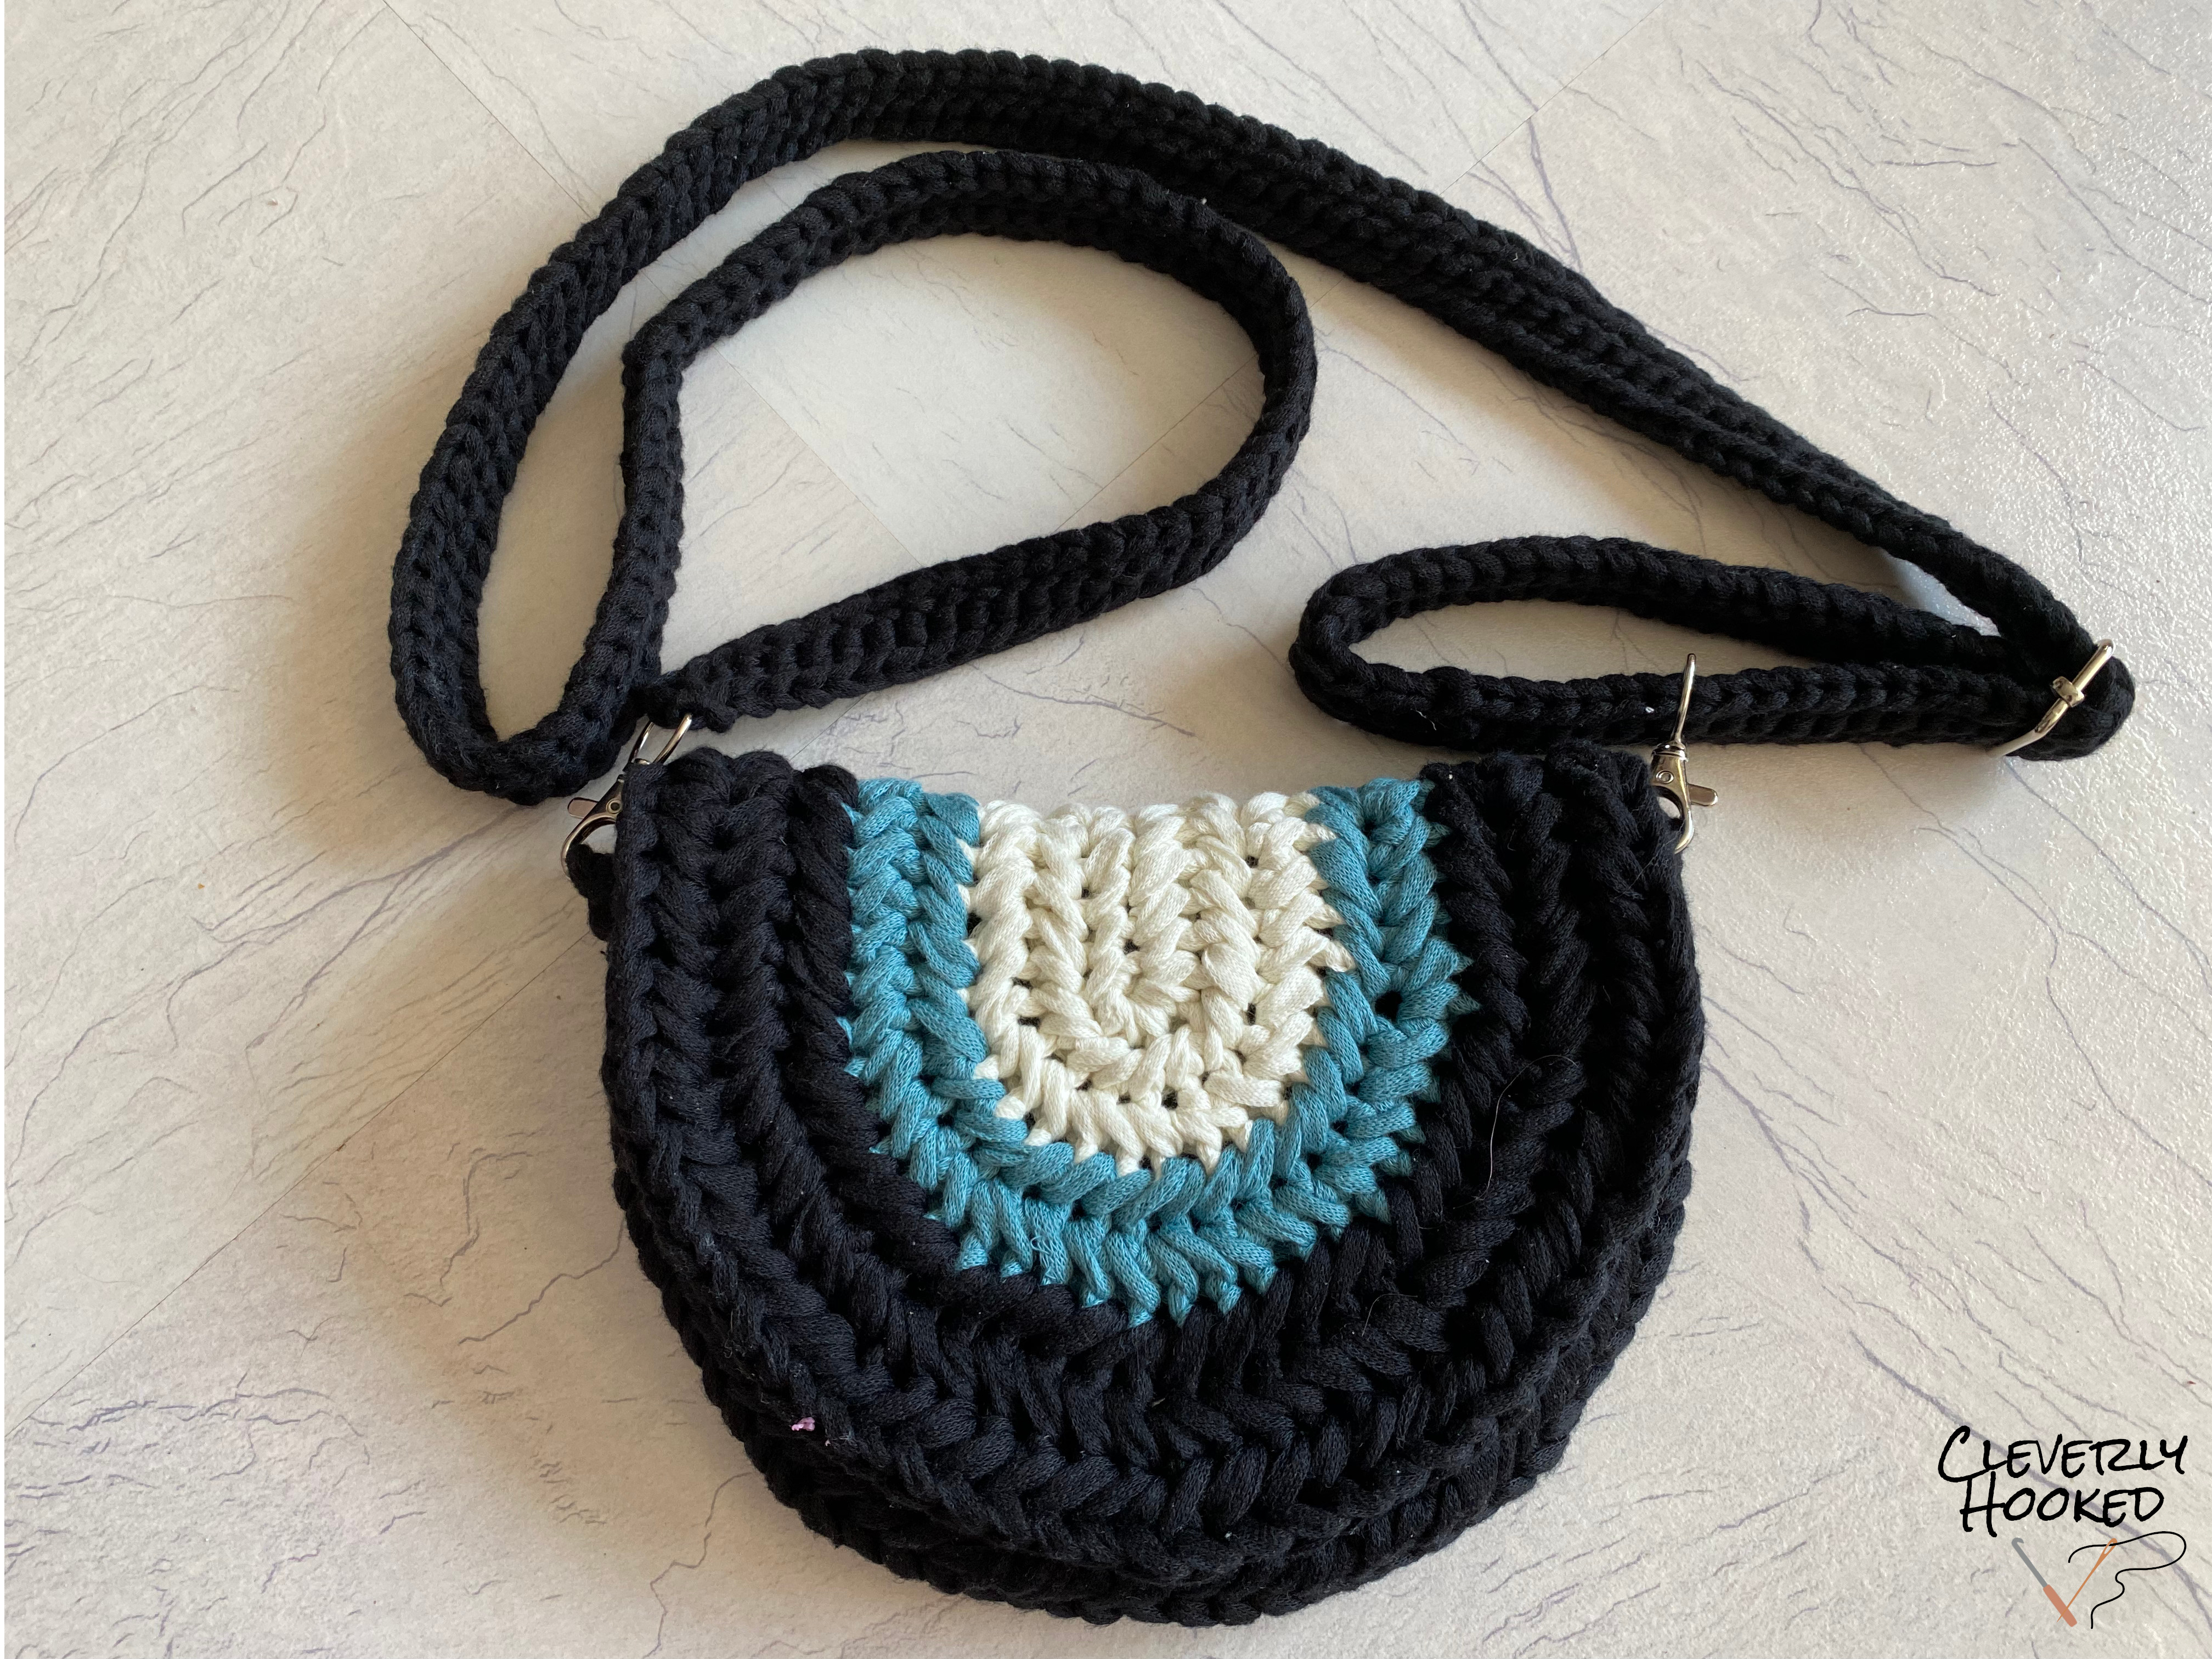
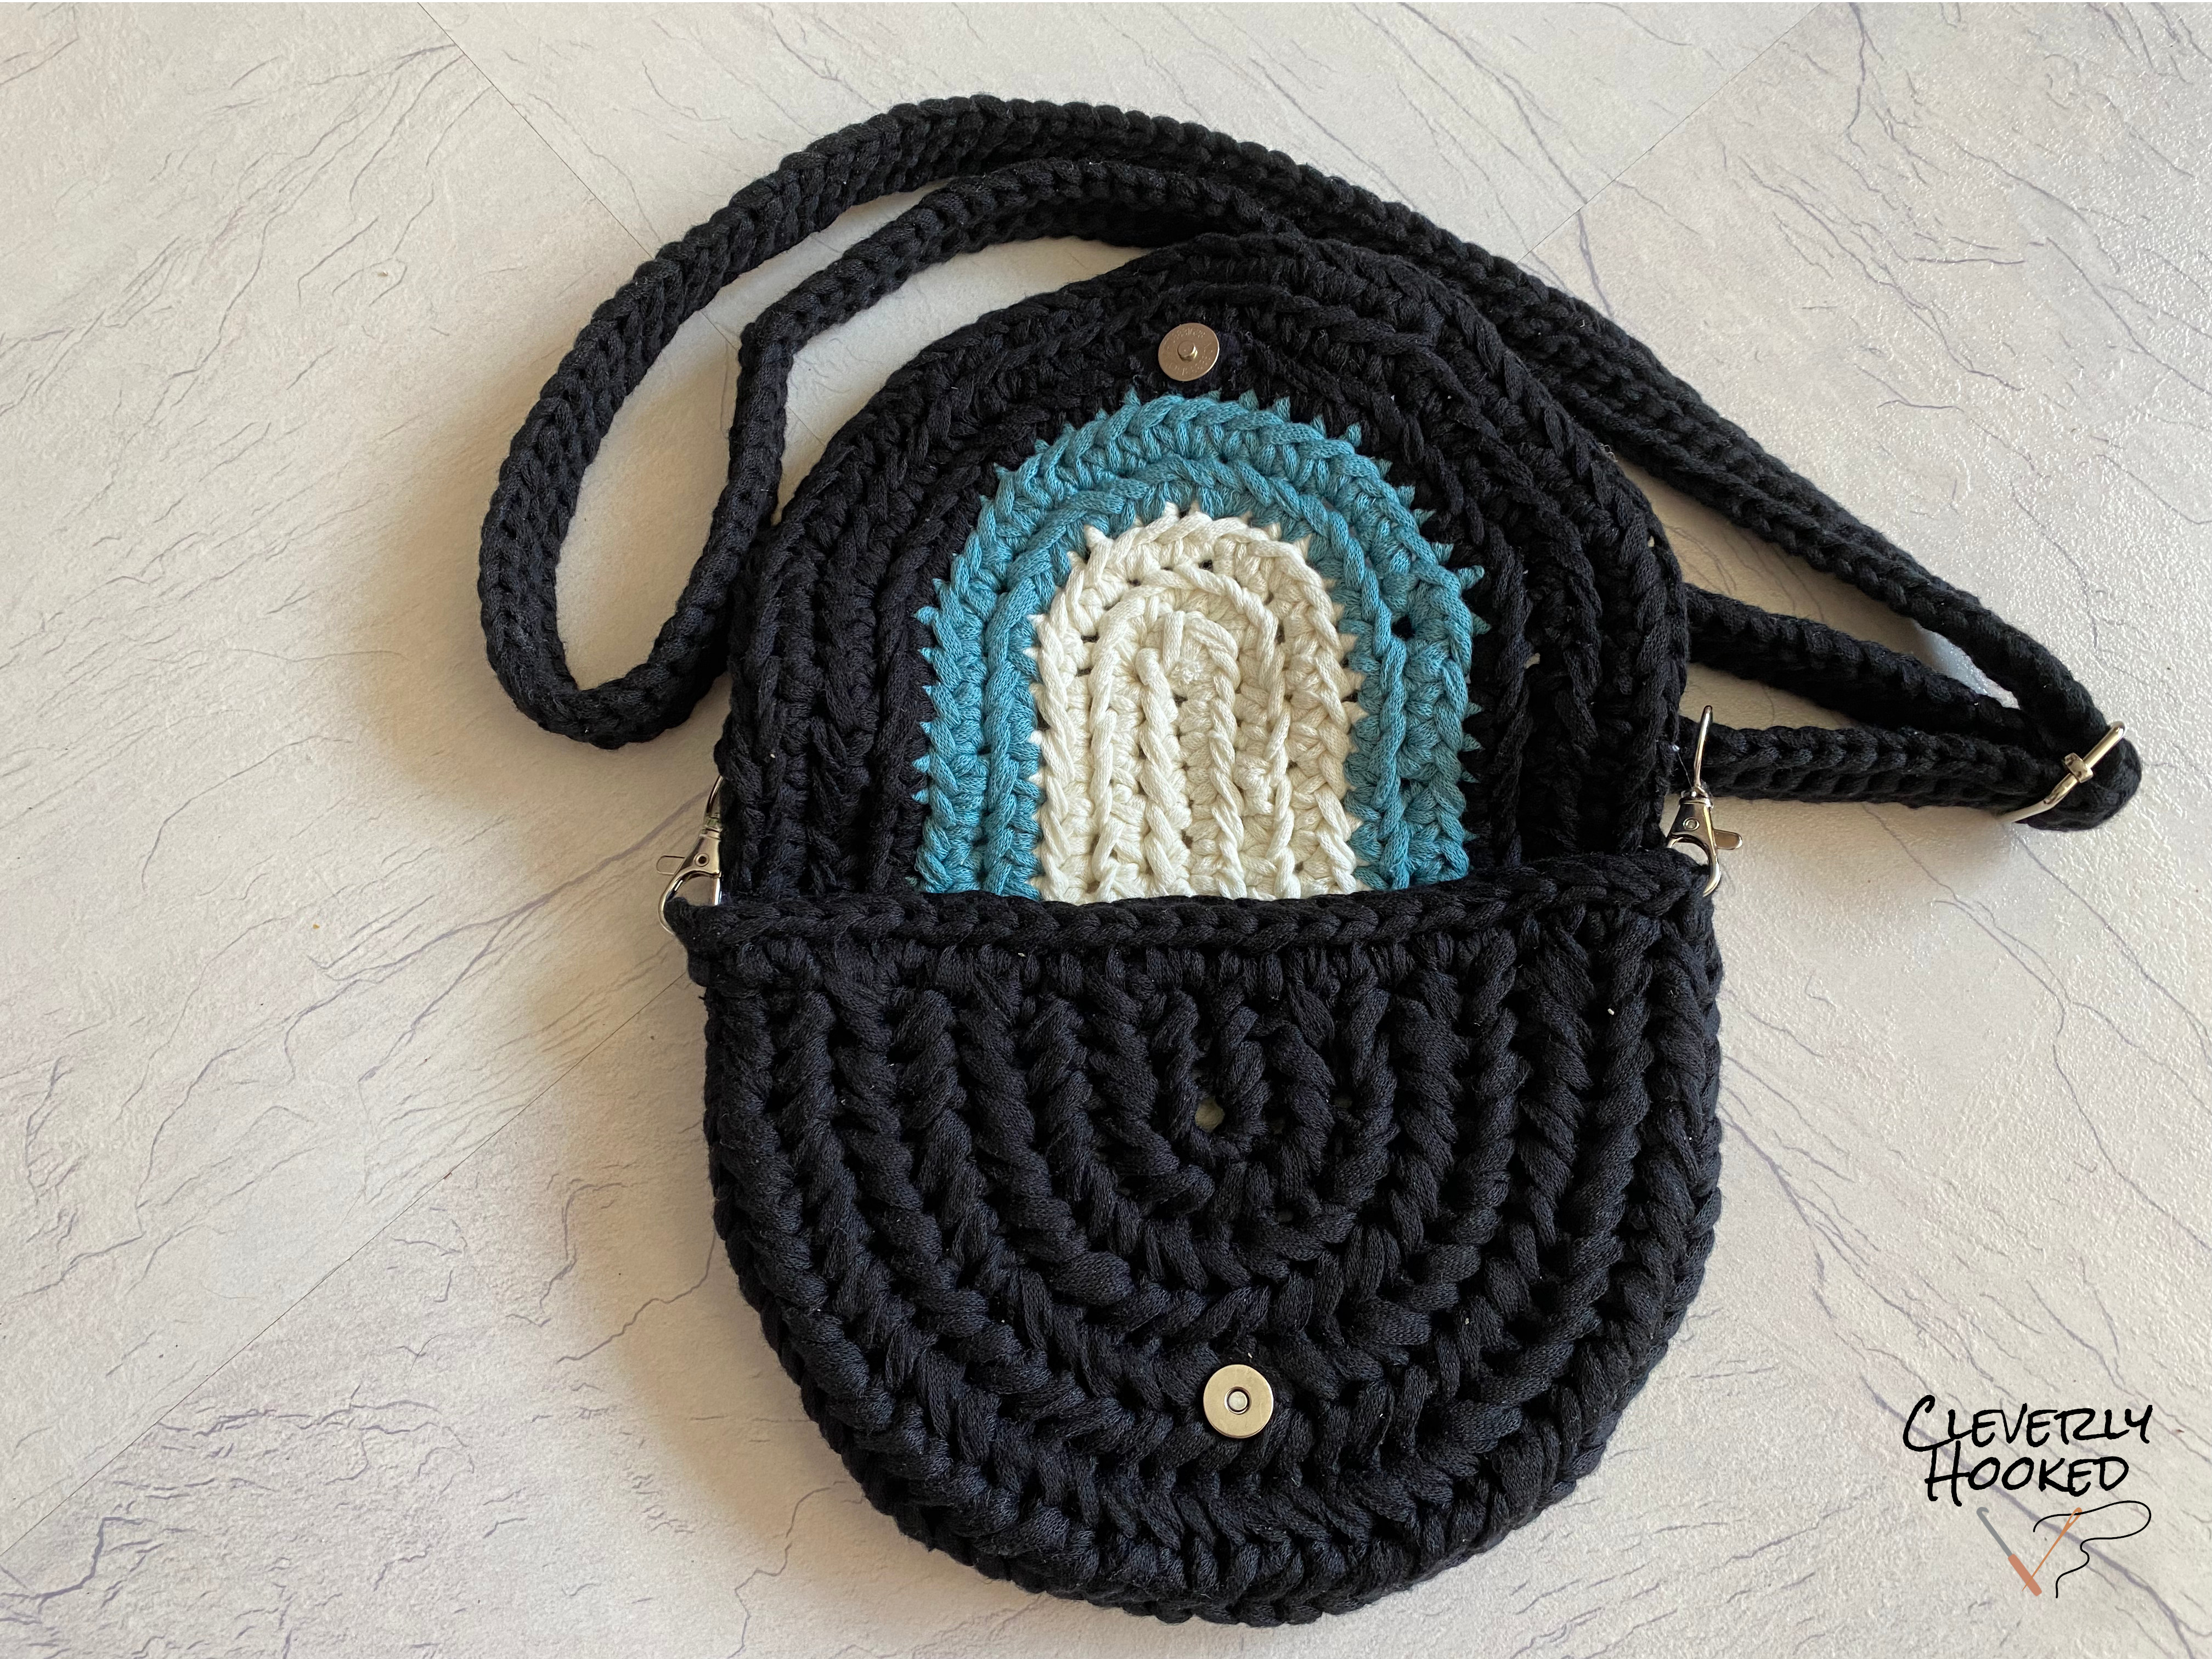
Why the herringbone stitch? I fell in love with the herringbone stitch the moment I found out there was such a thing. As a kid I always loved braiding hair and the look of braids has something playful, yet elegant. I tried the stitch out by making a scarf for my daughter and wanted to use it again to make other things. Often when I am looking online for new inspiration, I come across so many fun things. Sadly not in my language, and I speak and understand 4! So it was time to recreate this bag and write my own pattern for it. This is my first pattern I have ever written, so if you have any comments or tips, I would love to hear them and learn from them, so my future patterns can improve :) This pattern is based on a video made by Freao - Crochet and Knitting Pattern.
This bag can be either made in one color or with different colors. I think the stitch itself shows better if you only use one color, but with playing around with colors you can give different accents to the bag. I used the yarn ‘Ribbon’ and a crochet needle of 7 mm was used. I figured out that this combination worked best for me crocheting bags and will probably be my ‘go to’ when I make other bags.
When creating this bag I came across some decisions and experiences that I want to share with you as well. After all we are learning and creating together! The first time I created the bag I was just winging it while crocheting, hoping it would work out. Which seems like a reoccurring pattern in my life. It gives a lot of freedom, for me at least, but when something goes not how you would have wanted it, it might take some extra time and become a bit frustrating. I wanted to create a bag that was mostly half a circle, but not too wide. With that in mind, I tried to minimize the ‘straight’ stitches in my design. Starting with the inner part of the bag that determined the size of it, the outside layer was merely the double of it, plus a few extra stitches for the folding point. After finishing the bag, it was quite difficult to close while having some items in it. I needed to add more of those ‘few extra stitches’, to let the bag function properly.
The nice thing about this bag is that you can make it any size you want. If you want a bigger size bag, just add some more rounds to it. While I was determining the size of the bag, it got too big for my purpose of the bag. The whole last round had to be taken out, which gave a not nice finished look on the outer stitches. By pulling out all that yarn, I learned that it is so much easier to make a flat looking stitch when the yarn is not already used. That said, it is clearly possible to reuse the yarn, it just takes a little time to address the yarn to make flat stitches.
Another thing that I noticed, well it was clearly visible, was the ends of my rounds. By using slip stitches and turning to create the Herringbone stitch, it was hard to give it a seamless joint I thought, if I can make a herringbone single crochet, why cannot I make also a herringbone slip stitch? If you could call it that. With the same technique, I could make slip stitches that were not that obvious.
Herringbone stitch (HSC)
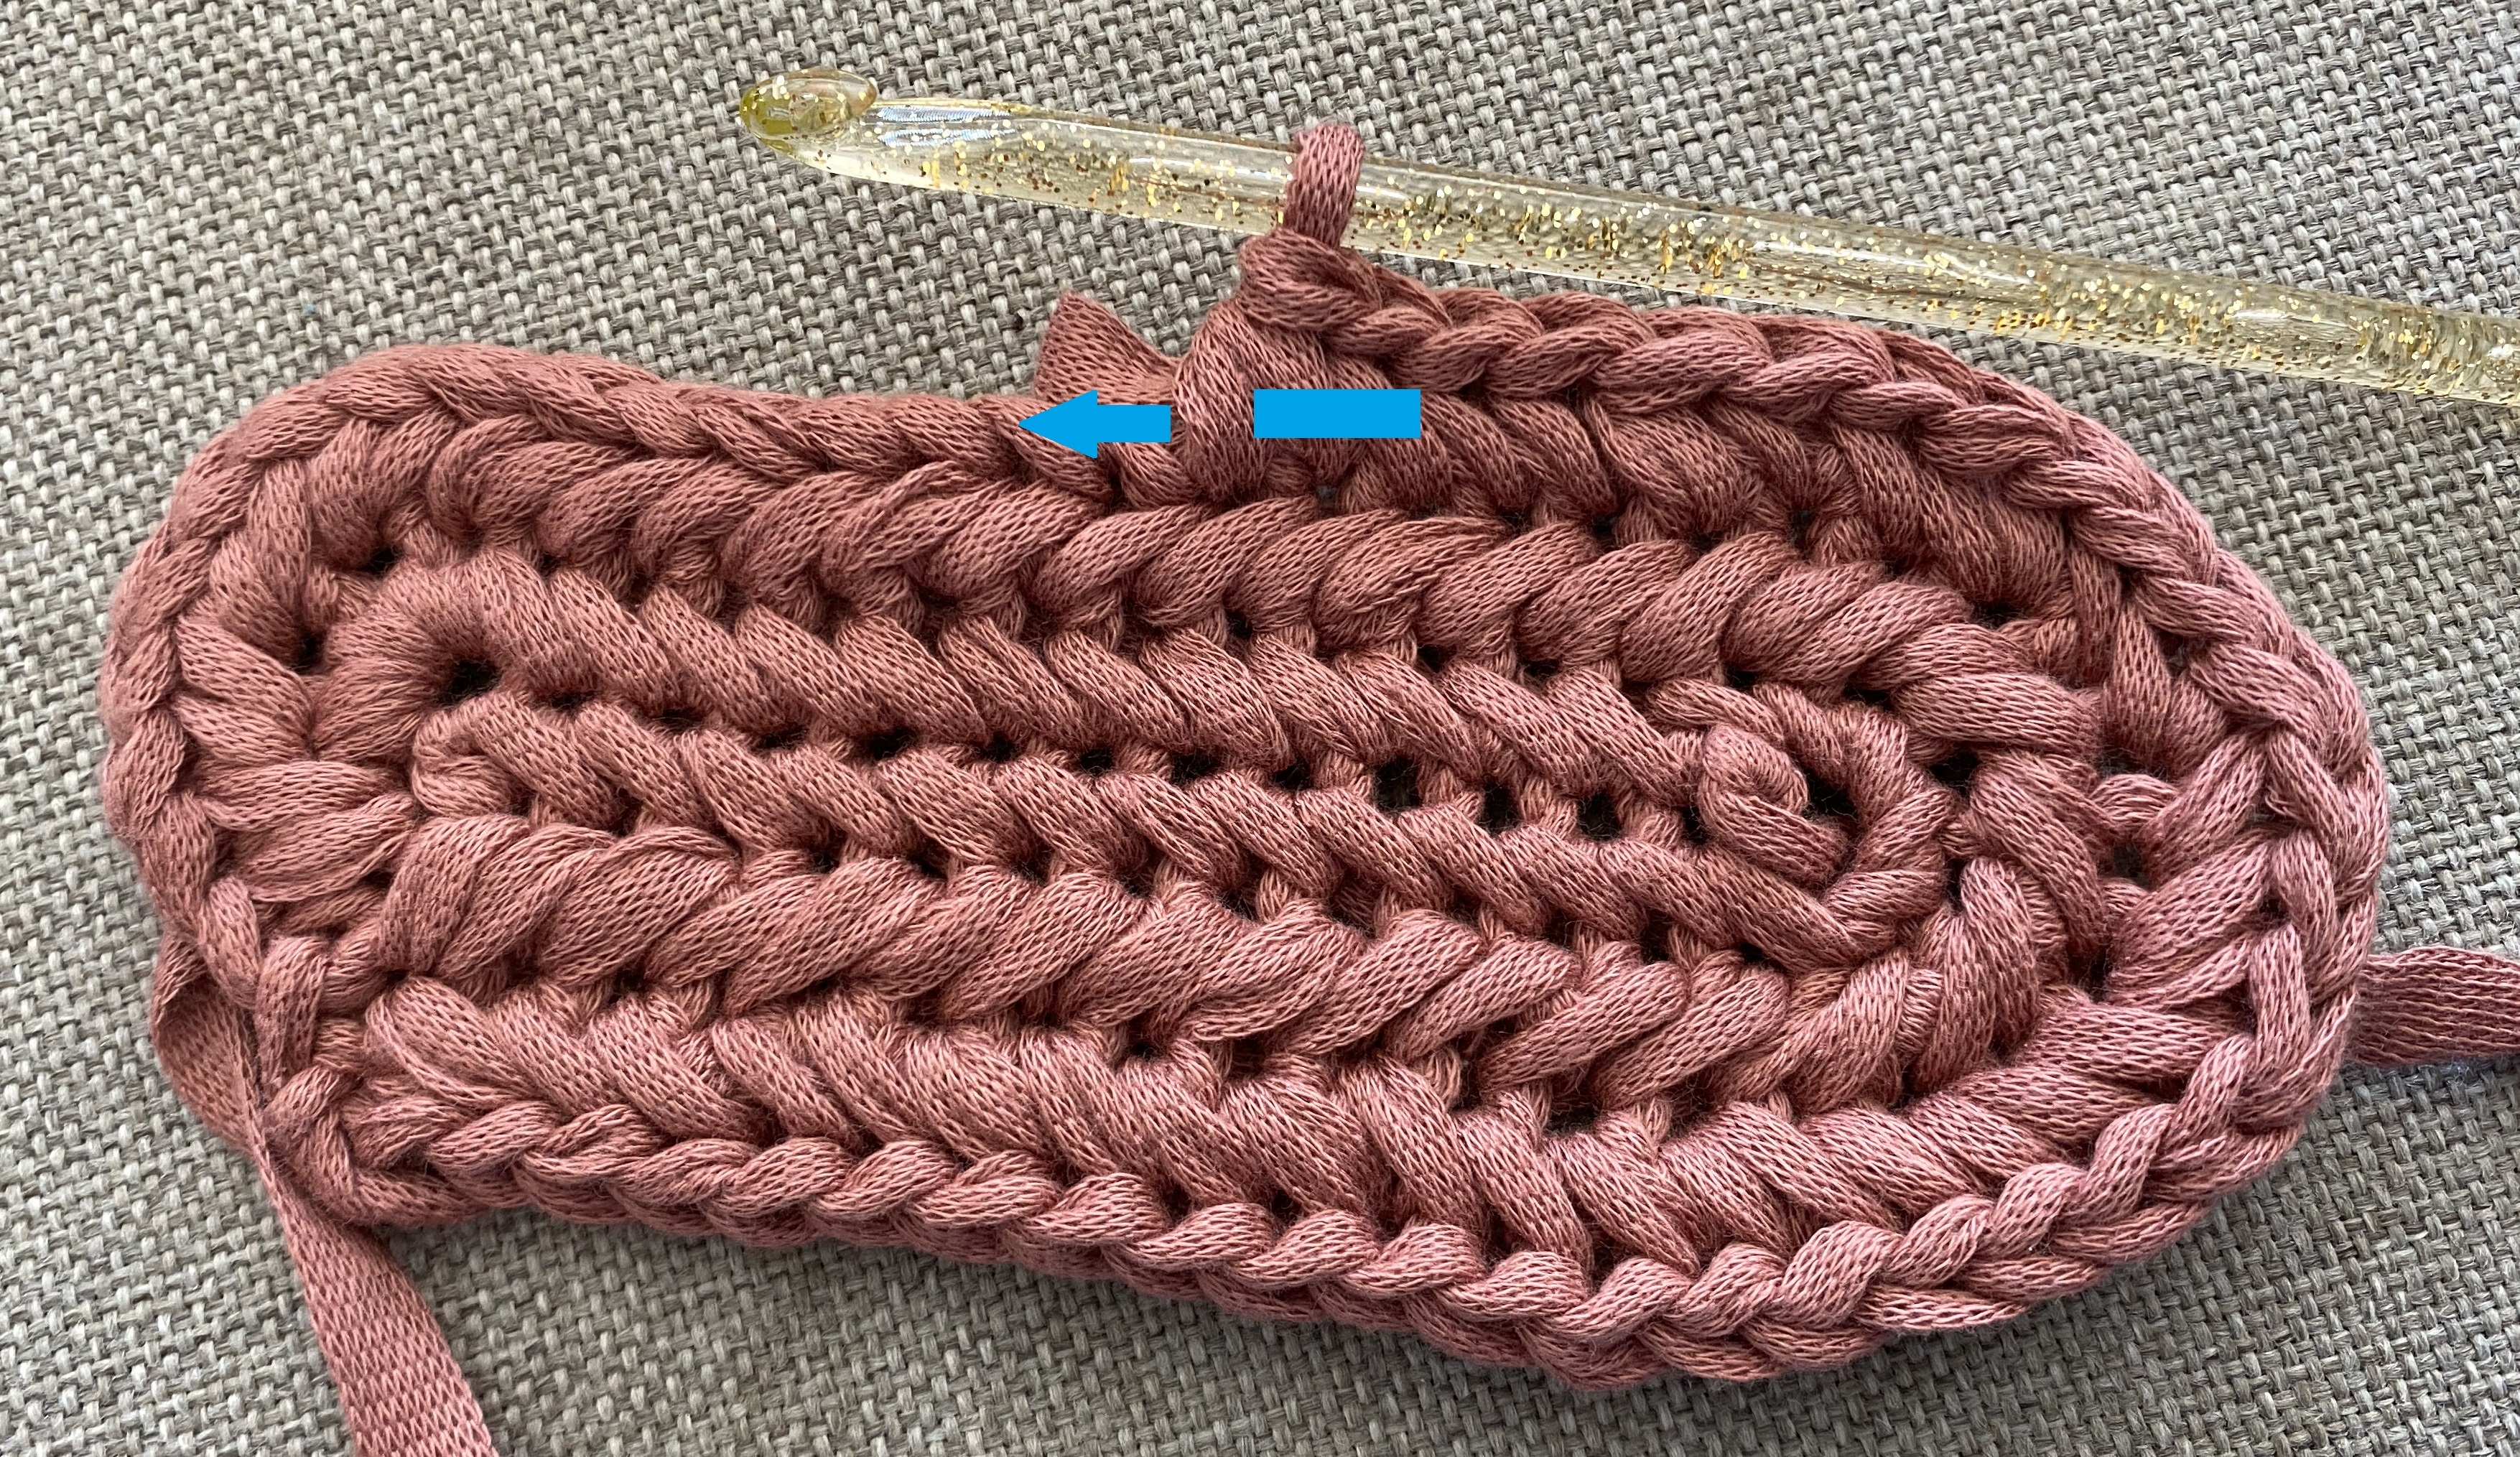
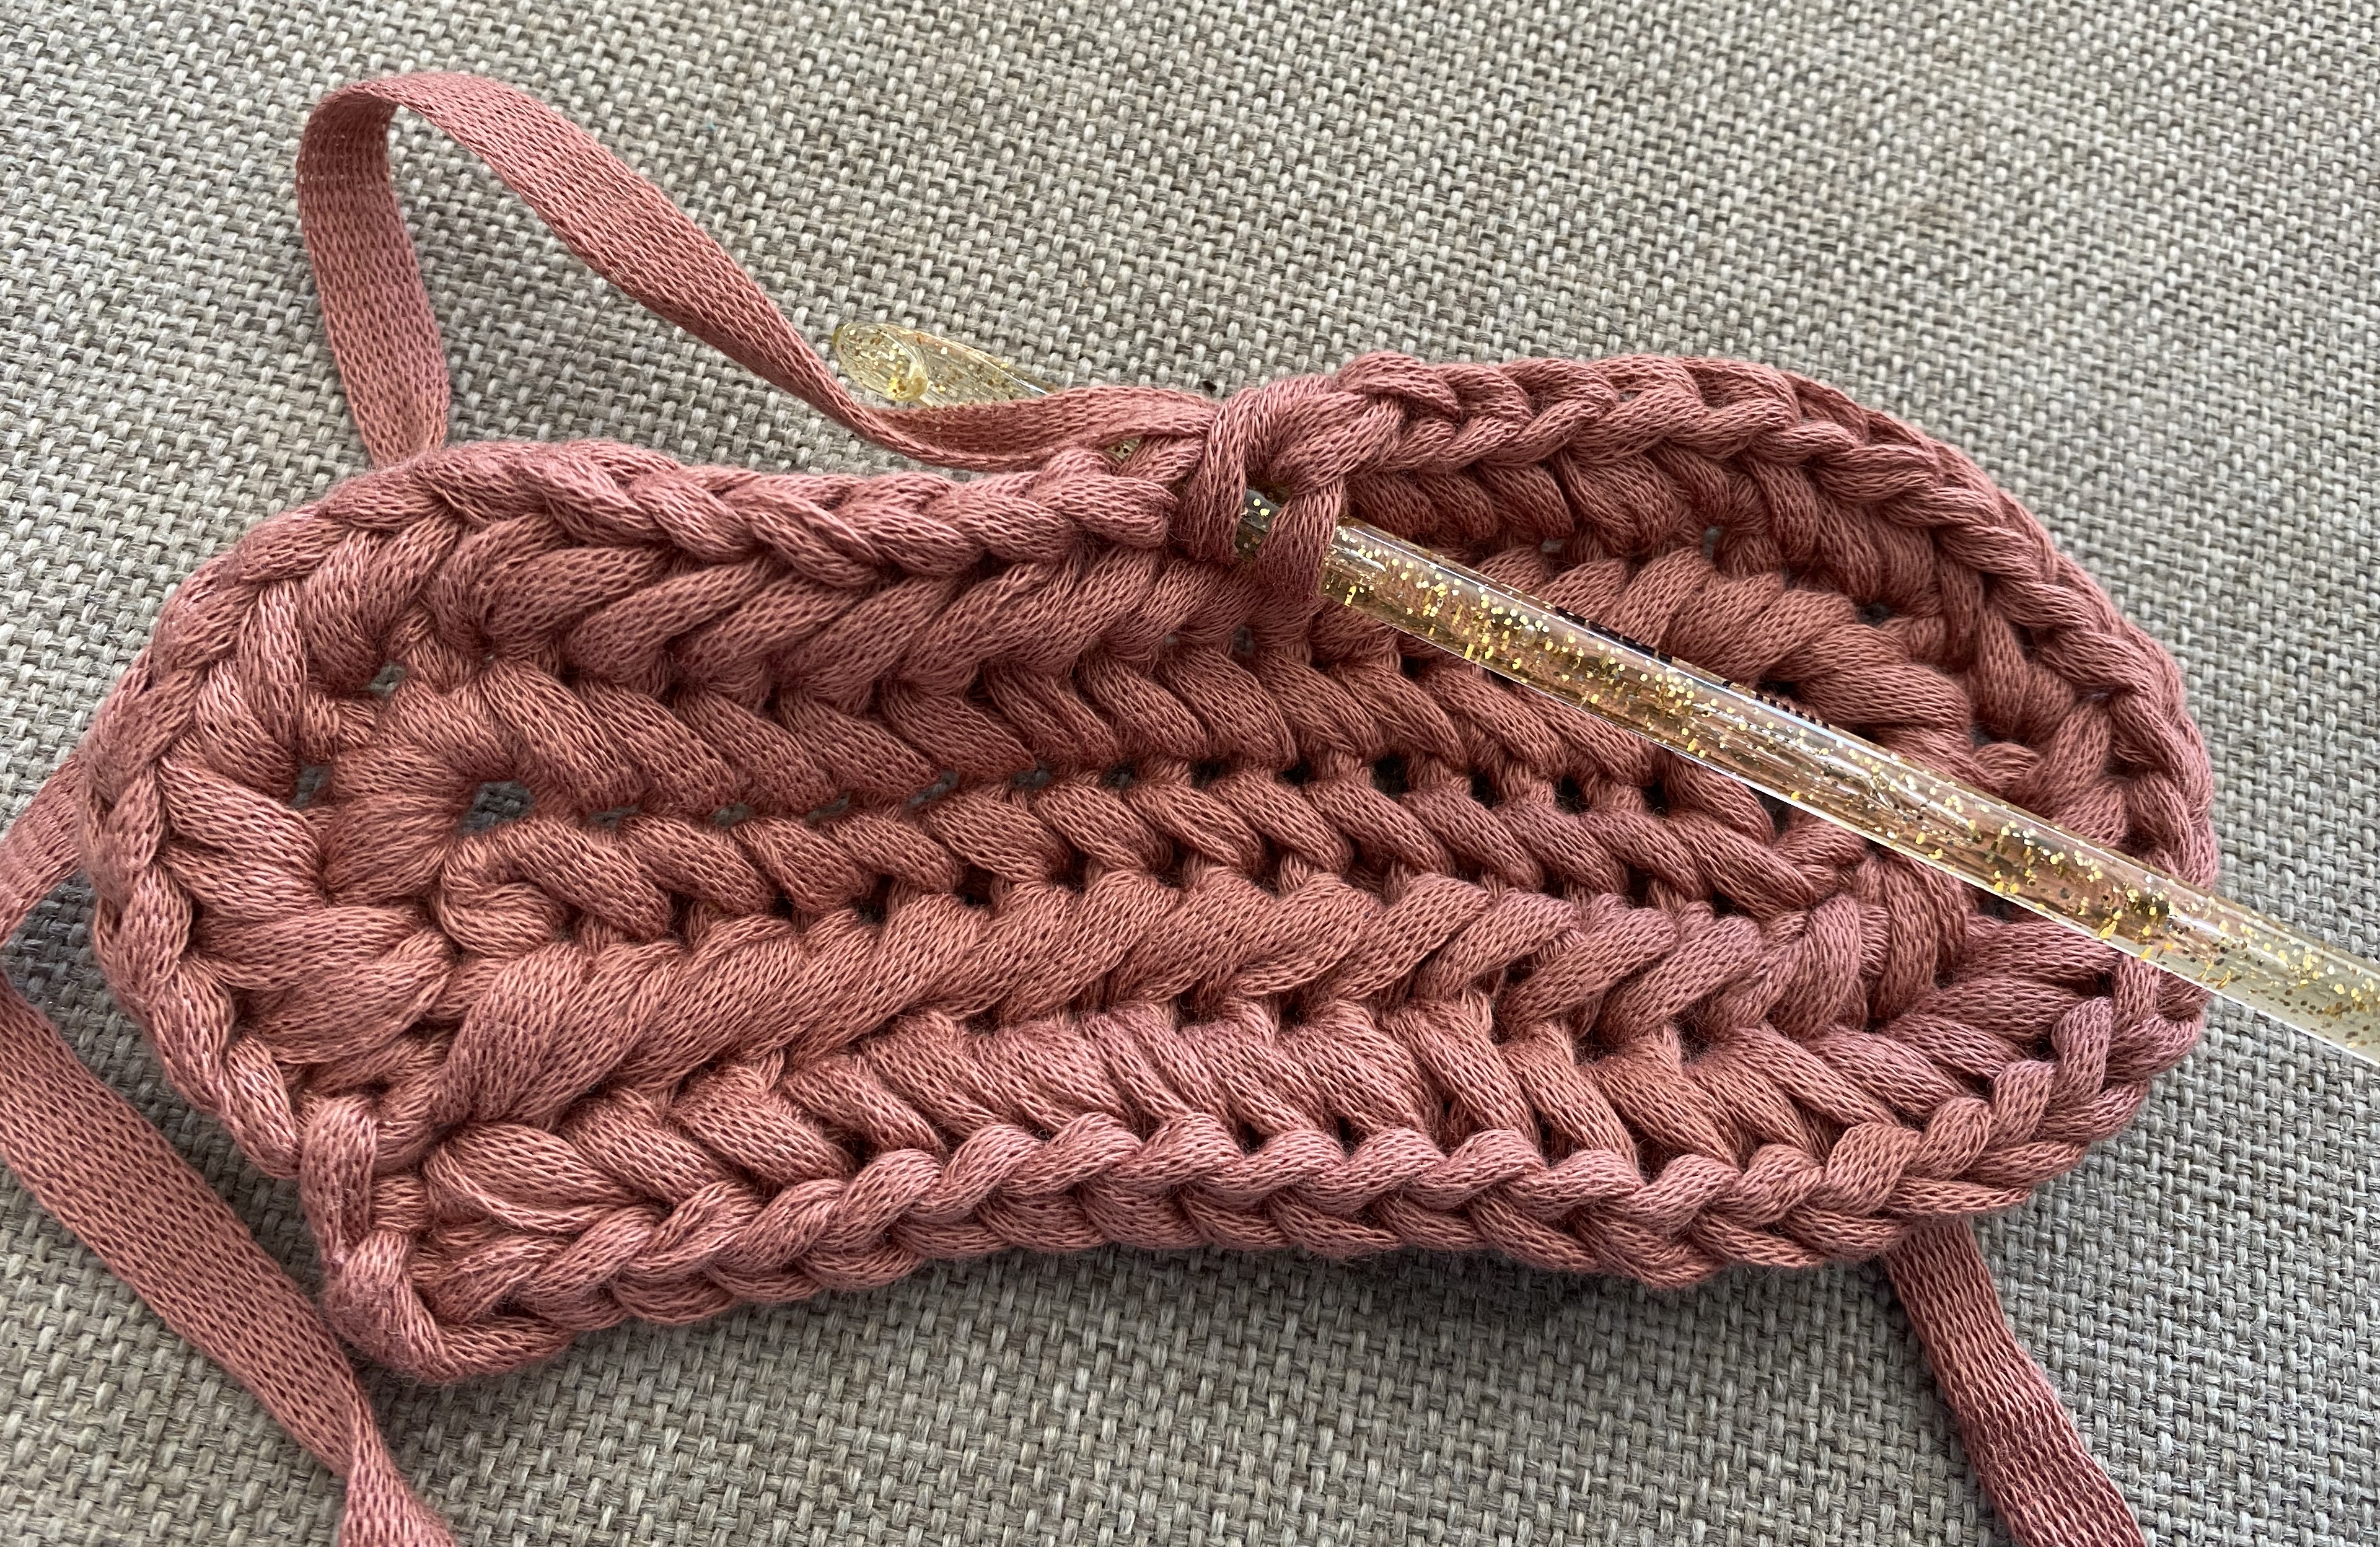
The herringbone single crochet stitch is a variation on the simple single crochet stitch. The stitch is crocheted in a two row repetition and on the 2nd row the hook is inserted from the other side. The Herringbone stitch gives a clear ‘right’ side and ‘wrong’ side. Both look completely different, so it is easy to see what side you are working on. The ‘right’ side gives that desirable braided look, and basically you always insert your hook from that side.To make this stitch in the first row; you insert your hook in the left(closest) vertical bar of the previous stitch (1). Then insert your hook into the next stitch (2) and pull up a loop (3). Yarn over and pull through all three loops (4). These stitches together form the ‘right’ side of your work.
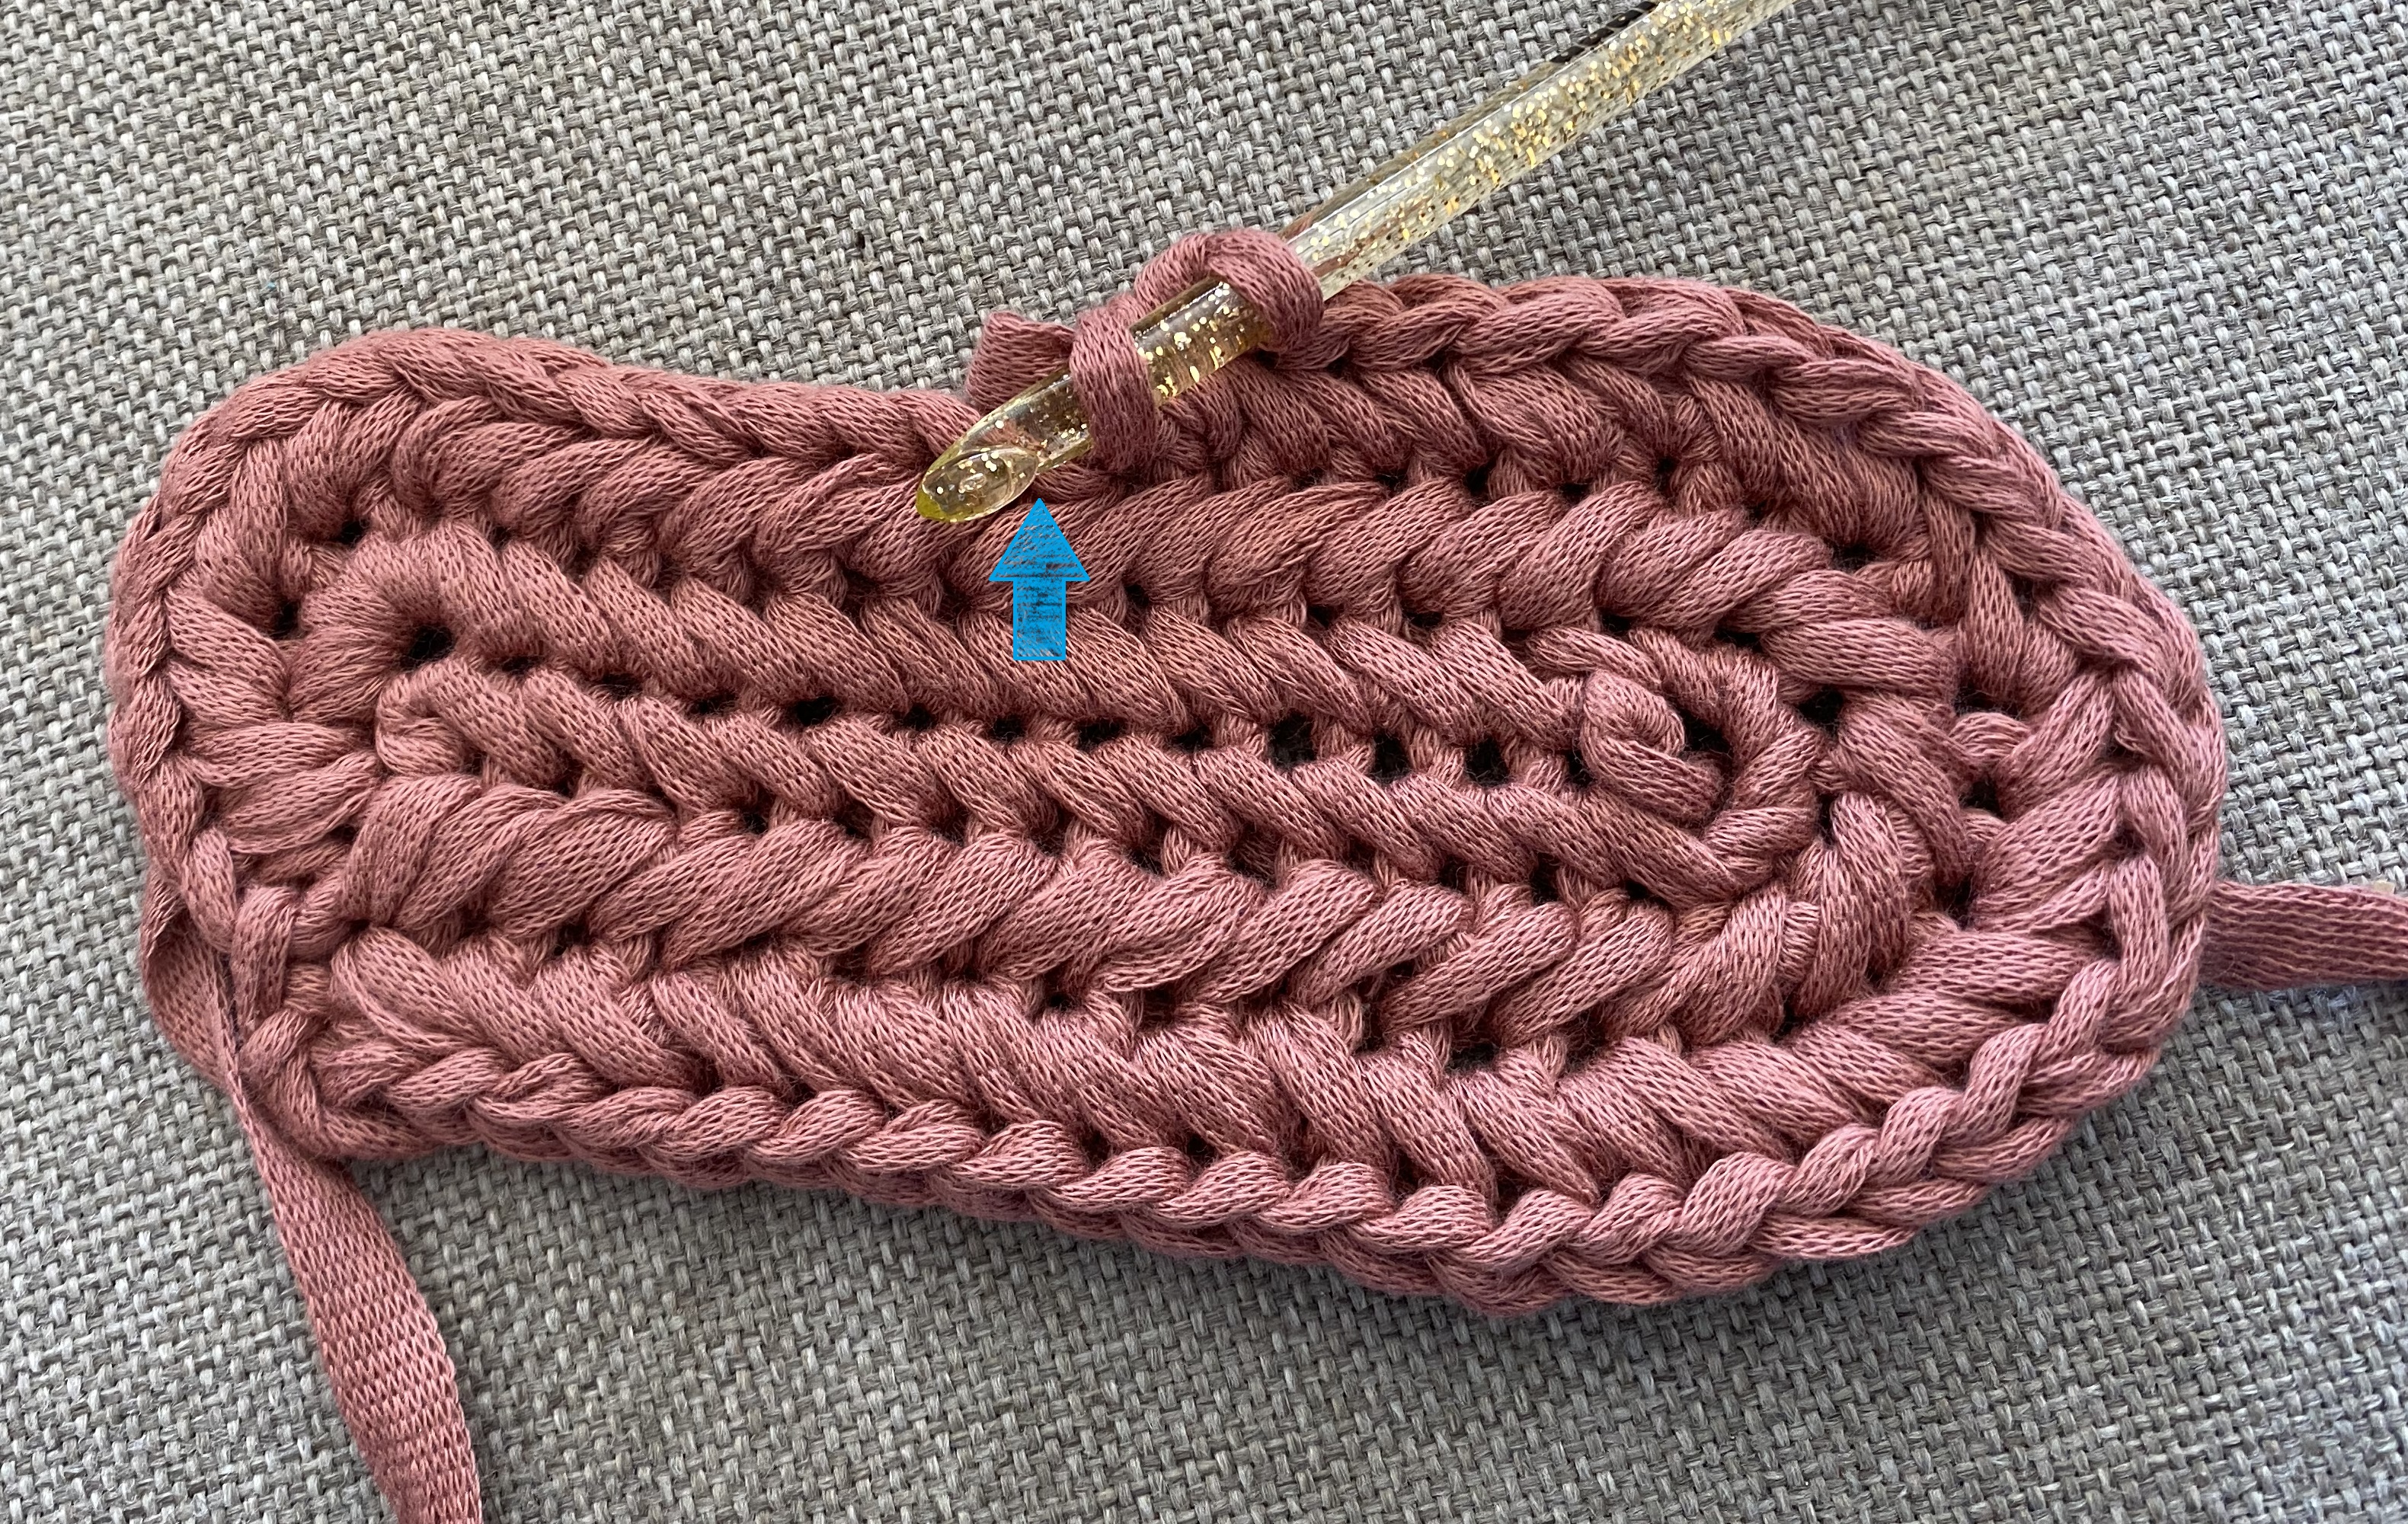
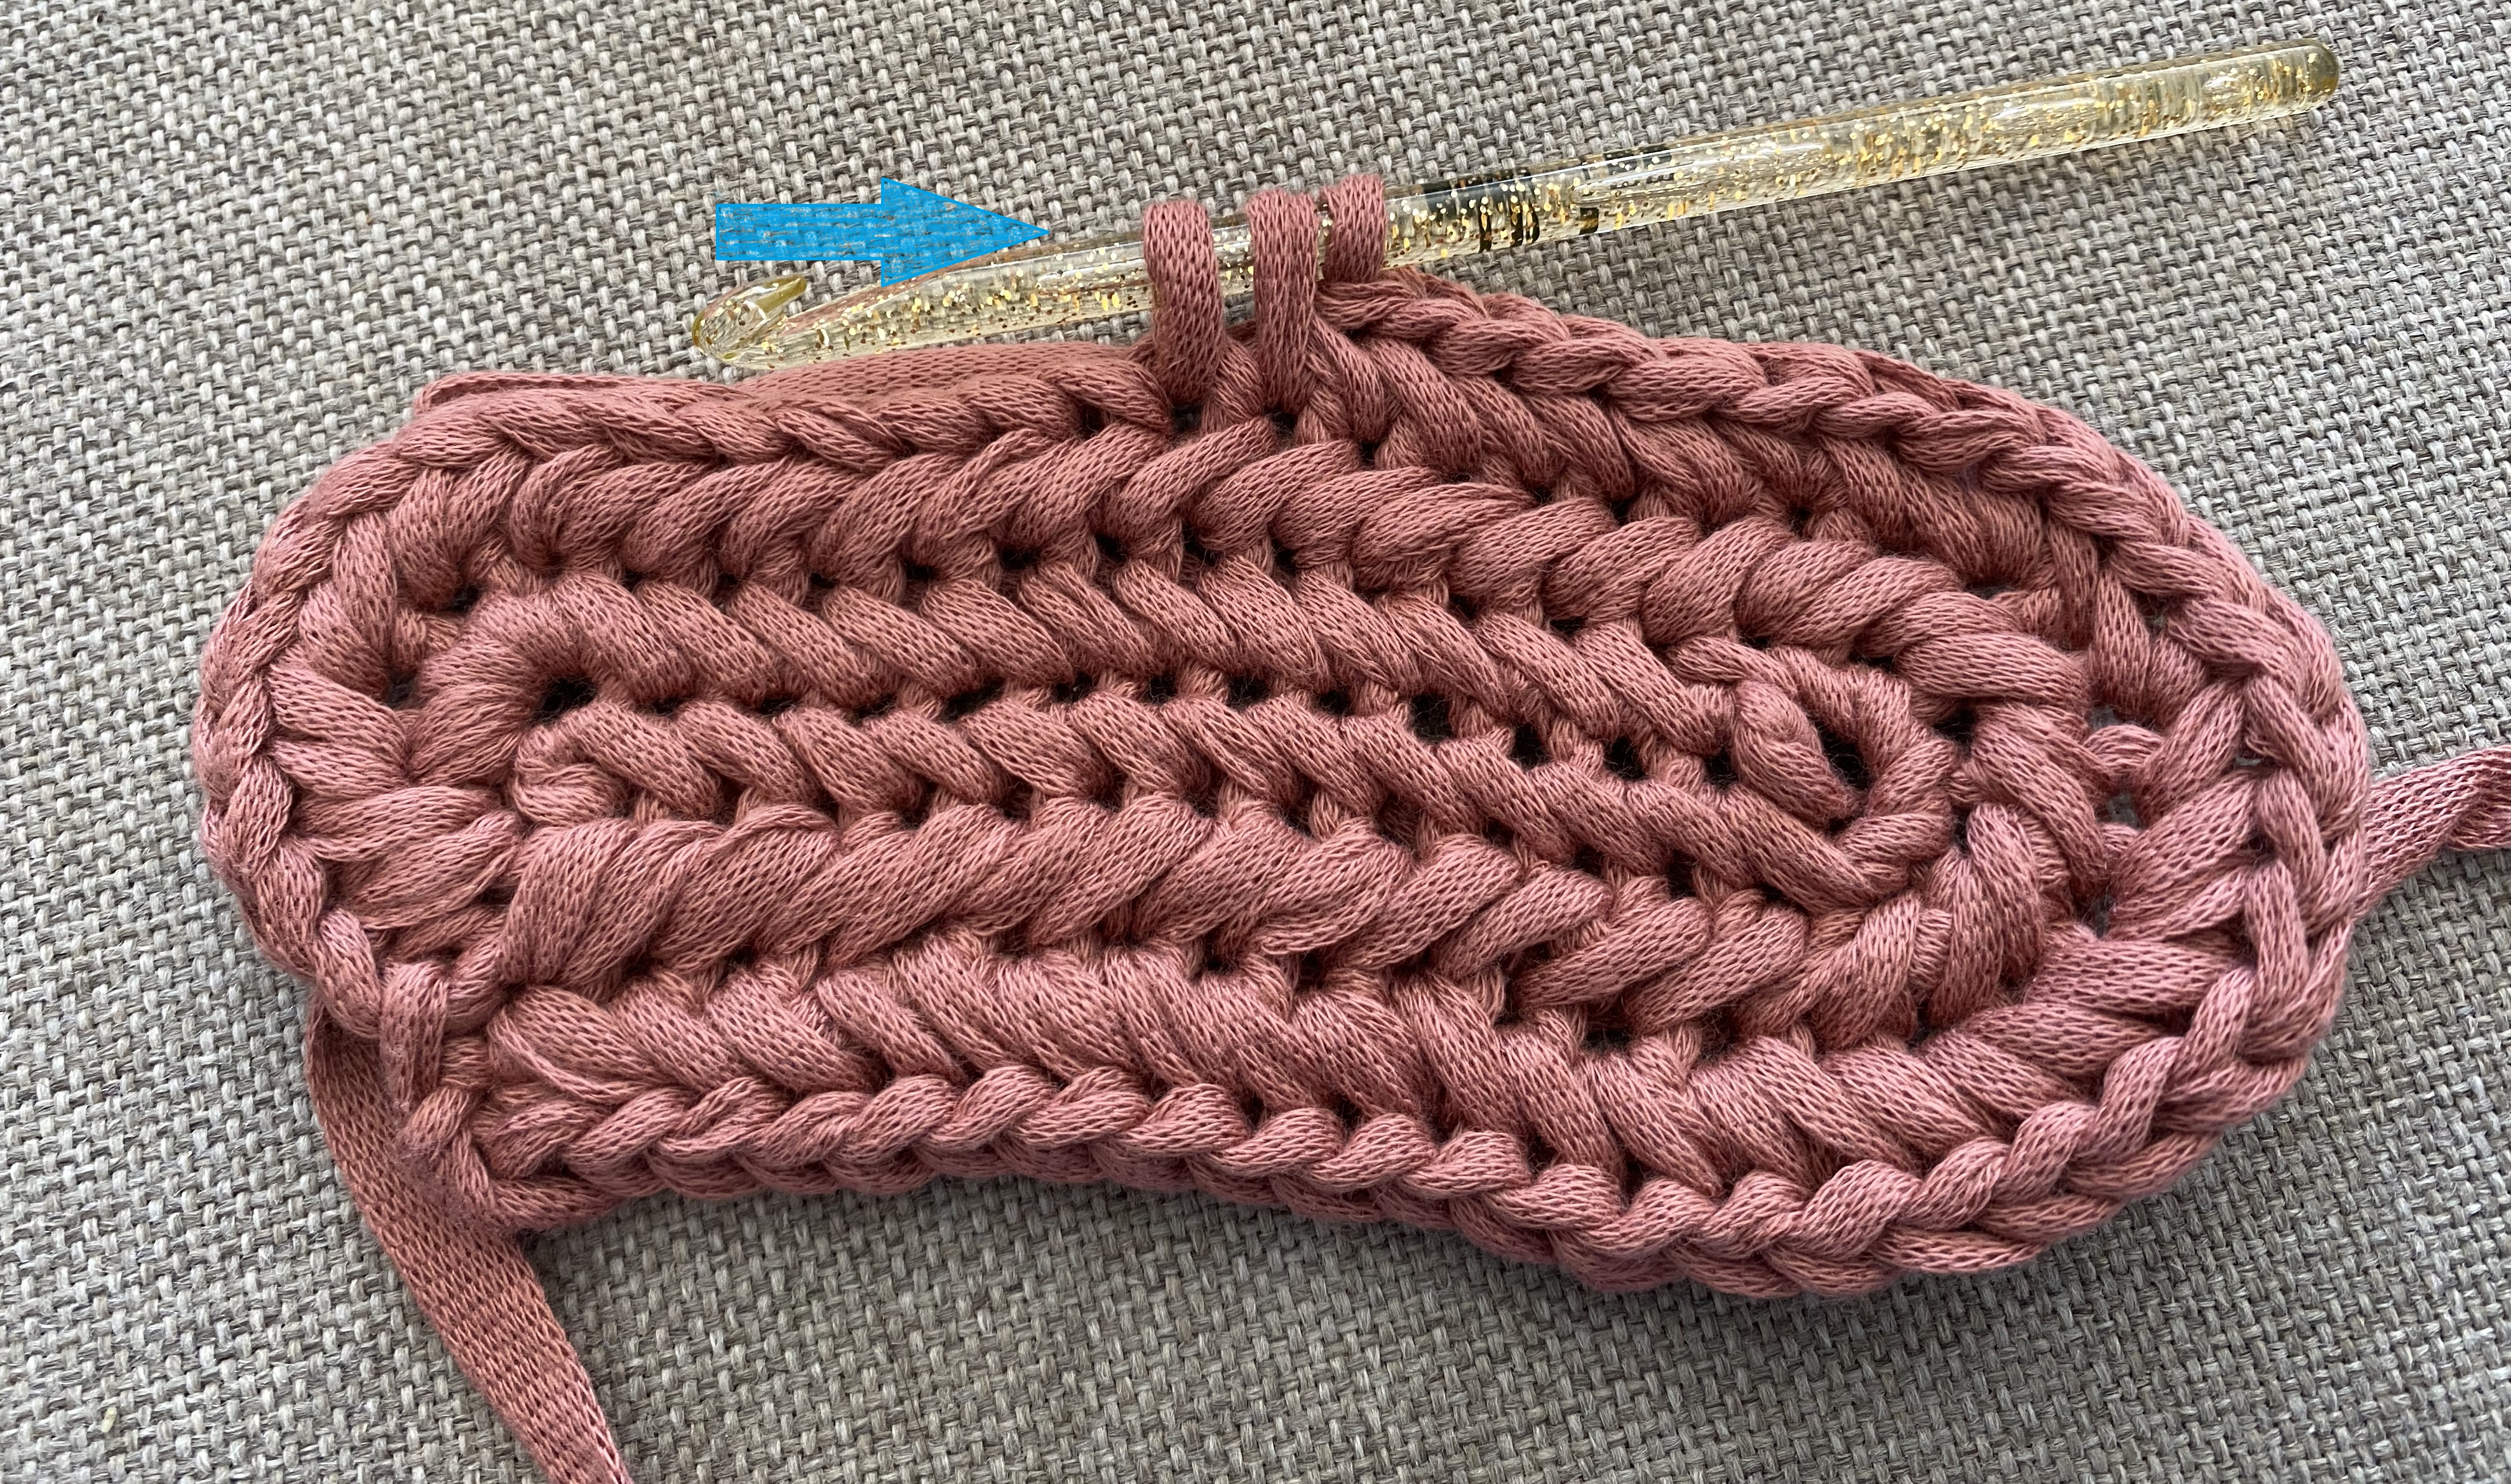
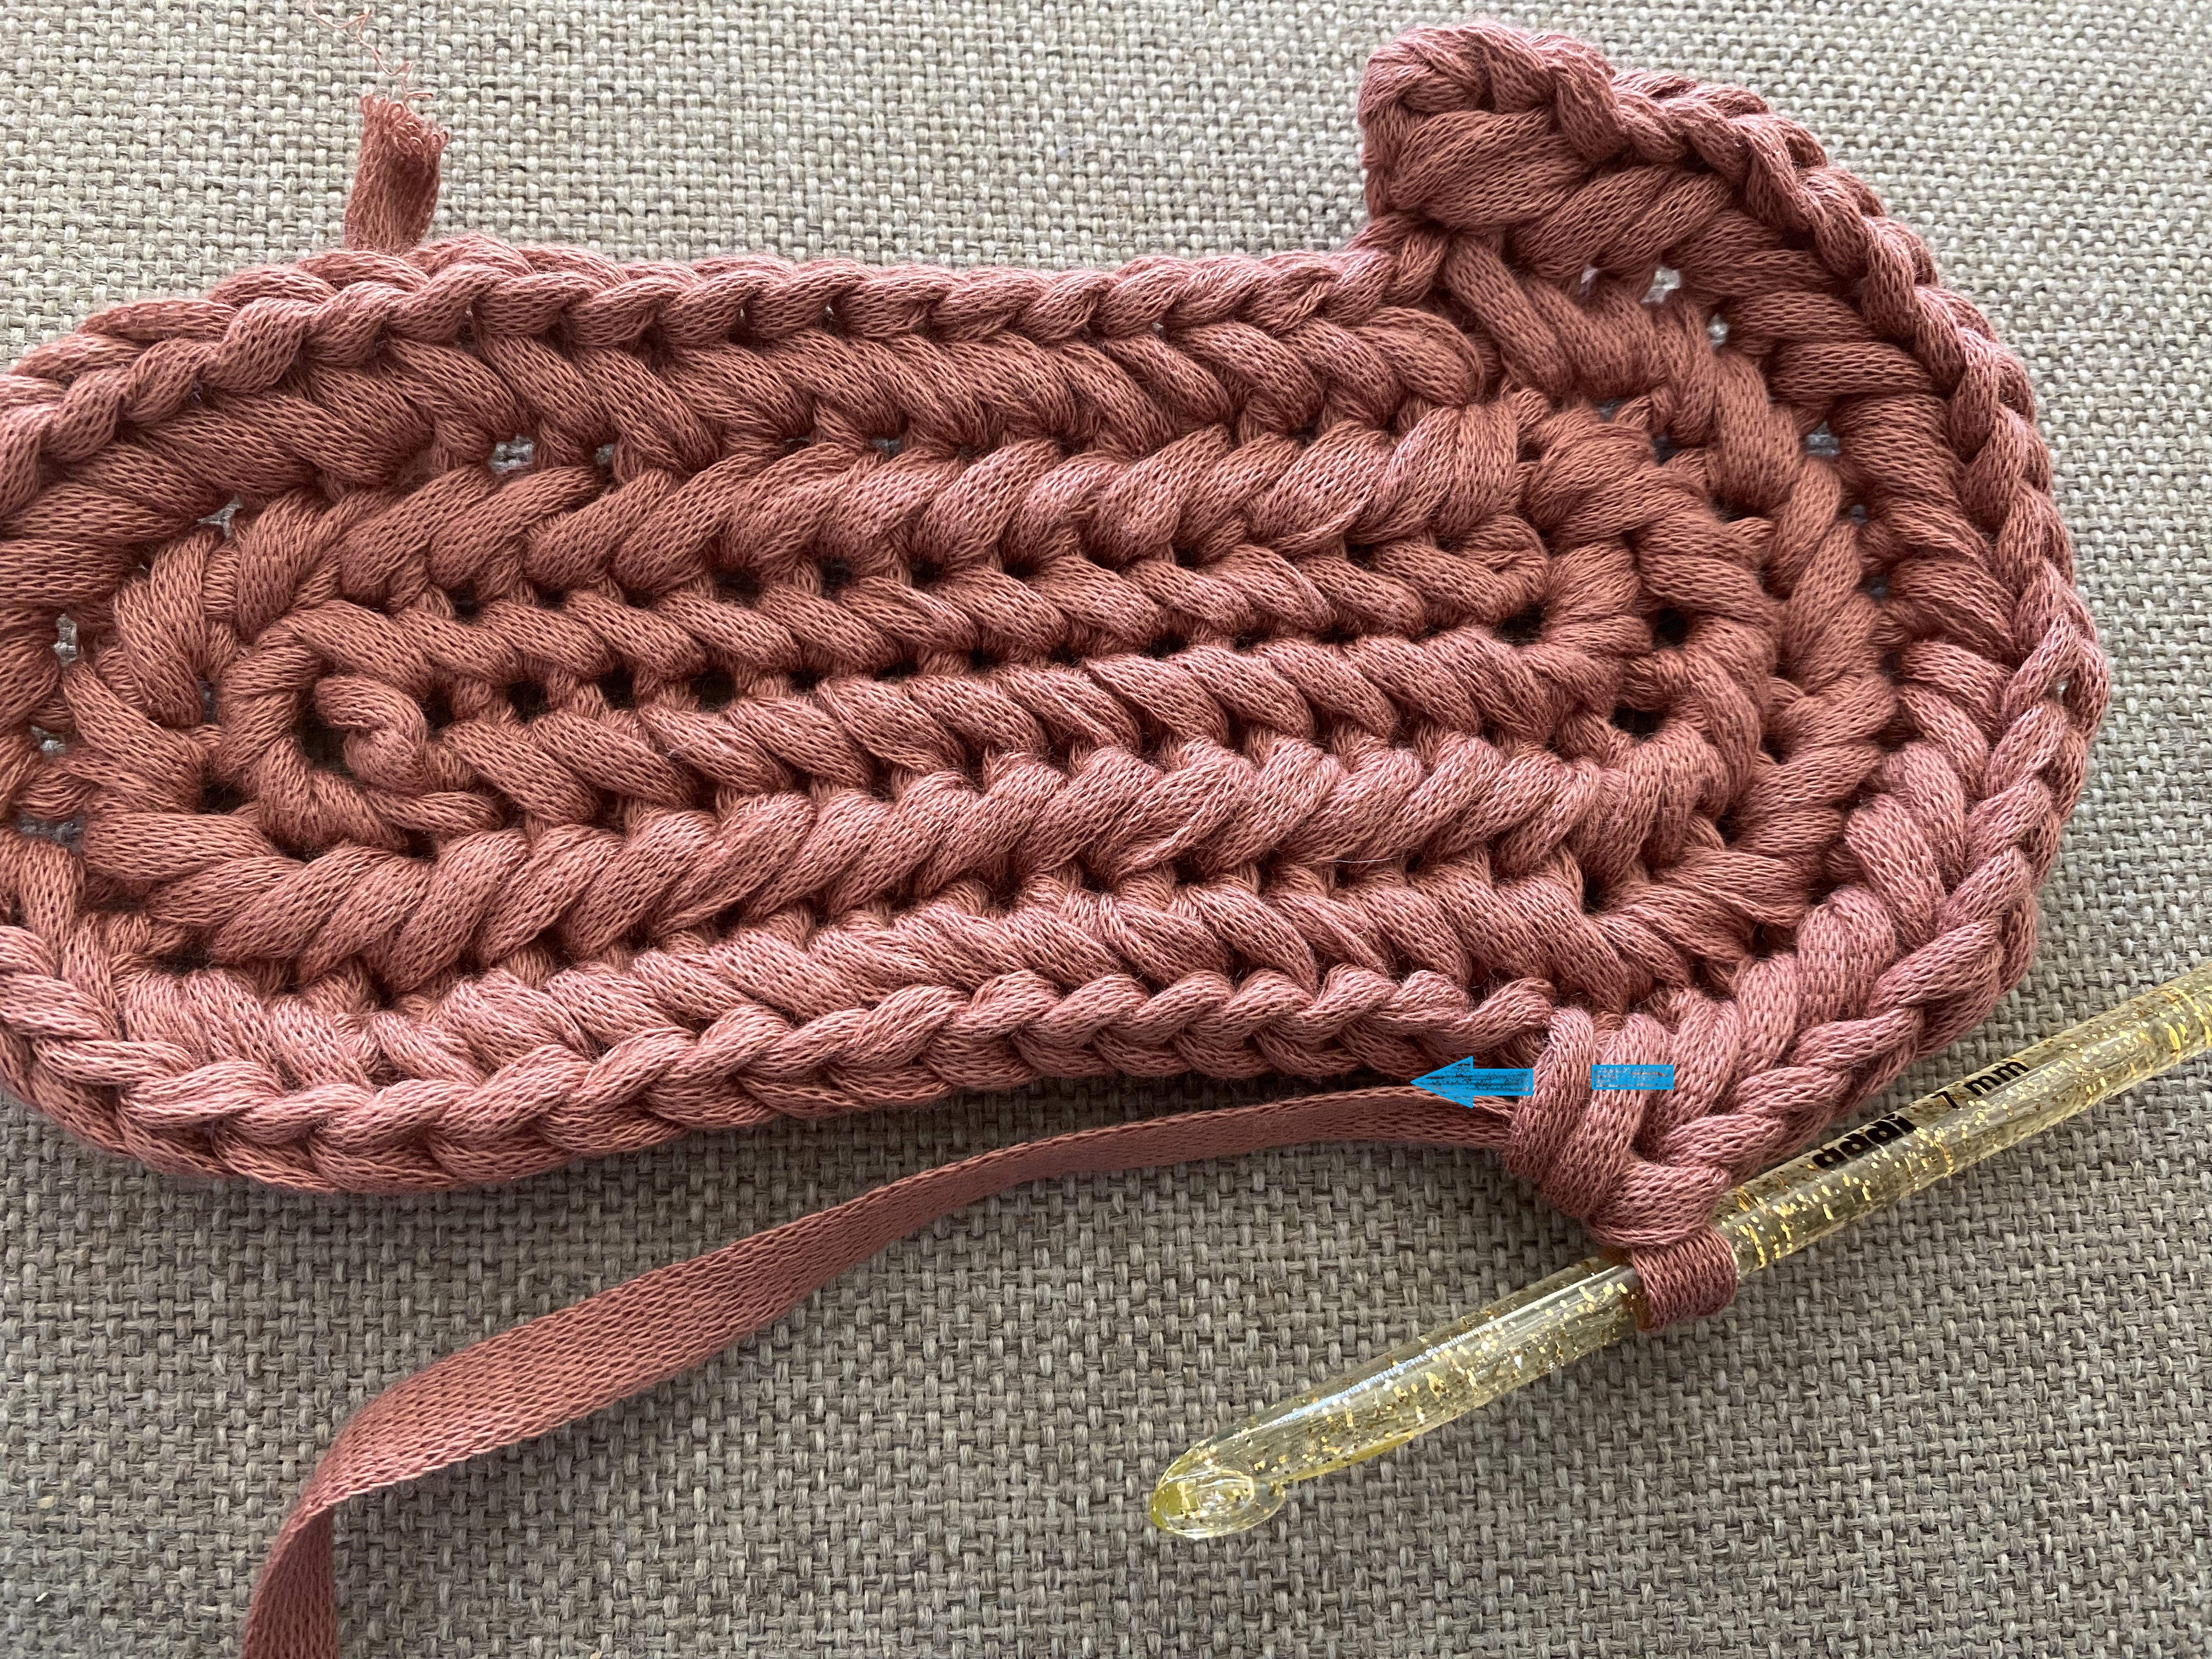
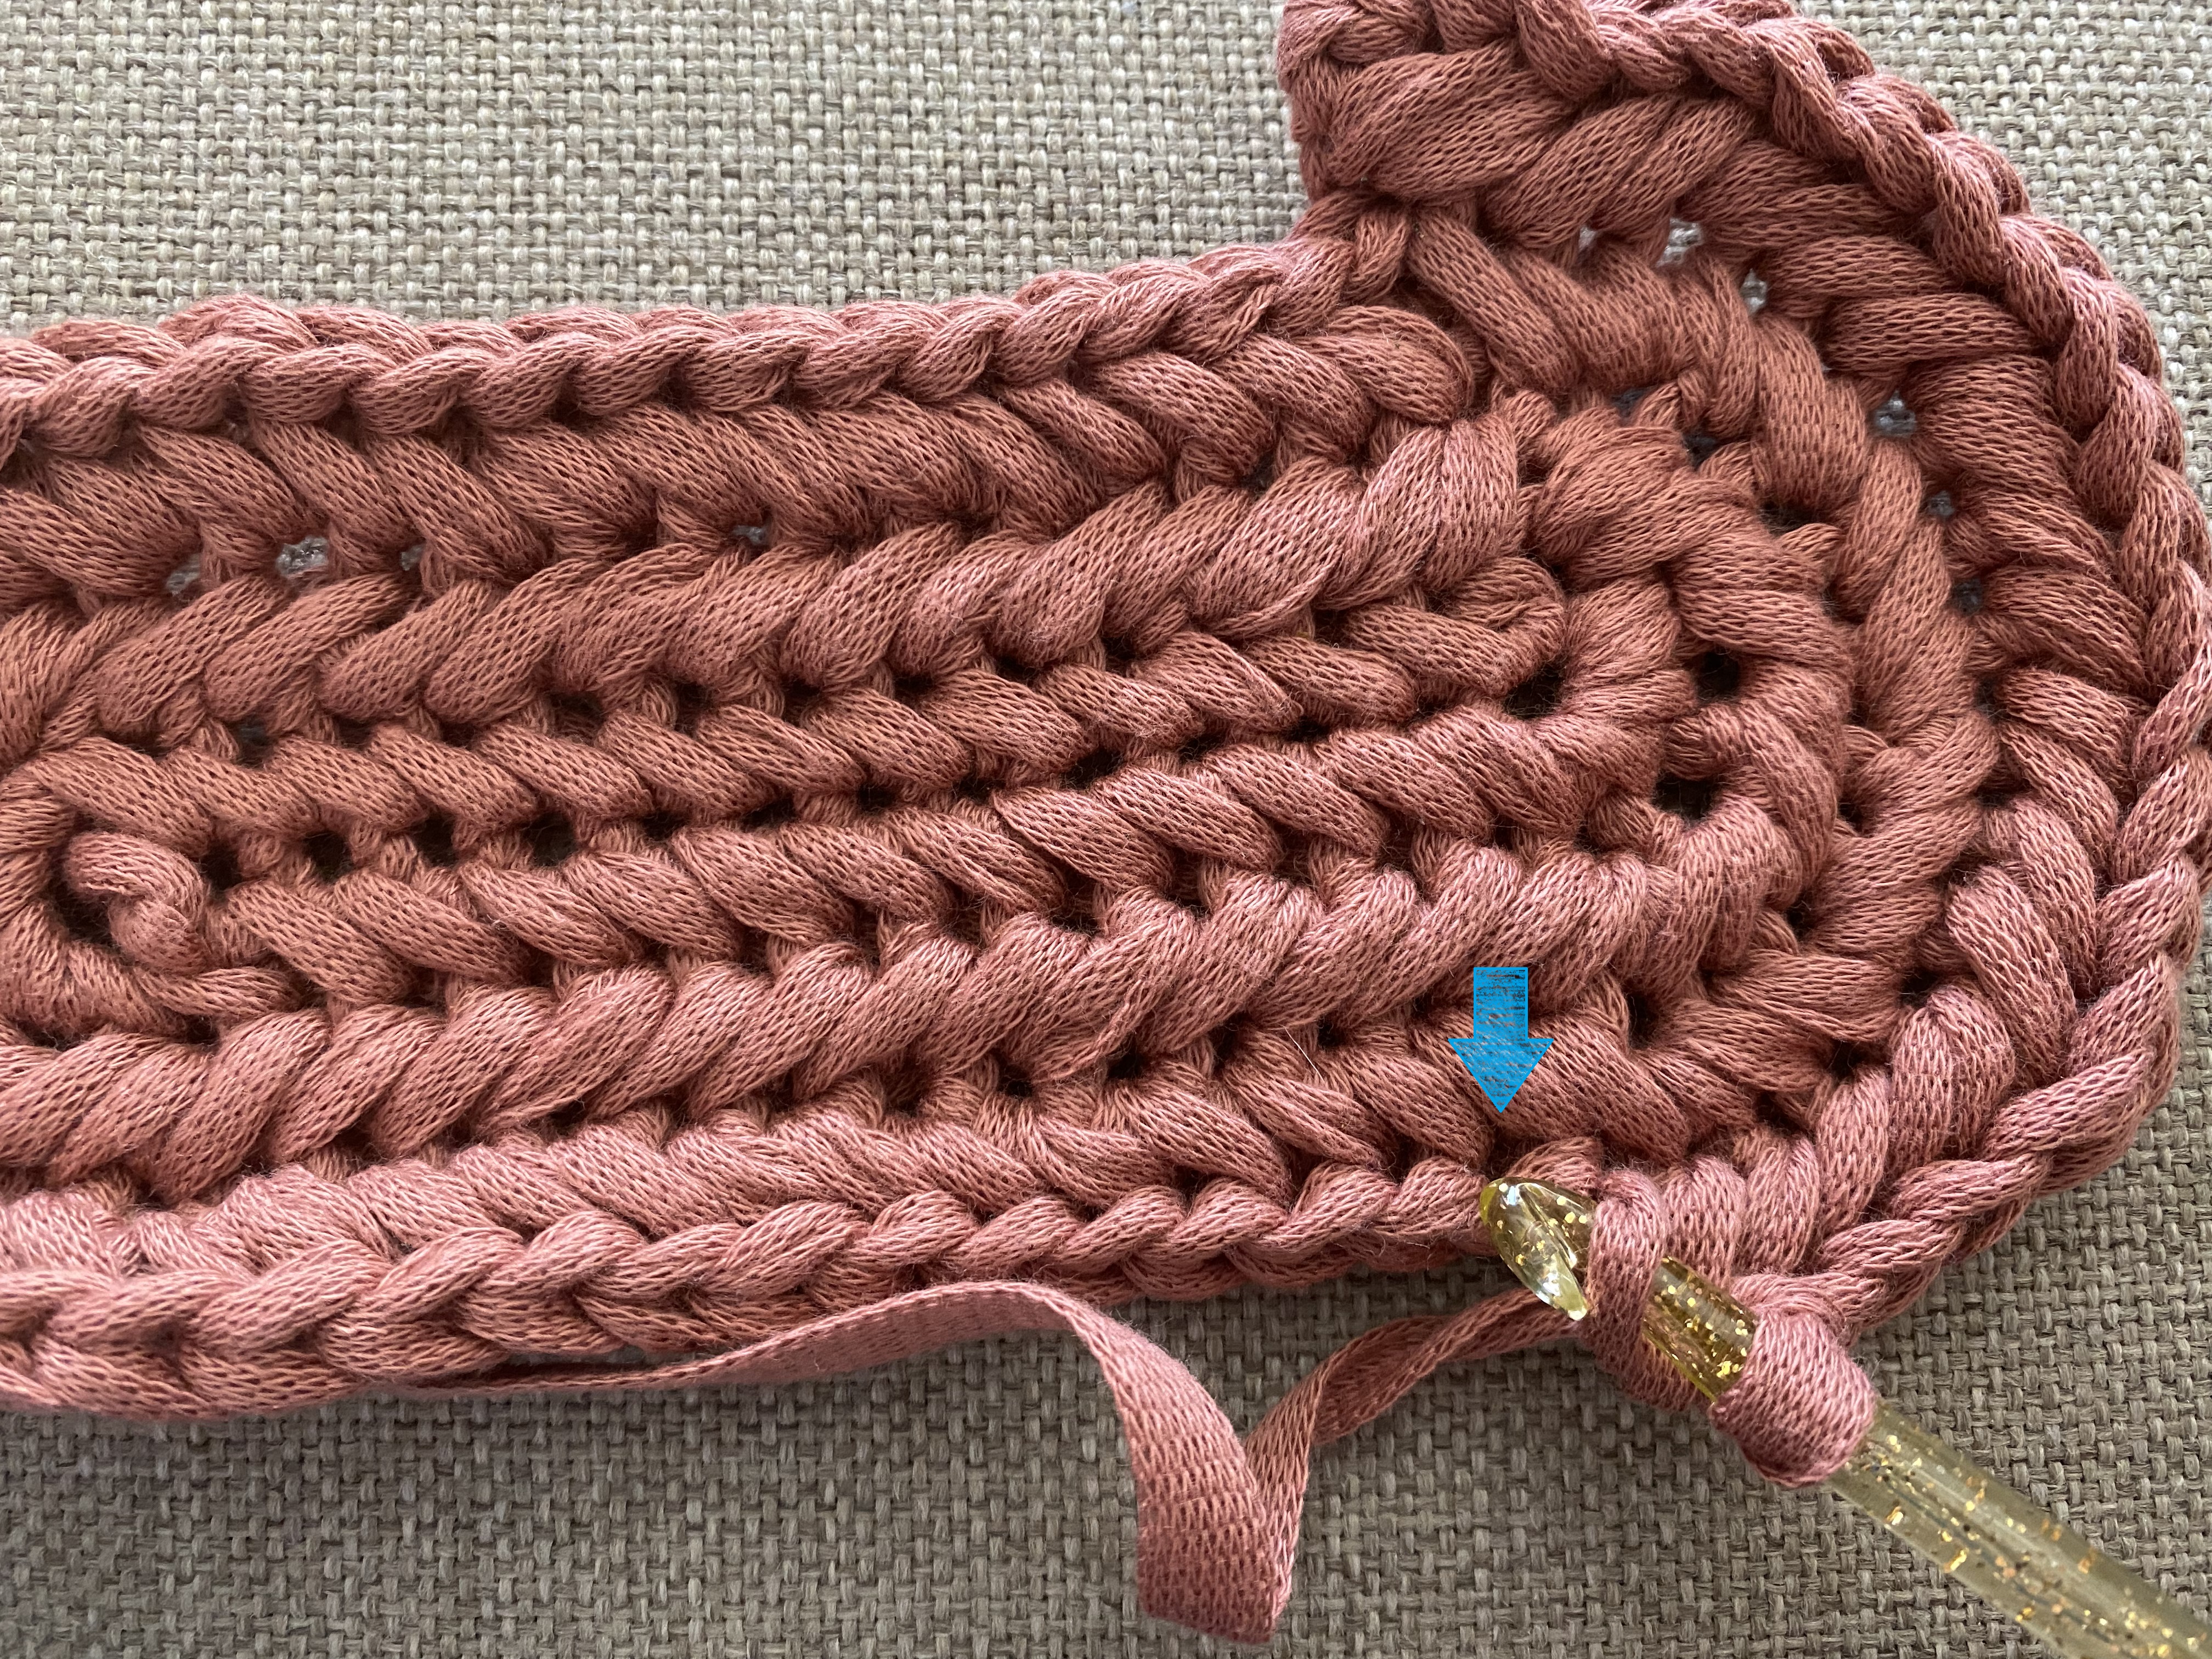
For stitches in the second row, when you would work at the ‘wrong’ side; basically you do the same thing, except working from the other side. You insert your hook in the left(closest) vertical bar of the previous stitch from the other side (1). Then insert your hook into the next stitch (2) and pull up a loop (3). Yarn over and pull through all three loops (4).
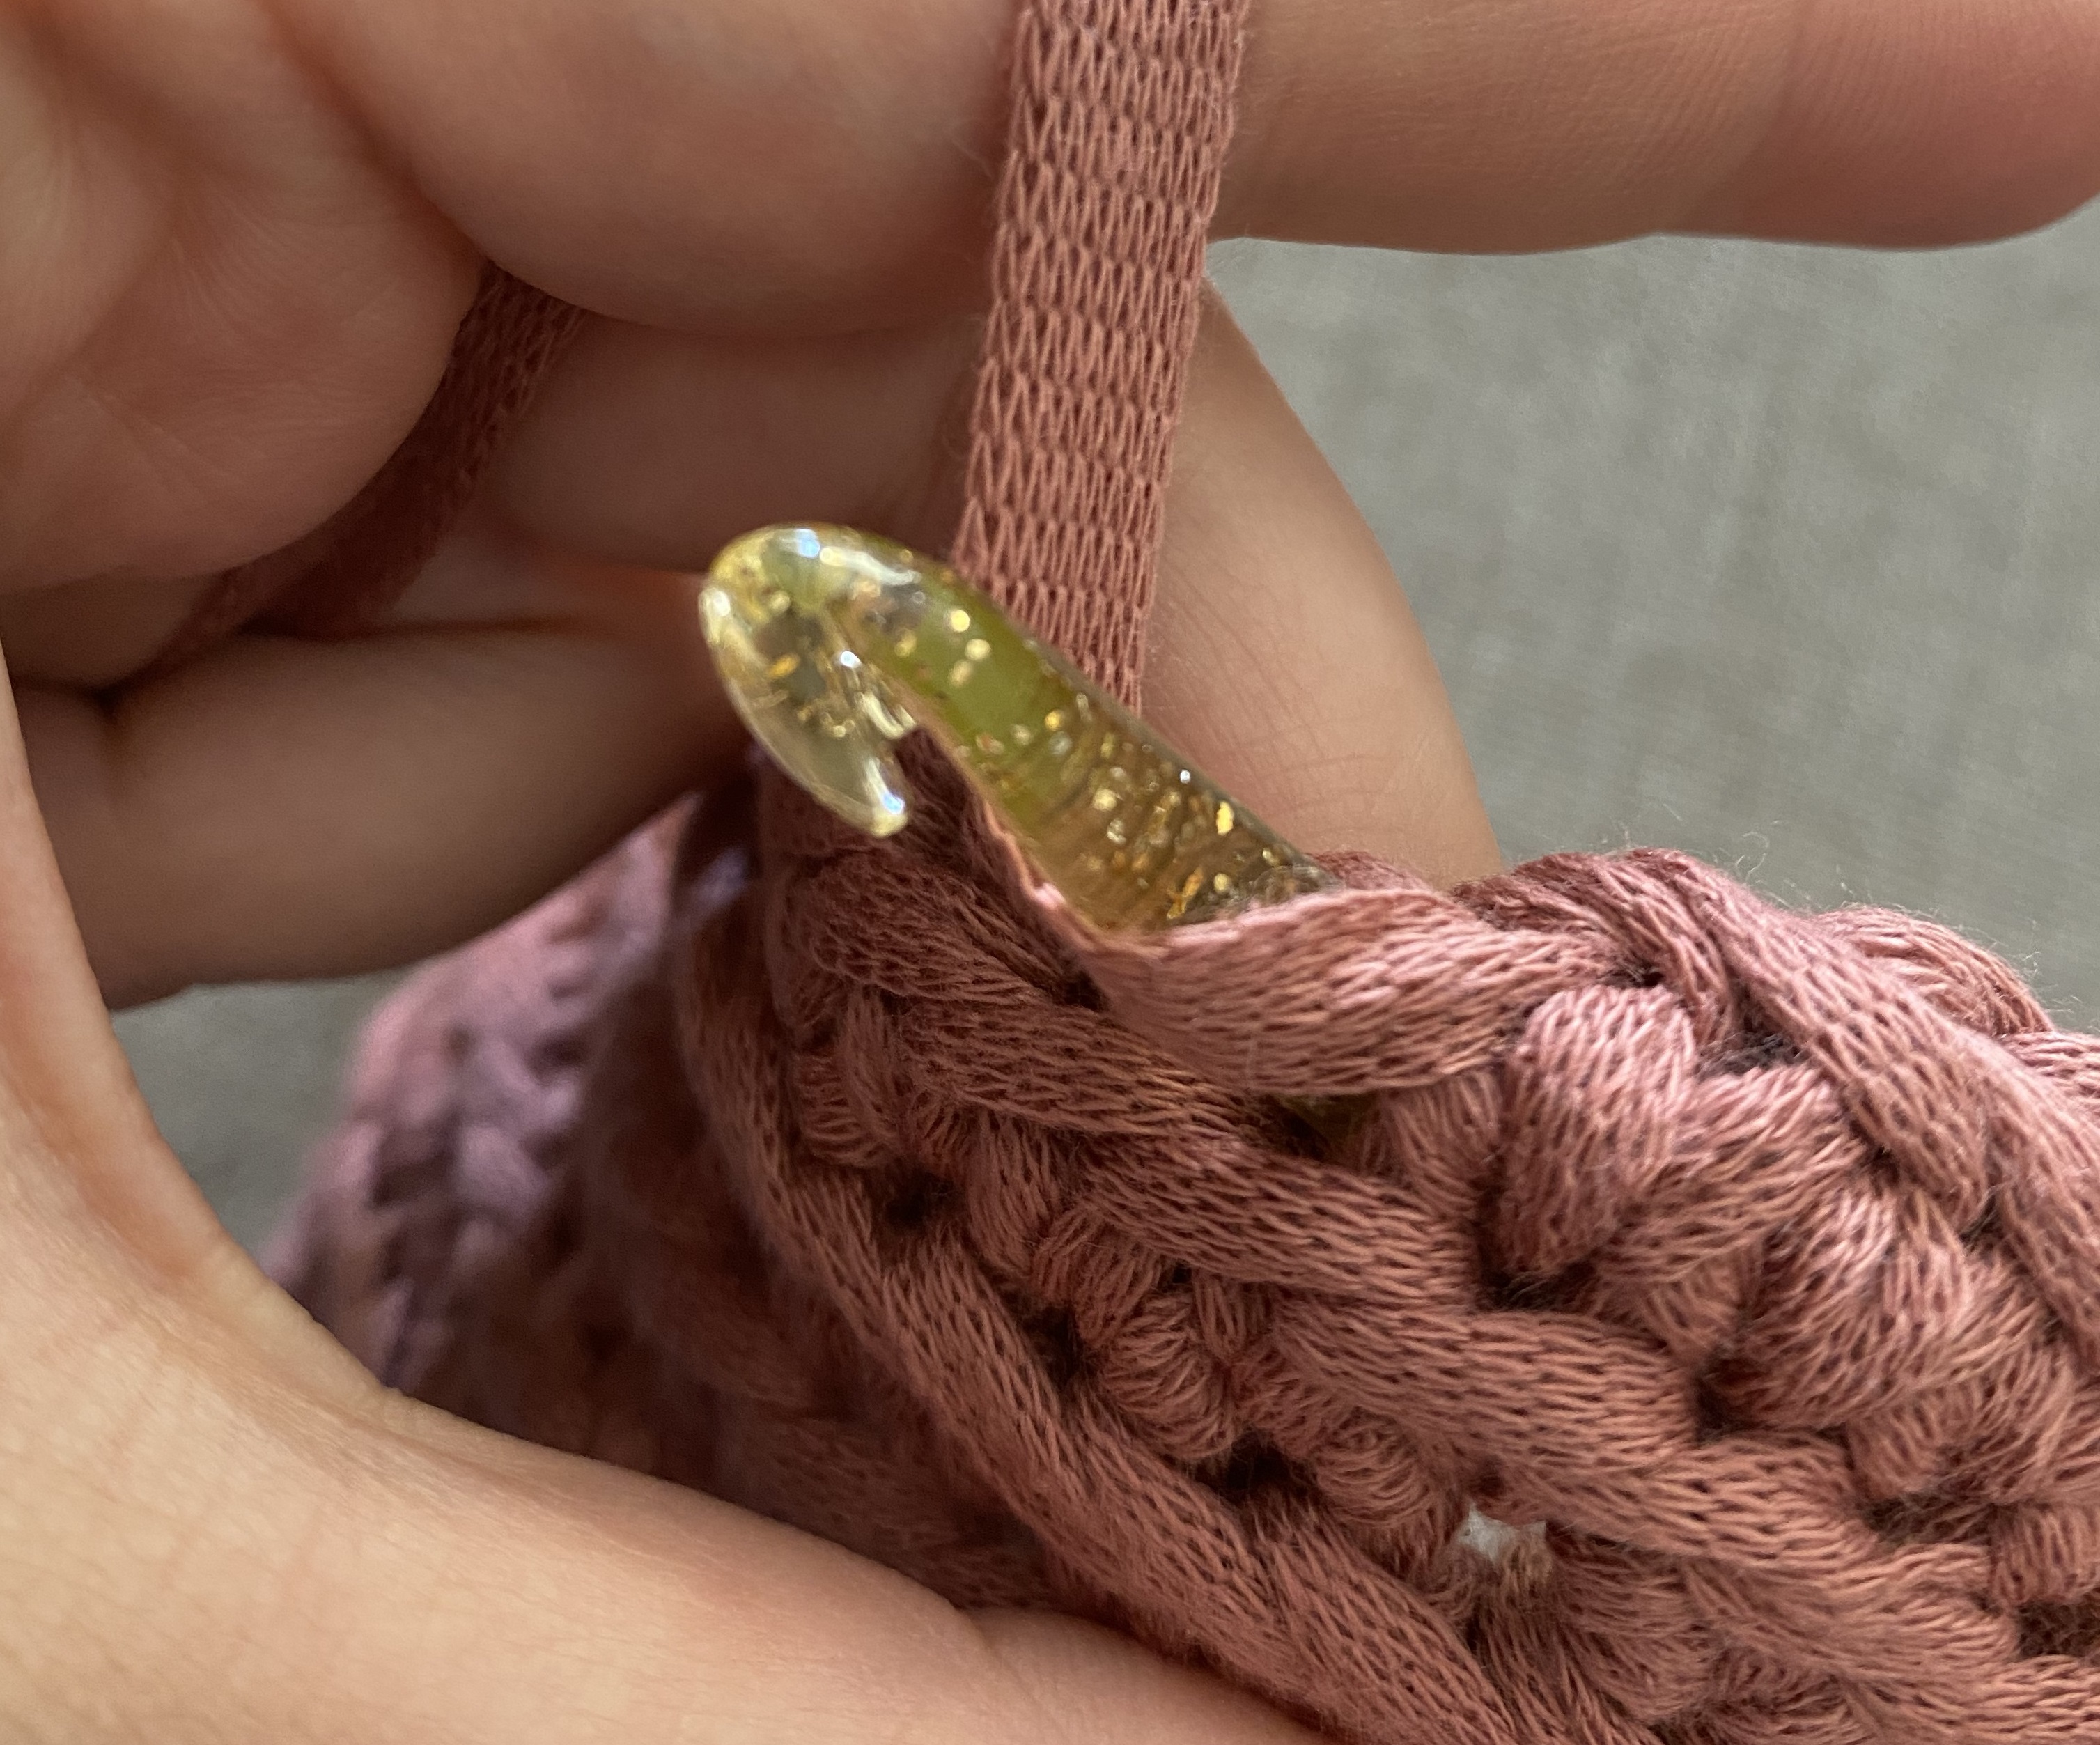
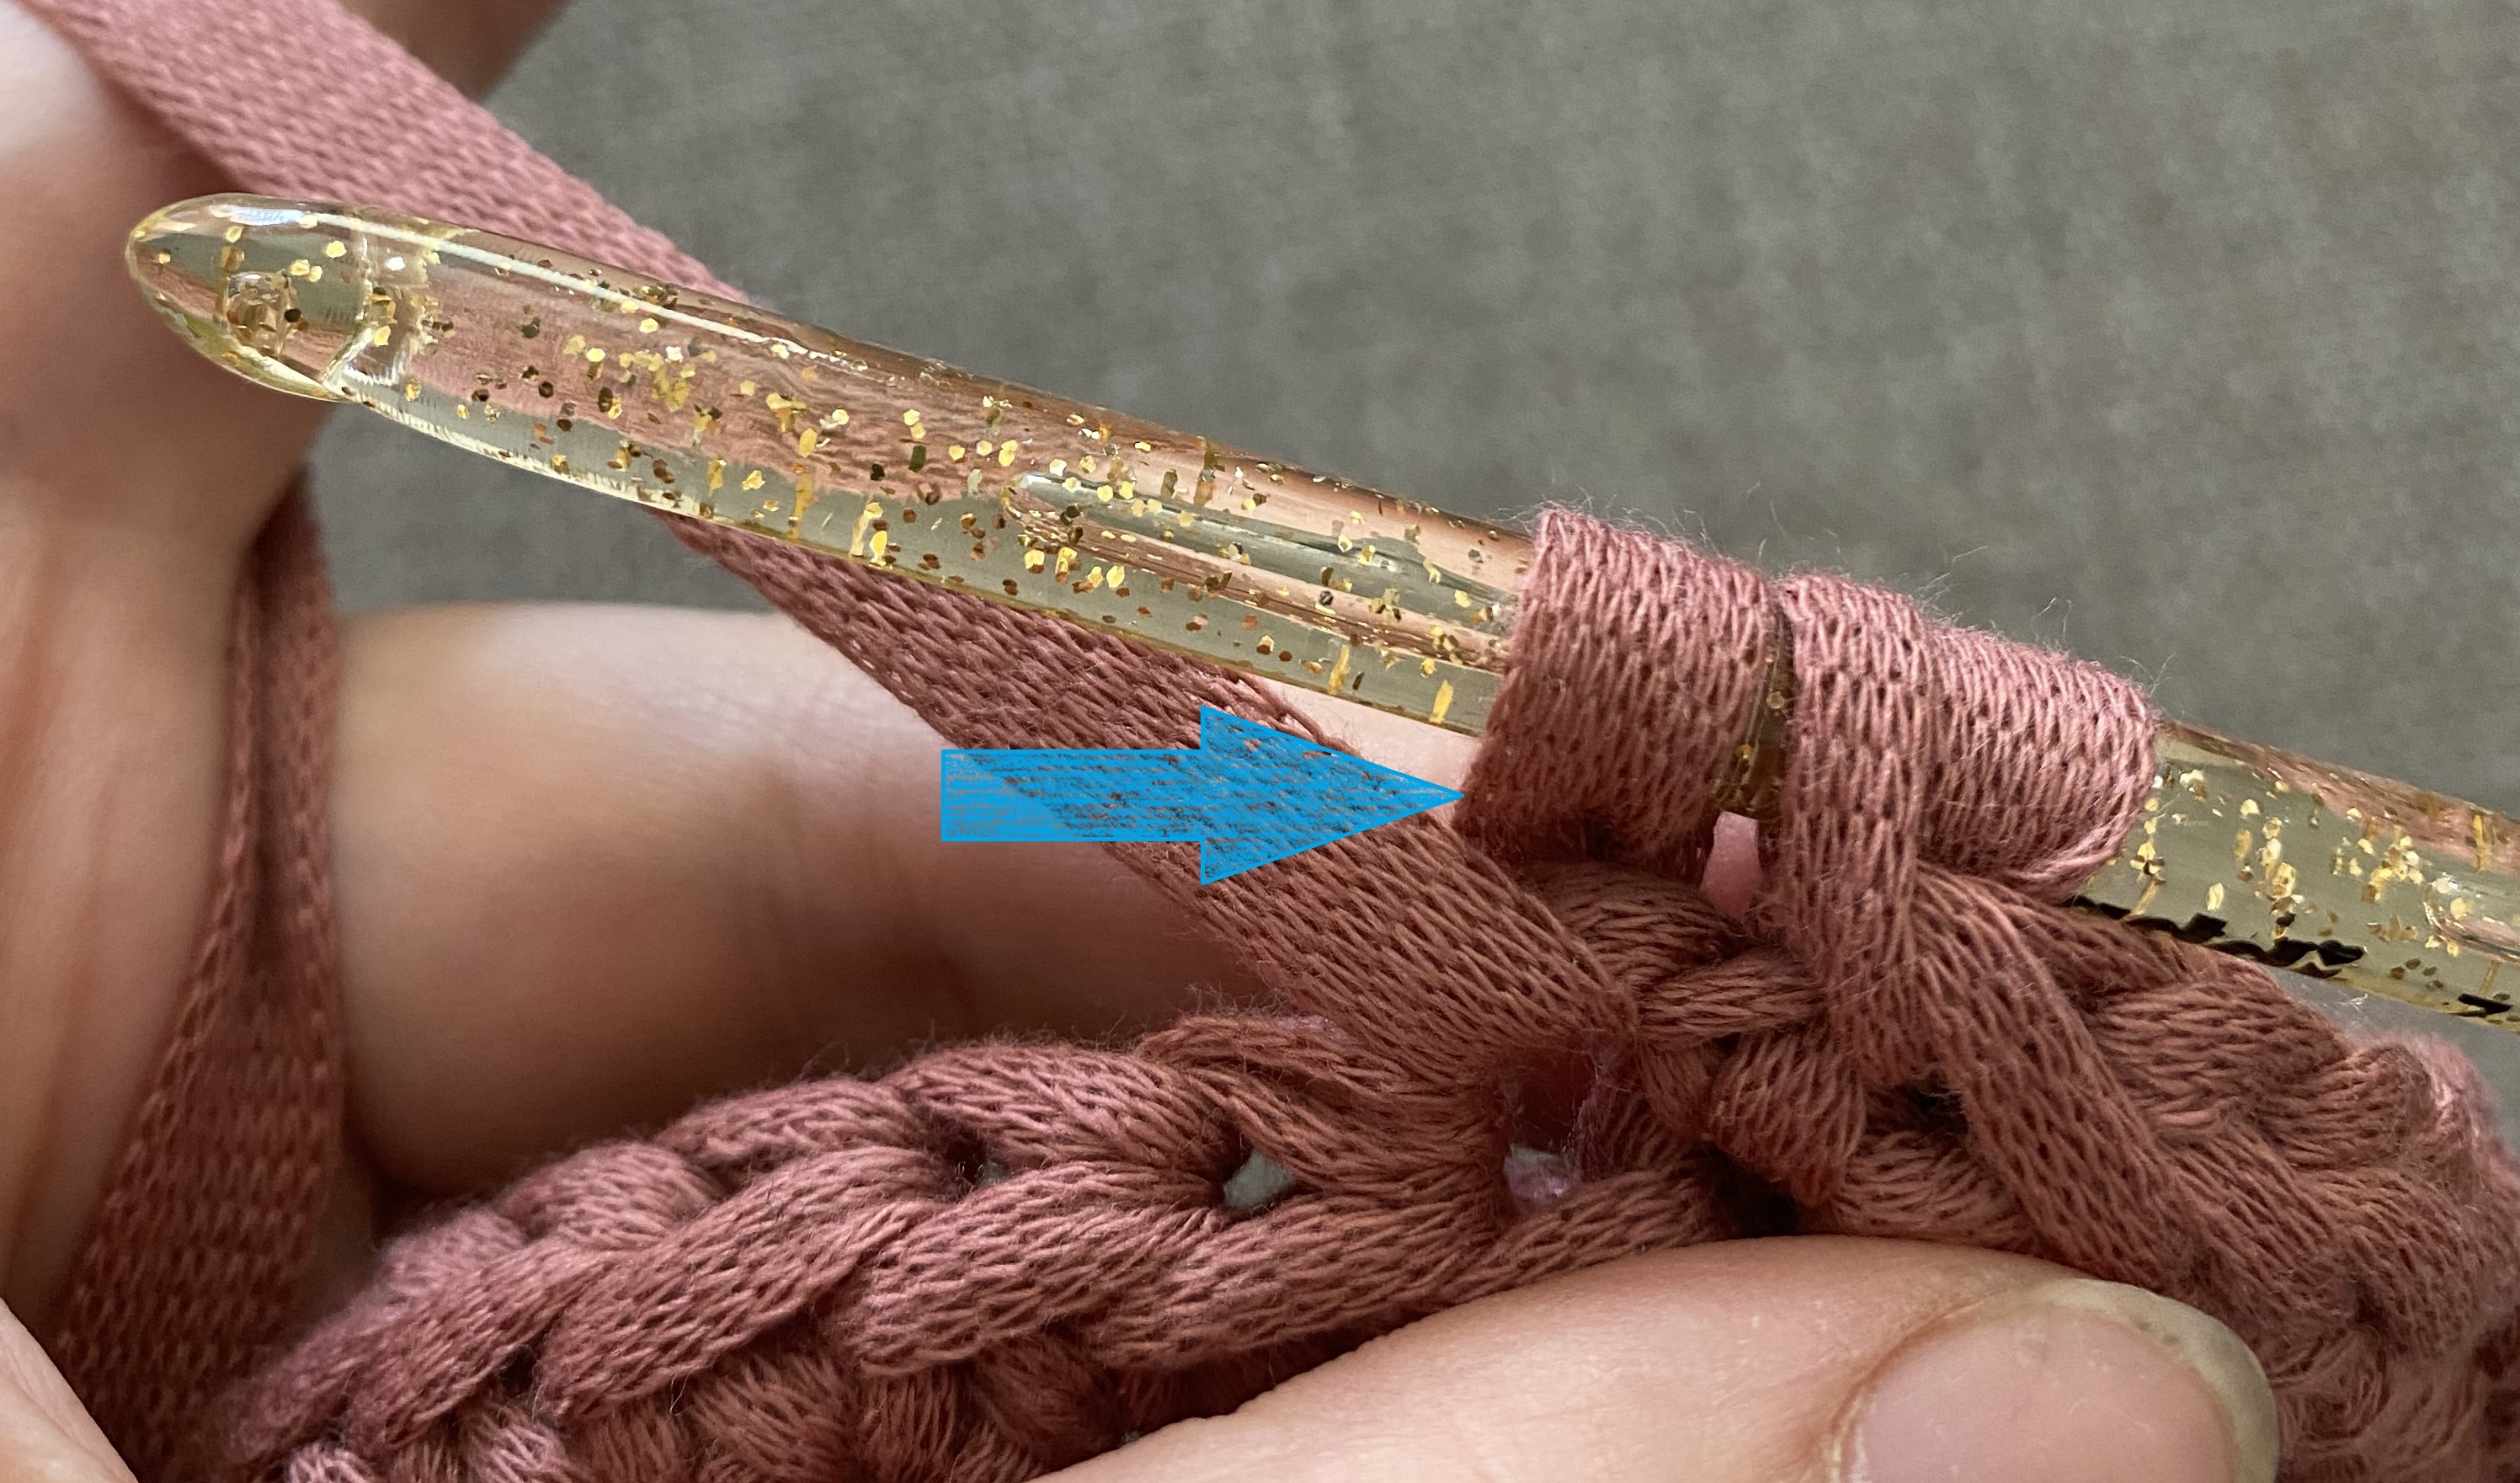
Notes:
Normally by the start of this stitch it is important where you insert your hook. With this bag, however, you work in rounds, so both sides of the chain will be used, and you can insert your hook like you normally do.
Because this stitch has a 2 row repetition, you always need to crochet back and forth, instead of keep working in the round.
While you are working with flat yarn, try to keep the yarn from rotating and folding while crocheting. You will see this back in your work.
By making the HSC, pull your loop almost double the size of your starting loop for an easier insert for the next stitch and a clear braid. You want to minimize the holes where you pull the loops, but maximize the braided look.
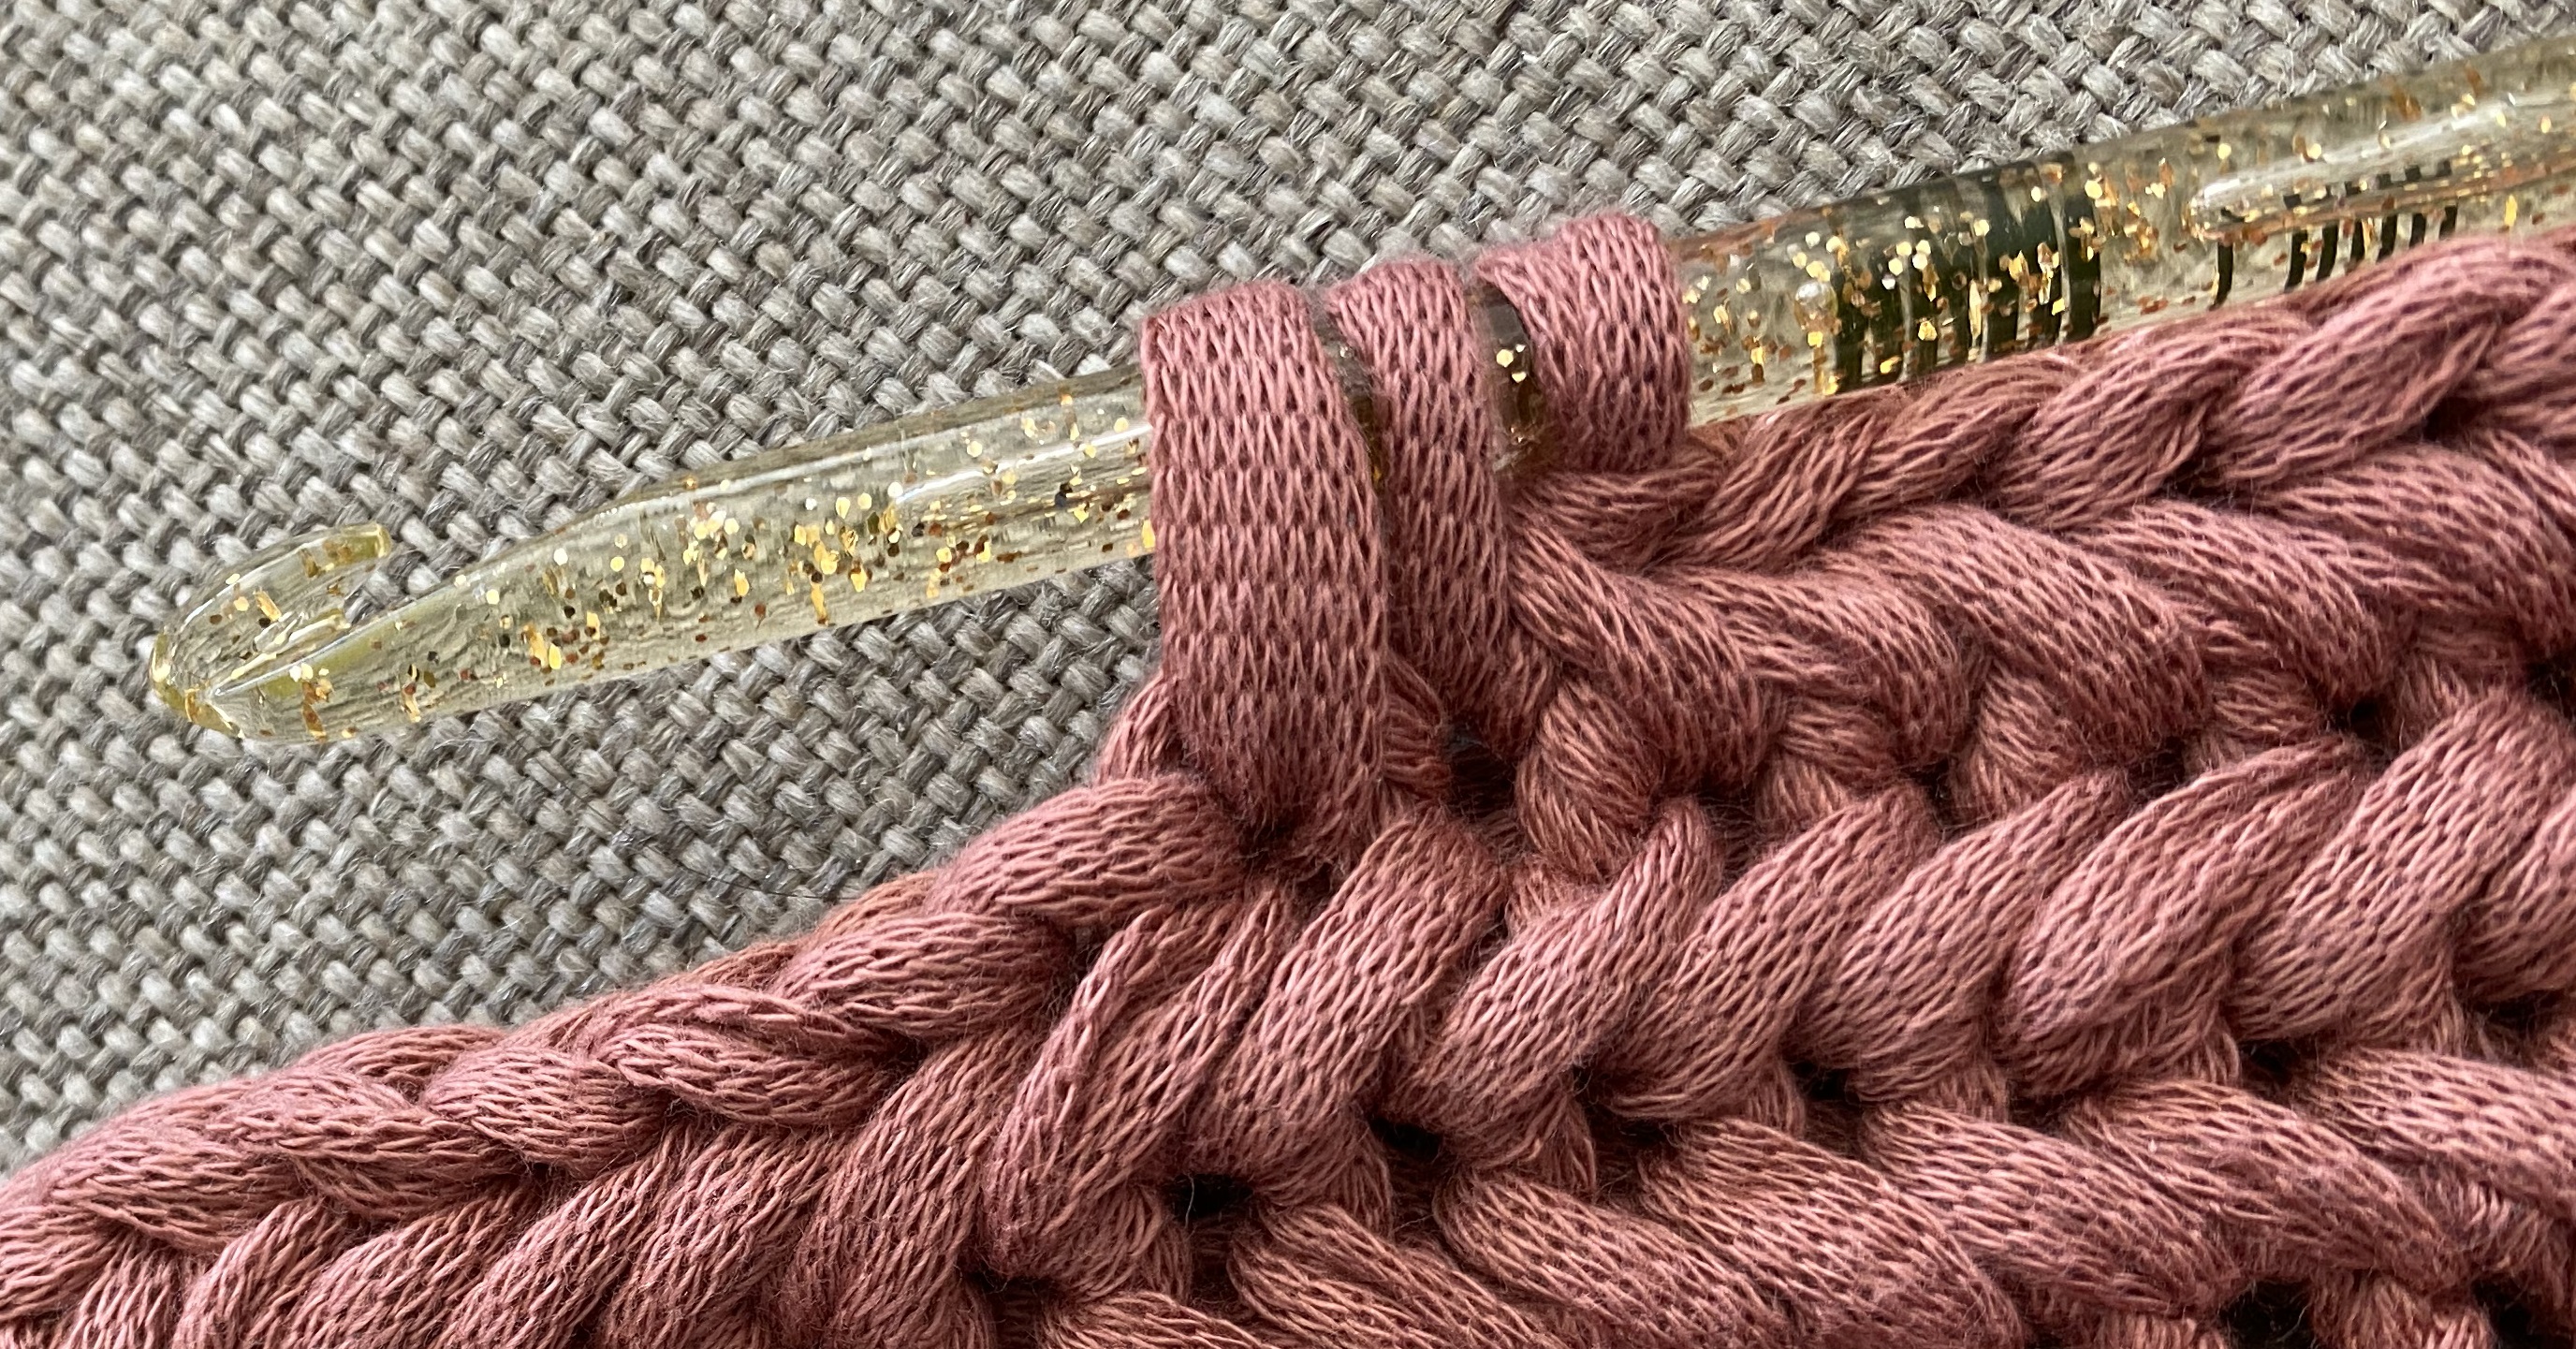
The pattern
Yes! You made it to the pattern, I am so excited for you that you can make your own braided looking summerbag! :) Gather all the materials together and hopefully you never have to stand before a closed door or lose your phone/keys again.Materials
- 7 mm crochet hook for the bag part
- 6 mm crochet hook for the strap
- 1 skein of ribbon yarn (more if you want to implement more colors)
- Stitch marker
- Tapestry needle
- Scissors
Stitch abbreviations
- ch – chain
- hsc – herringbone single crochet
- hdc – half double crochet
- sl st – slip stitch
Outer bag section
The outer bag section is basically an crocheted oval. All the odd number round are crocheted by insterting the hook from the other side to create the nice braid pattern of the herringbone stitch. The rounds that are inserted from the other side are marked with (ios). The bag part is created with a crochet hook of 7 mm.Rnd 1: Make a slip knot and ch 15
Rnd 2: Skip the chain closest to your hook and place a sc. Make hsc12 in the next stitches. In the last st make 5hsc, then keep crocheting on the other side of the chain hsc12. Make 5hhdc in the last ch, then insert your hook in the left bar of your previous stitch and sl st to the first st, ch and turn. (34)
Note: The way we end this round by sl st in the herringbone stitch manner will be continued through the whole pattern and will be only mentioned as sl st.
Rnd 3: (Instert hook from other side see herringbone stitch) Ch 1 and make a sc and a hsc in the first stitch. Finish your half circle by crocheting 2hsc in the next 4 stitches. Hsc12 further along the straight side and make 2 hsc in the next 5 stitches to make the other half circle of the oval. Hsc12 straight on, sl st and turn. (44)
Rnd 4: Ch 1 and make a sc in the first st. Hsc11 along the straight side and repeat (hsc, 2hsc) 5 times to form your half circle. Hsc12 along the straight side and repeat (2hsc, hsc) 5 times to make the other half circle of the oval. Sl st and turn. (54)
NOTE: Switch colors if you want to make a multicolored bag.
Rnd 5(ios): Ch 1 and make a 1 sc and 1 hsc in the first stitch. Make 2 more hsc in the next 2 stitches and repeat (2hsc, hsc2) 4 times to finish your half circle. Hsc 12 along the straight side and repeat (hsc2, 2hsc) 5 times to make the other half circle of the oval. Hsc 12 straight on, sl st and turn. (64)
Rnd 6: Ch 1 and make a sc in the first st. Hsc11 along the straight side and repeat (hsc3, 2hsc) 5 times to form your half circle. Hsc12 along the straight side and repeat (hsc3, 2hsc) 5 times to make the other half circle of the oval. Sl st and turn. (74)
NOTE: Switch colors again for a multicolored bag.
Rnd 7(ios): Ch 1 and repeat (hsc4, 2hsc) 5 times to make half a circle. Hsc 12 along the straight side and repeat (hsc4, 2hsc) 5 times to make the other half circle of the oval. Hsc 12 straight on, sl st and turn. (84)
Rnd8: Ch 1 and make a sc in the first st. Hsc11 along the straight side and repeat (hsc5, 2hsc) 5 times to form your half circle. Hsc12 along the straight side and repeat (hsc5, 2hsc) 5 times to make the other half circle of the oval. Sl st and turn. (94)
Rnd 9(ios): Ch 1 and repeat (hsc6, 2hsc) 5 times to make half a circle. Hsc 12 along the straight side and repeat (hsc6, 2hsc) 5 times to make the other half circle of the oval. Hsc 12 straight on, sl st and turn. (104)
Inner bag section
Rnd 1: Make a slip knot and ch 5.Rnd 2: Skip the chain closest to your hook, make sc1 and hsc2 further. In the last st make 5hsc, then keep crocheting on the other side of the chain hsc3. Ch and turn. (11)
Rnd 3 (ios): Ch1 and make a sc in the first stitch. Hsc2 further. Make 2hsc in the next 5 stitches and hsc3 further. Ch and turn.(16)
Rnd 4: Ch1 and make a sc in the first stitch. Hsc2 further. Repeat (hsc, 2hsc) 5 times. Hsc3, ch and turn. (21)
Rnd 5 (ios): Ch1 and make a sc in the first stitch. Hsc2 further. Repeat (hsc2, 2hsc) 5 times. Hsc3, ch and turn. (26)
Rnd 6: Ch1 and make a sc in the first stitch. Hsc2 further. Repeat (hsc3, 2hsc) 5 times. Hsc3, ch and turn. (31)
Rnd 7 (ios): Ch1 and make a sc in the first stitch. Hsc2 further. Repeat (hsc4, 2hsc) 5 times. Hsc3, ch and turn. (36)
Rnd 8: Ch1 and make a sc in the first stitch. Hsc2 further. Repeat (hsc5, 2hsc) 5 times. Hsc3, ch and turn. (41)
Rnd 9 (ios): Ch1 and make a sc in the first stitch. Hsc2 further. Repeat (hsc6, 2hsc) 5 times. Hsc3. (46) Do not fasten off!
To make a border for the Inner Bag Section, you need to turn your work so that the straight side is upwards and the ‘good’ side faces down.
Row 1: Ch1 and hdc21 along the straight side of the bag. Ch2 and turn.
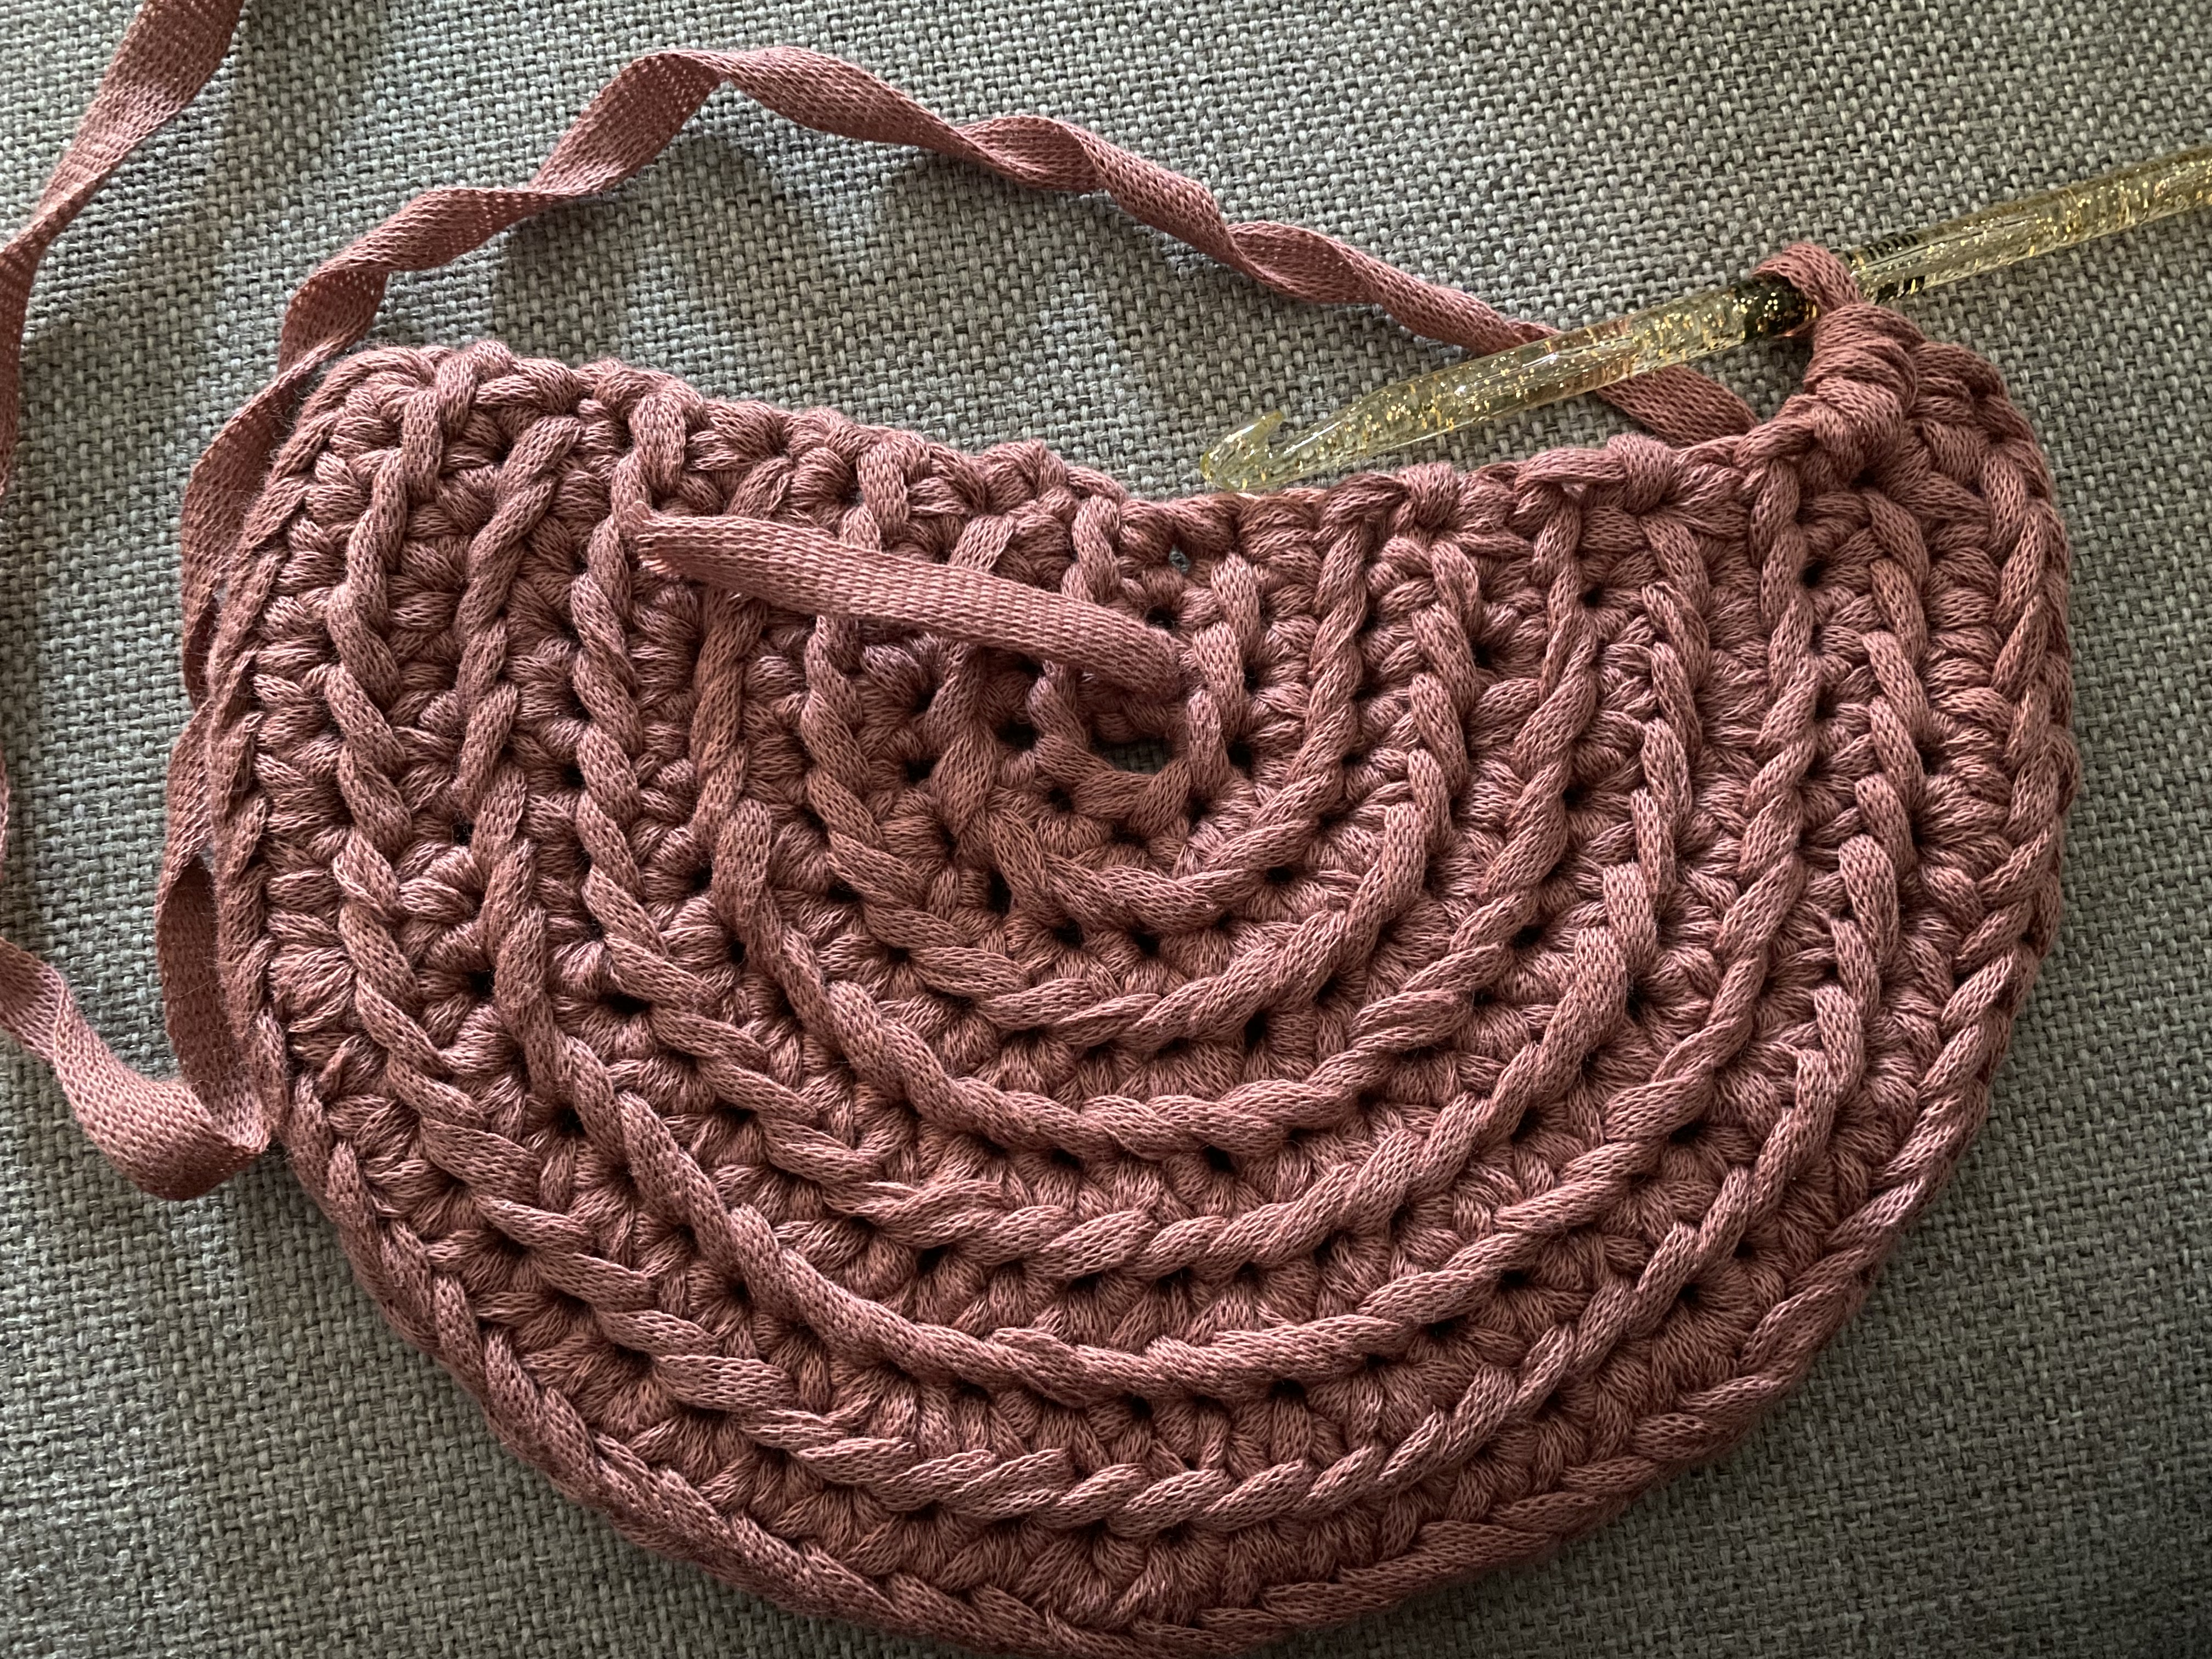
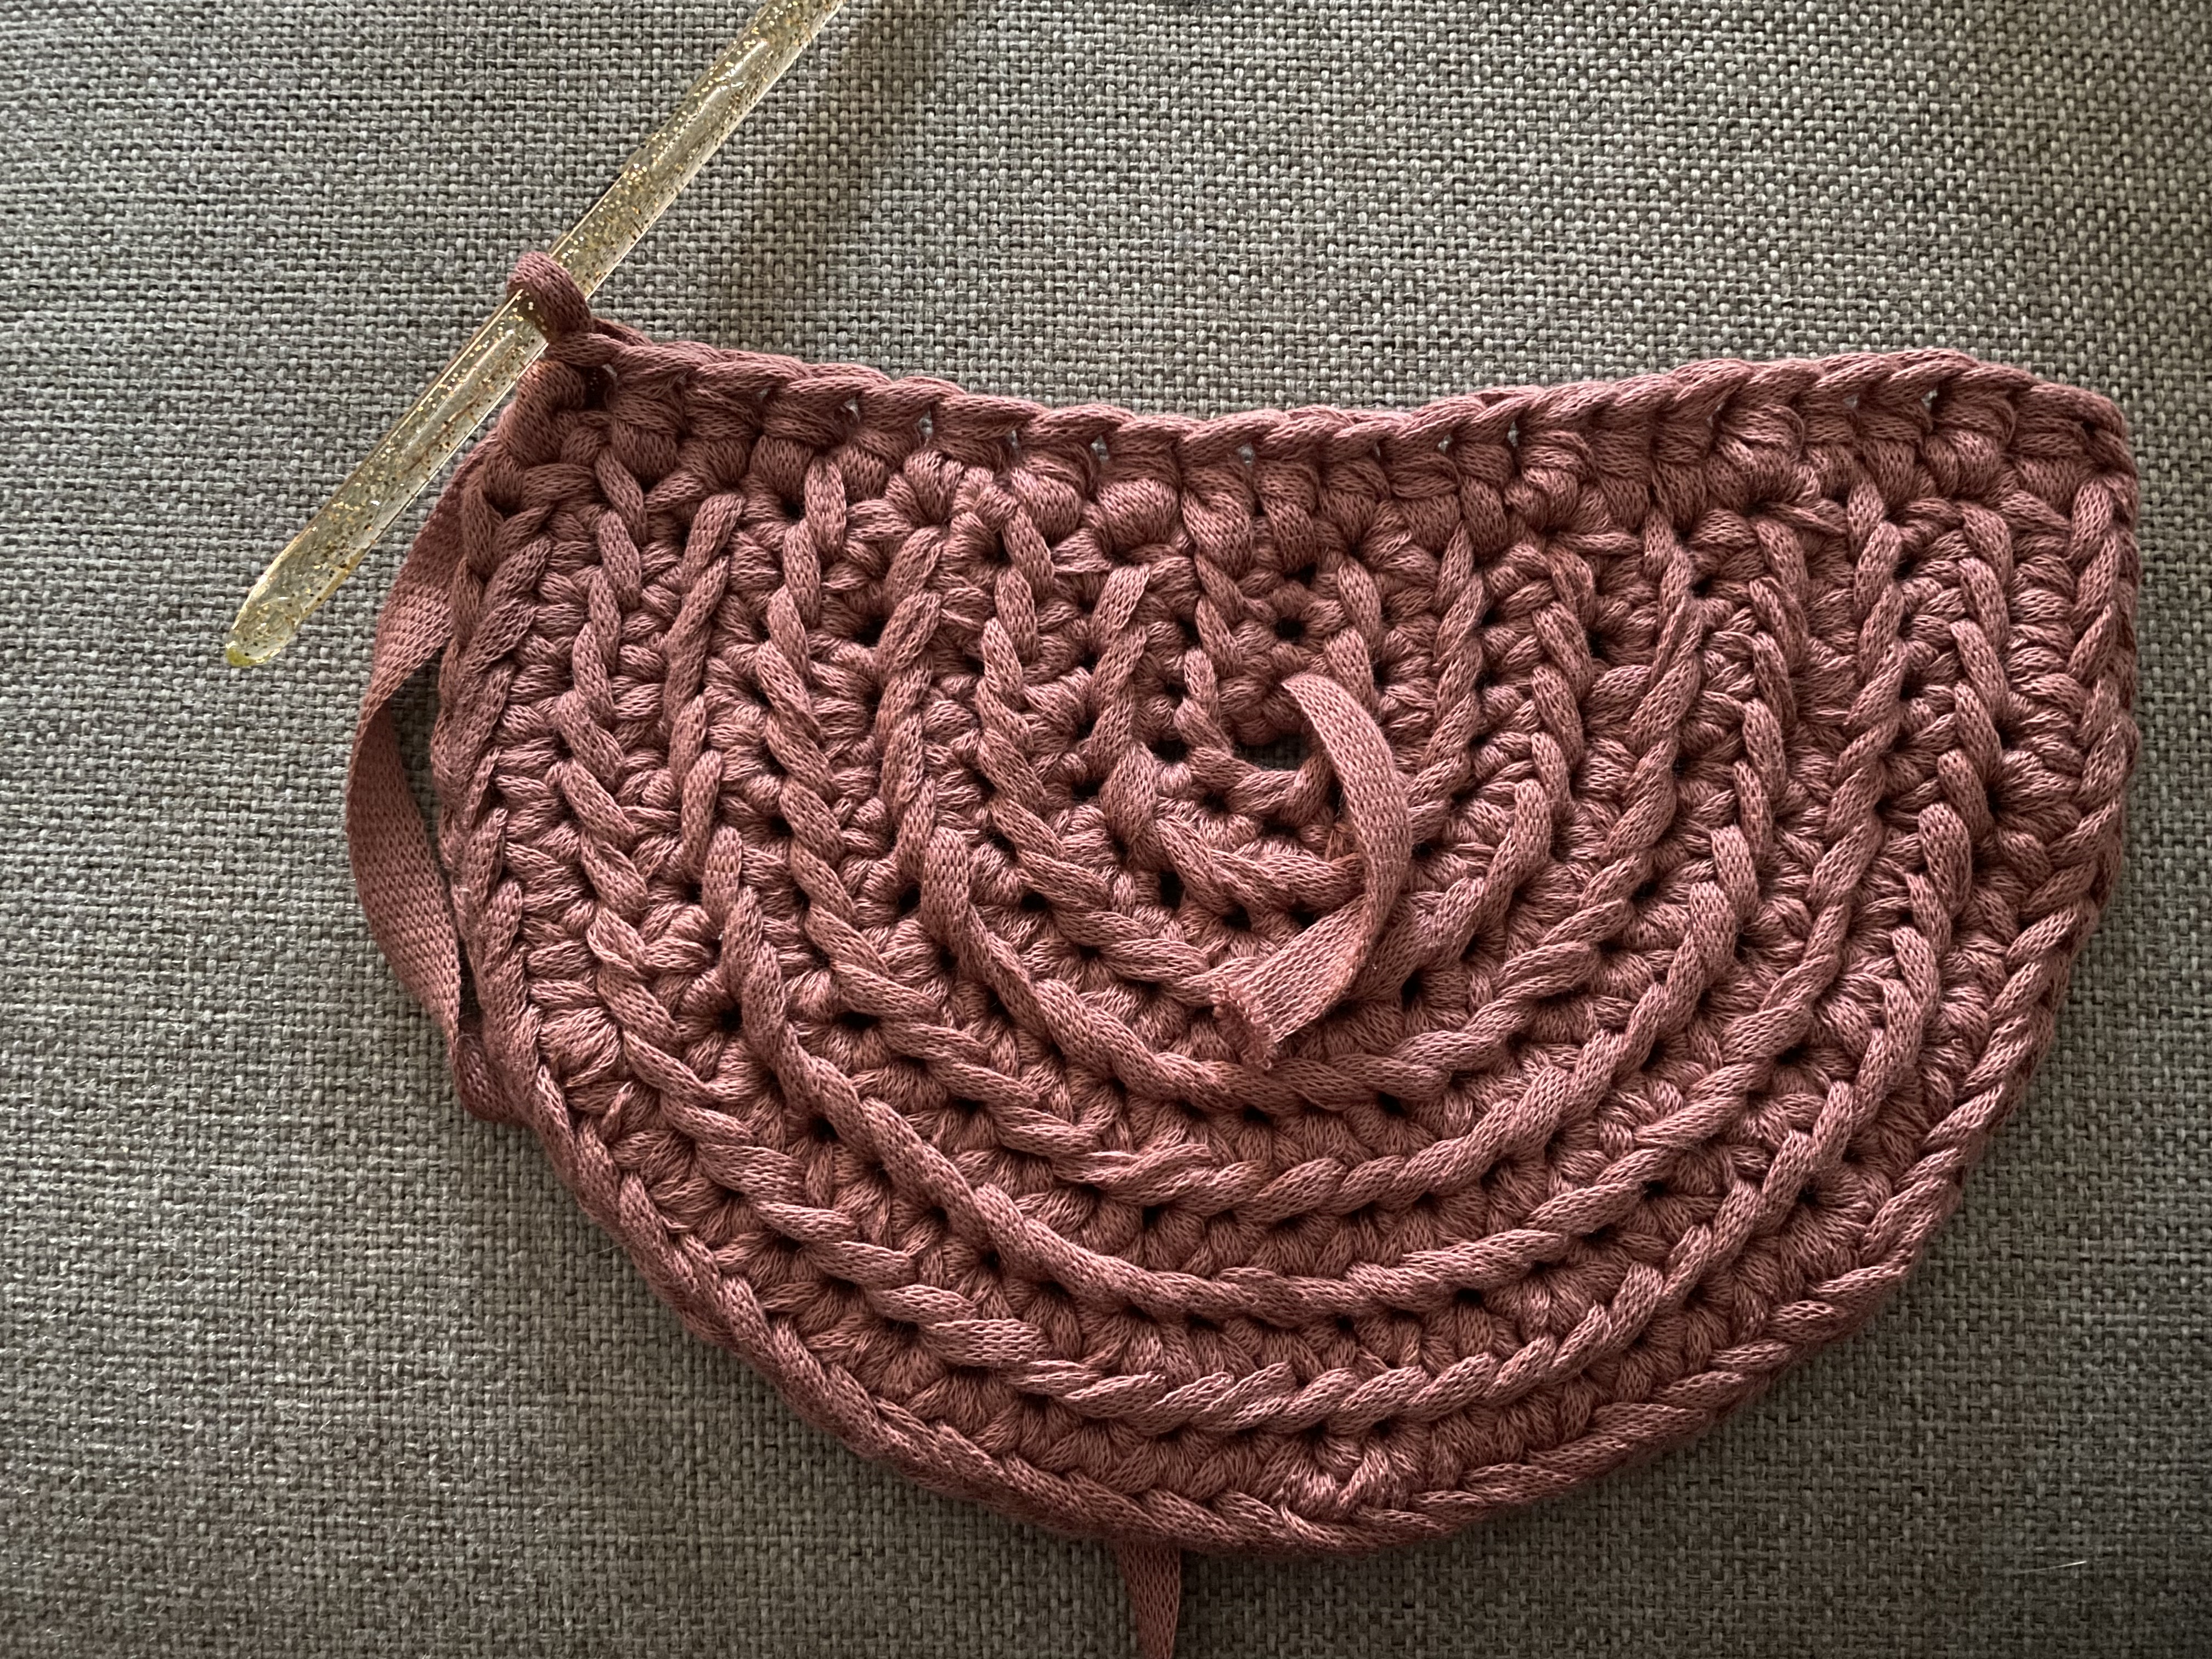
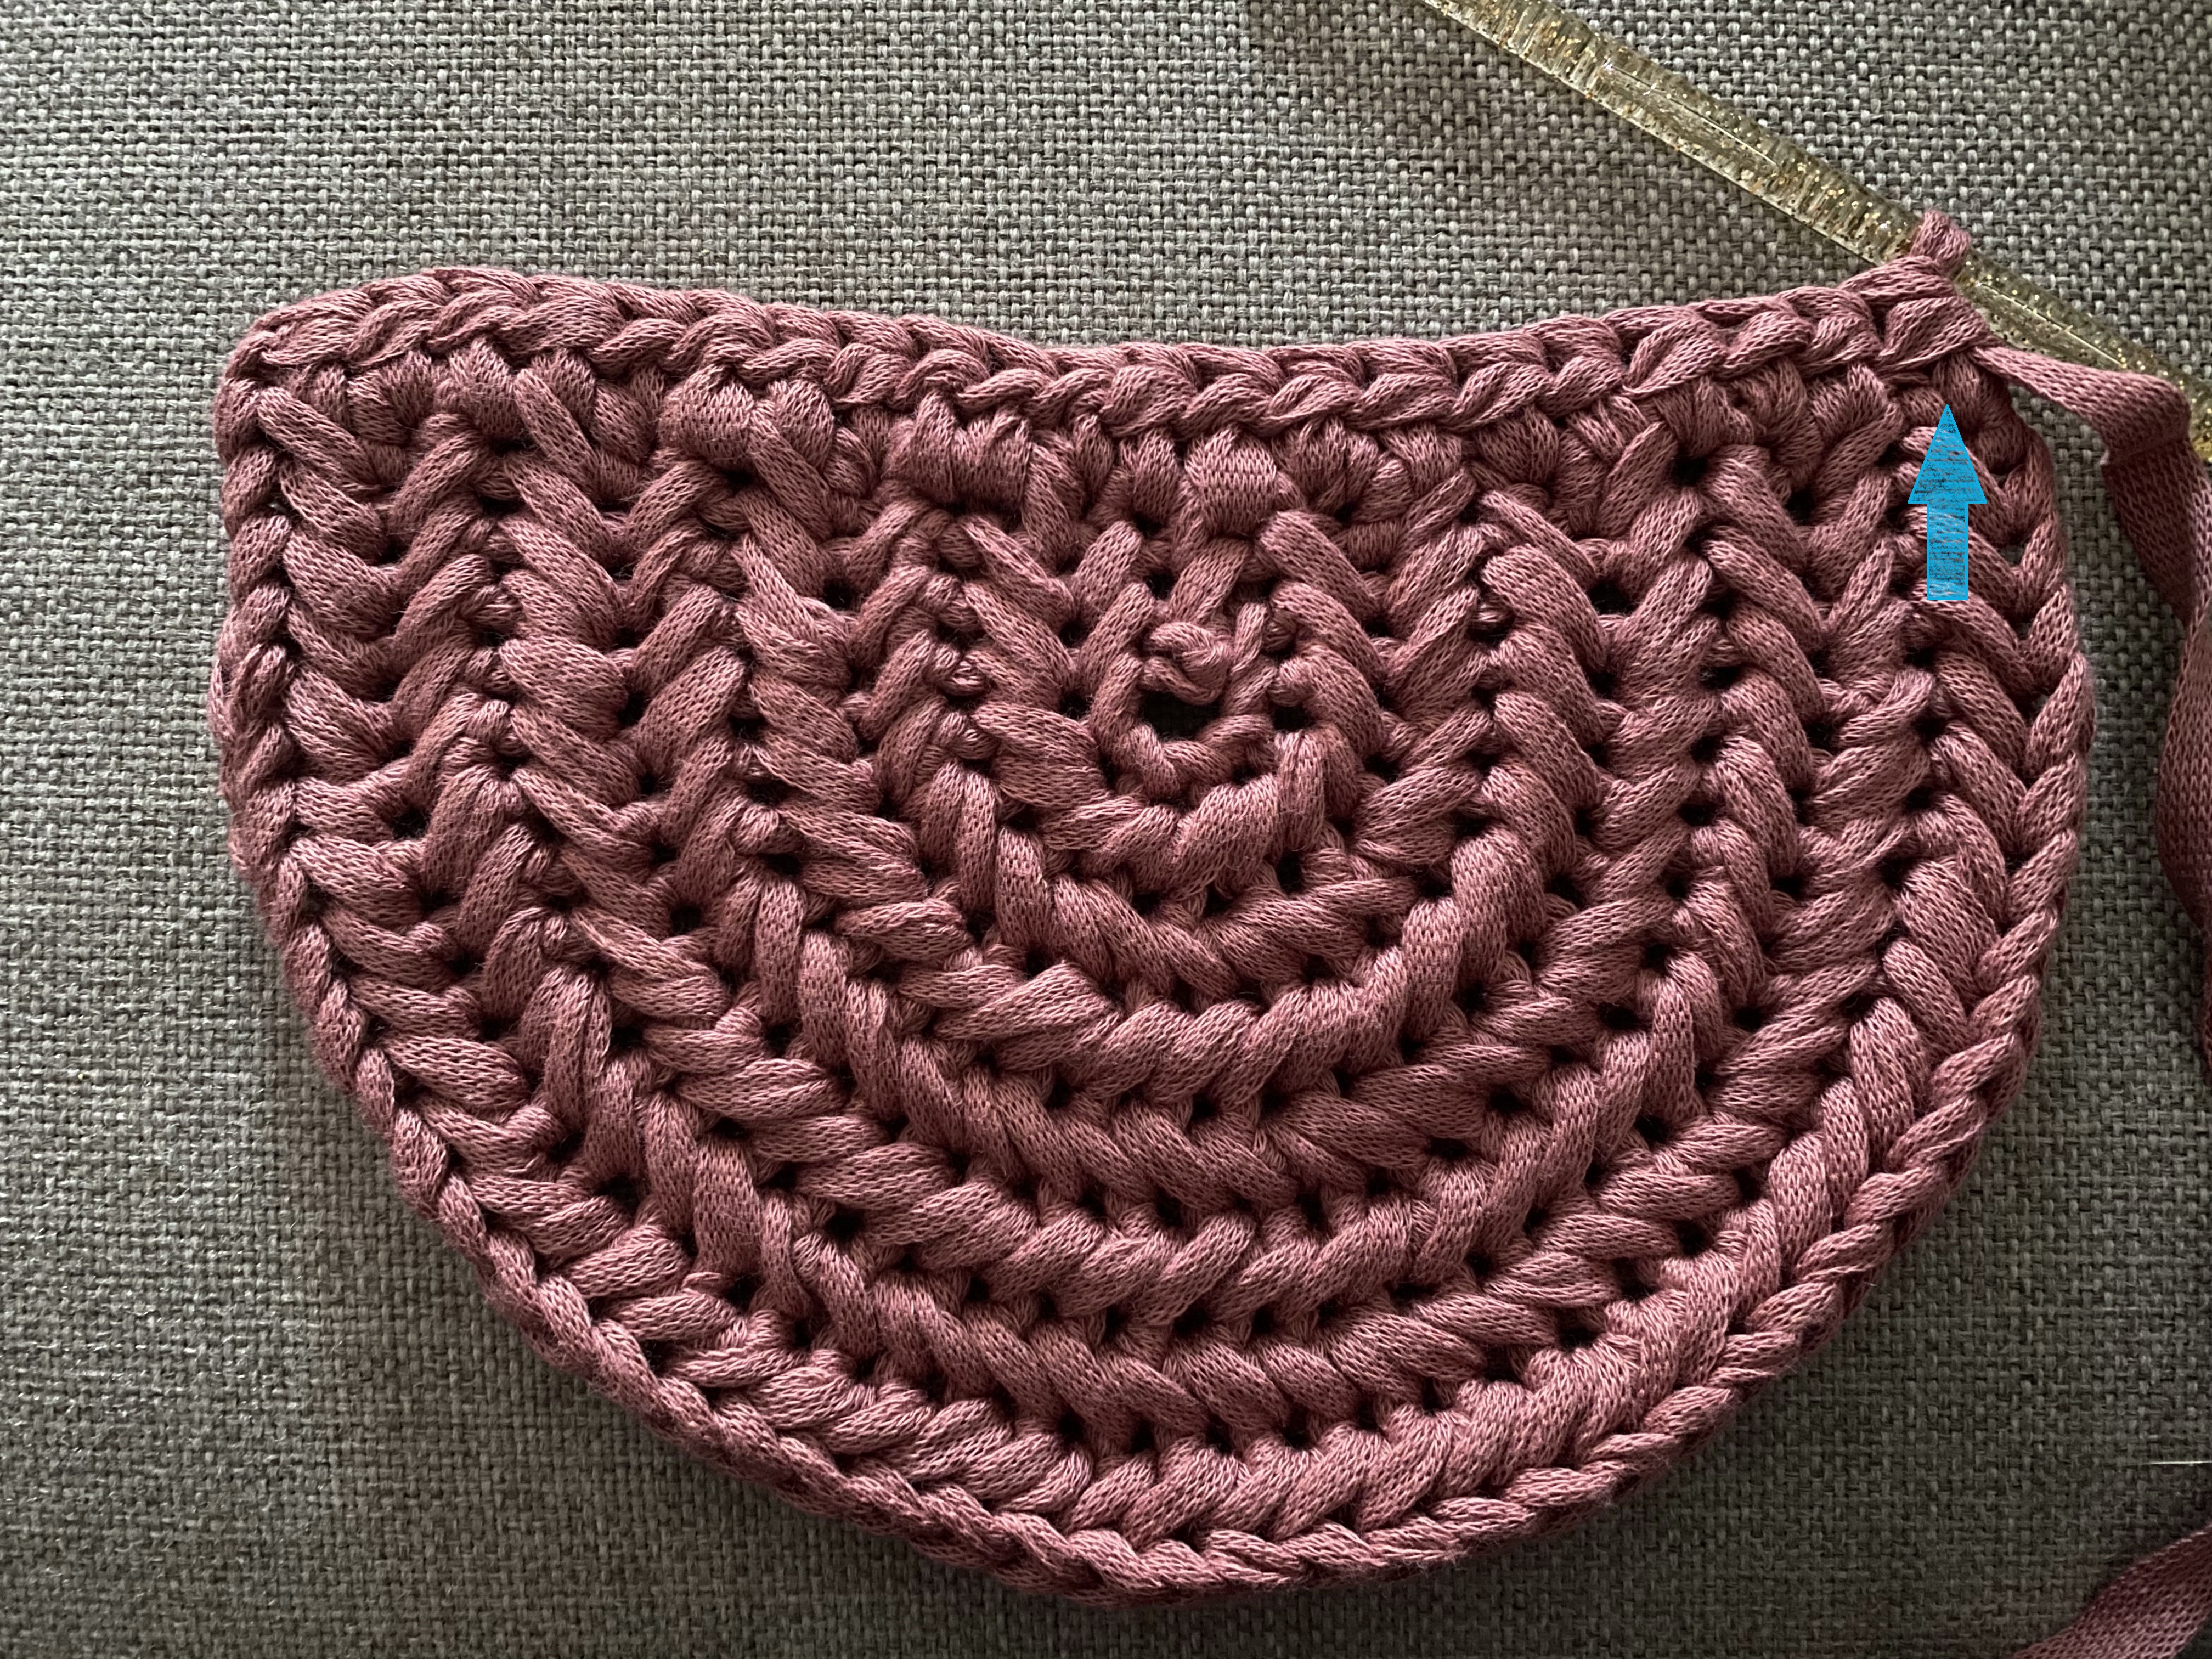
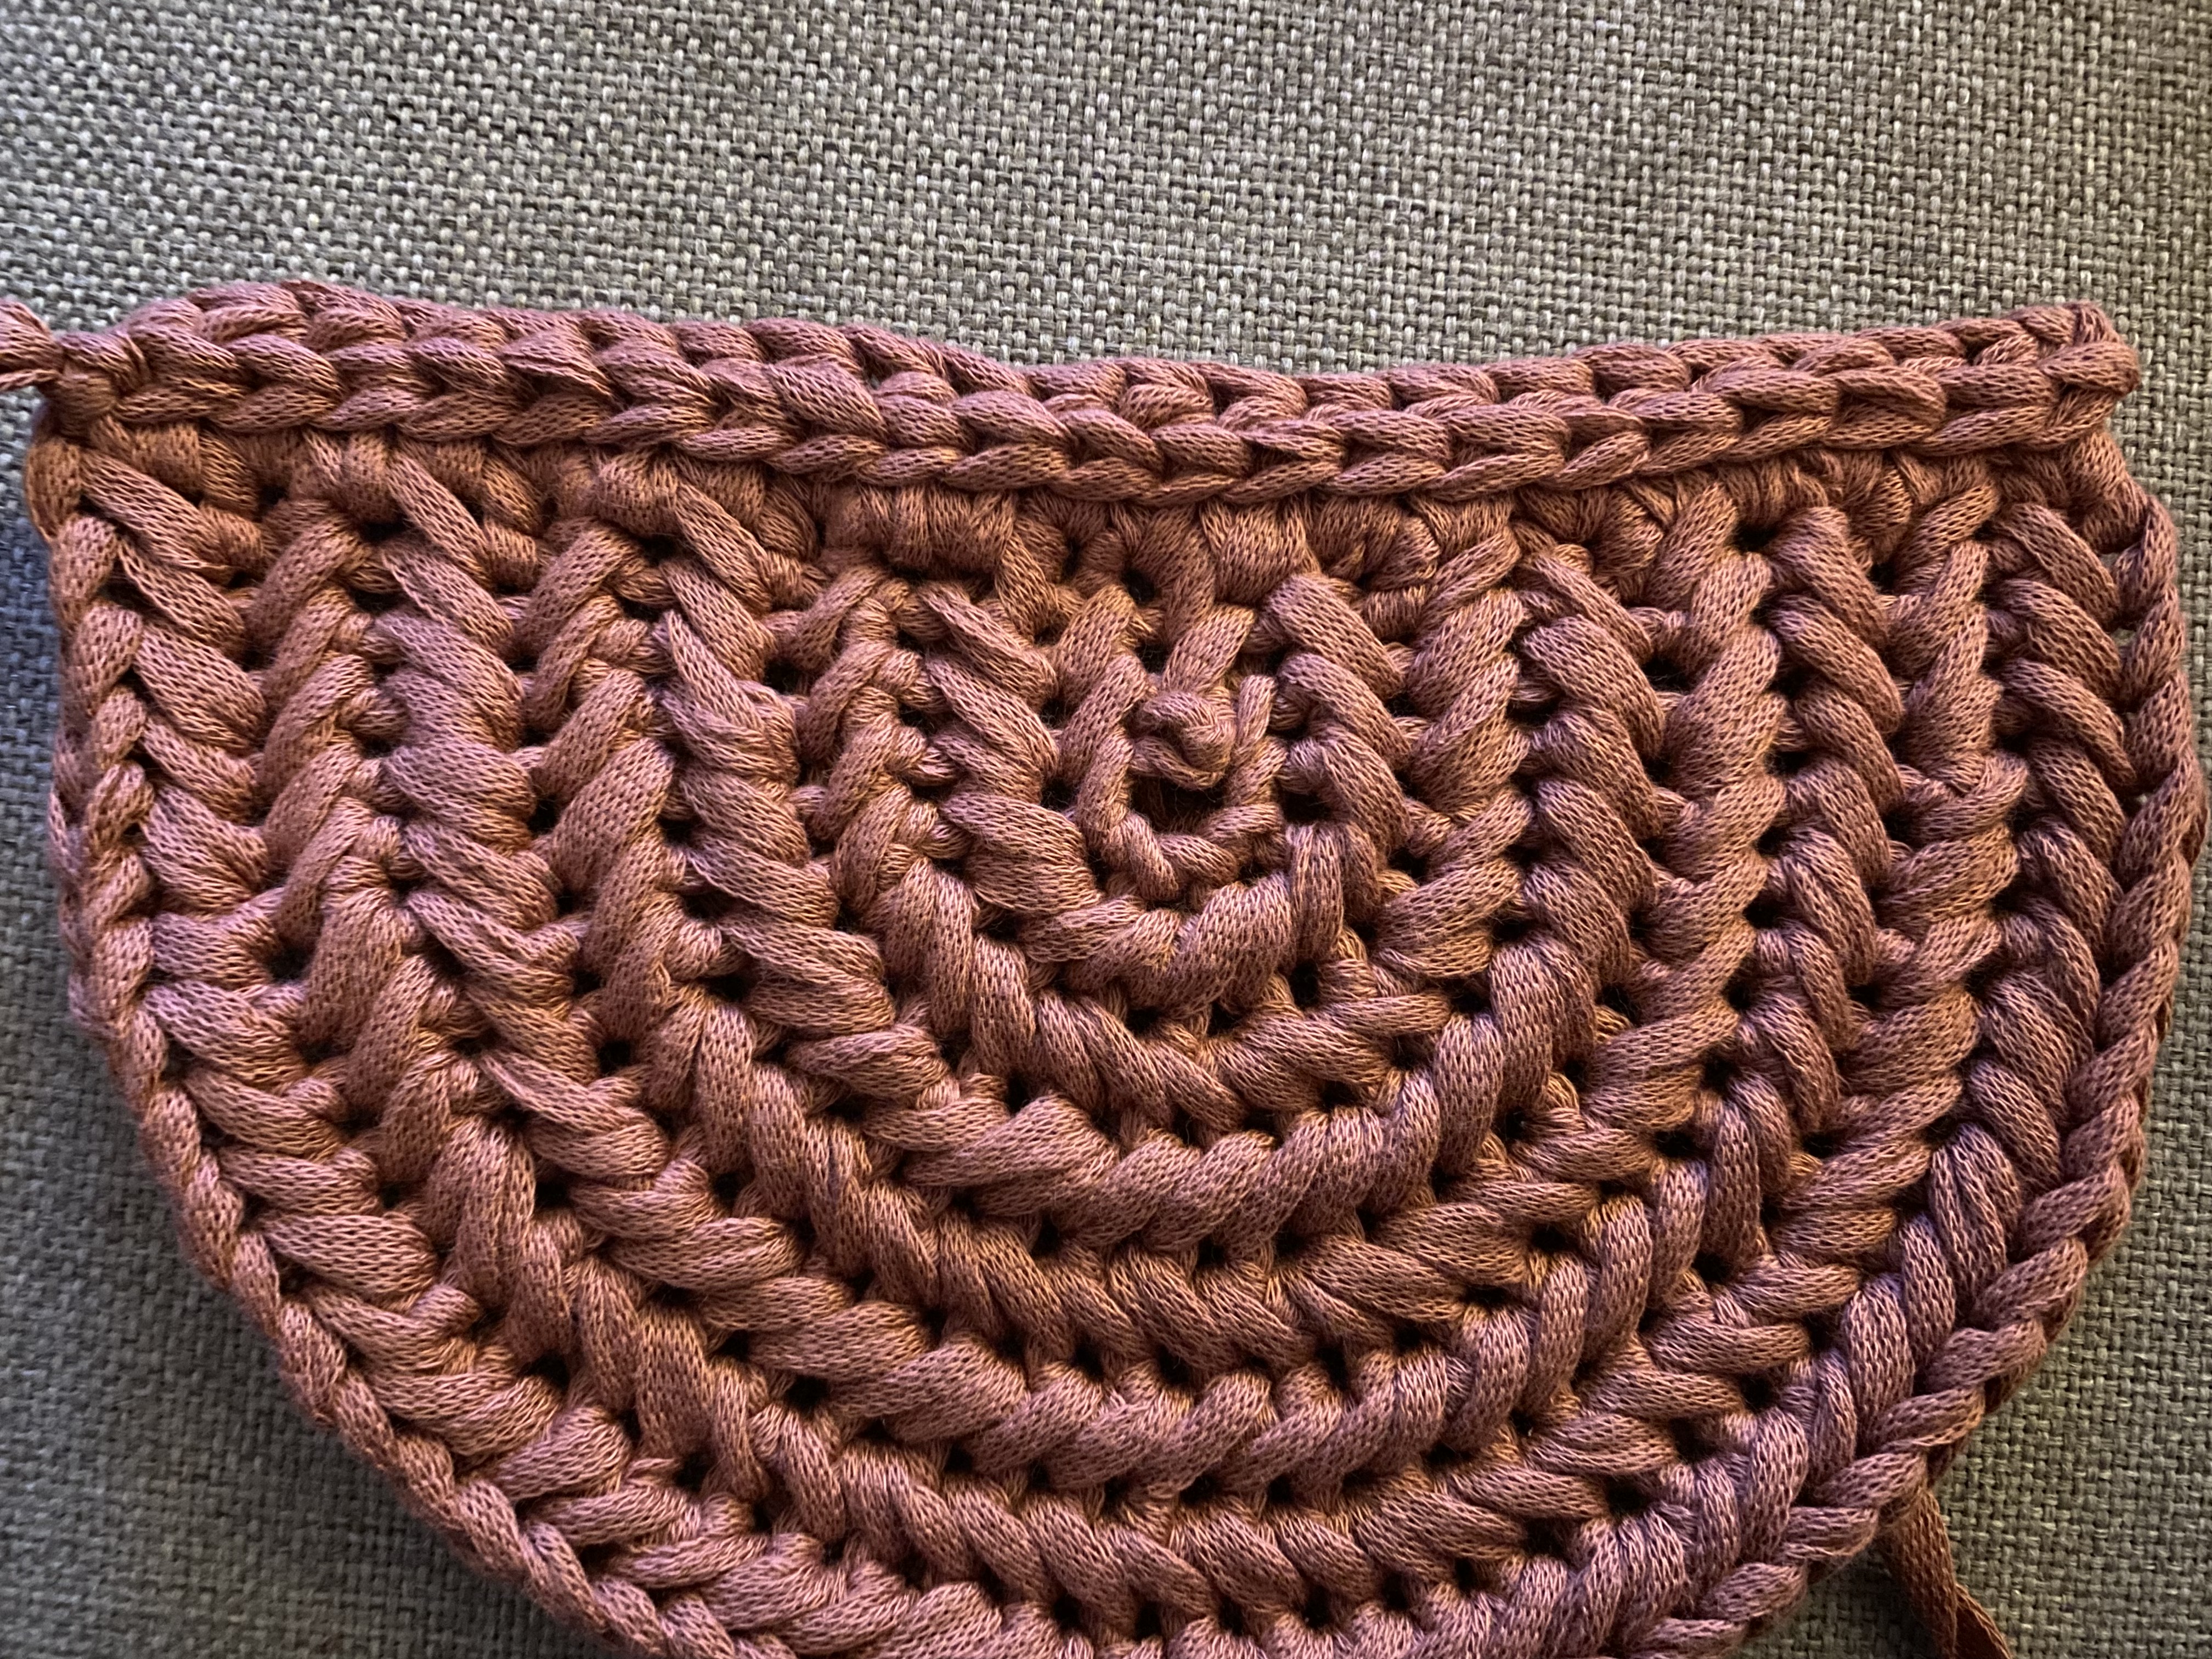
Sew the pieces of the bag together using a seamless joint. I learned to do this joint on Yarnspiration. They have some really great tutorials and patterns.
Strap
This strap is made by a whole bunch of slip stitches. Why? This is not one of my favorite stitches and it is definatly not one of the fastest, but it creates something sturdy with little spring in it. And that is what you most want of a bag strap right? I also like that something of a braid pattern comes back into the strap. The following picture shows the texture of the finished strap.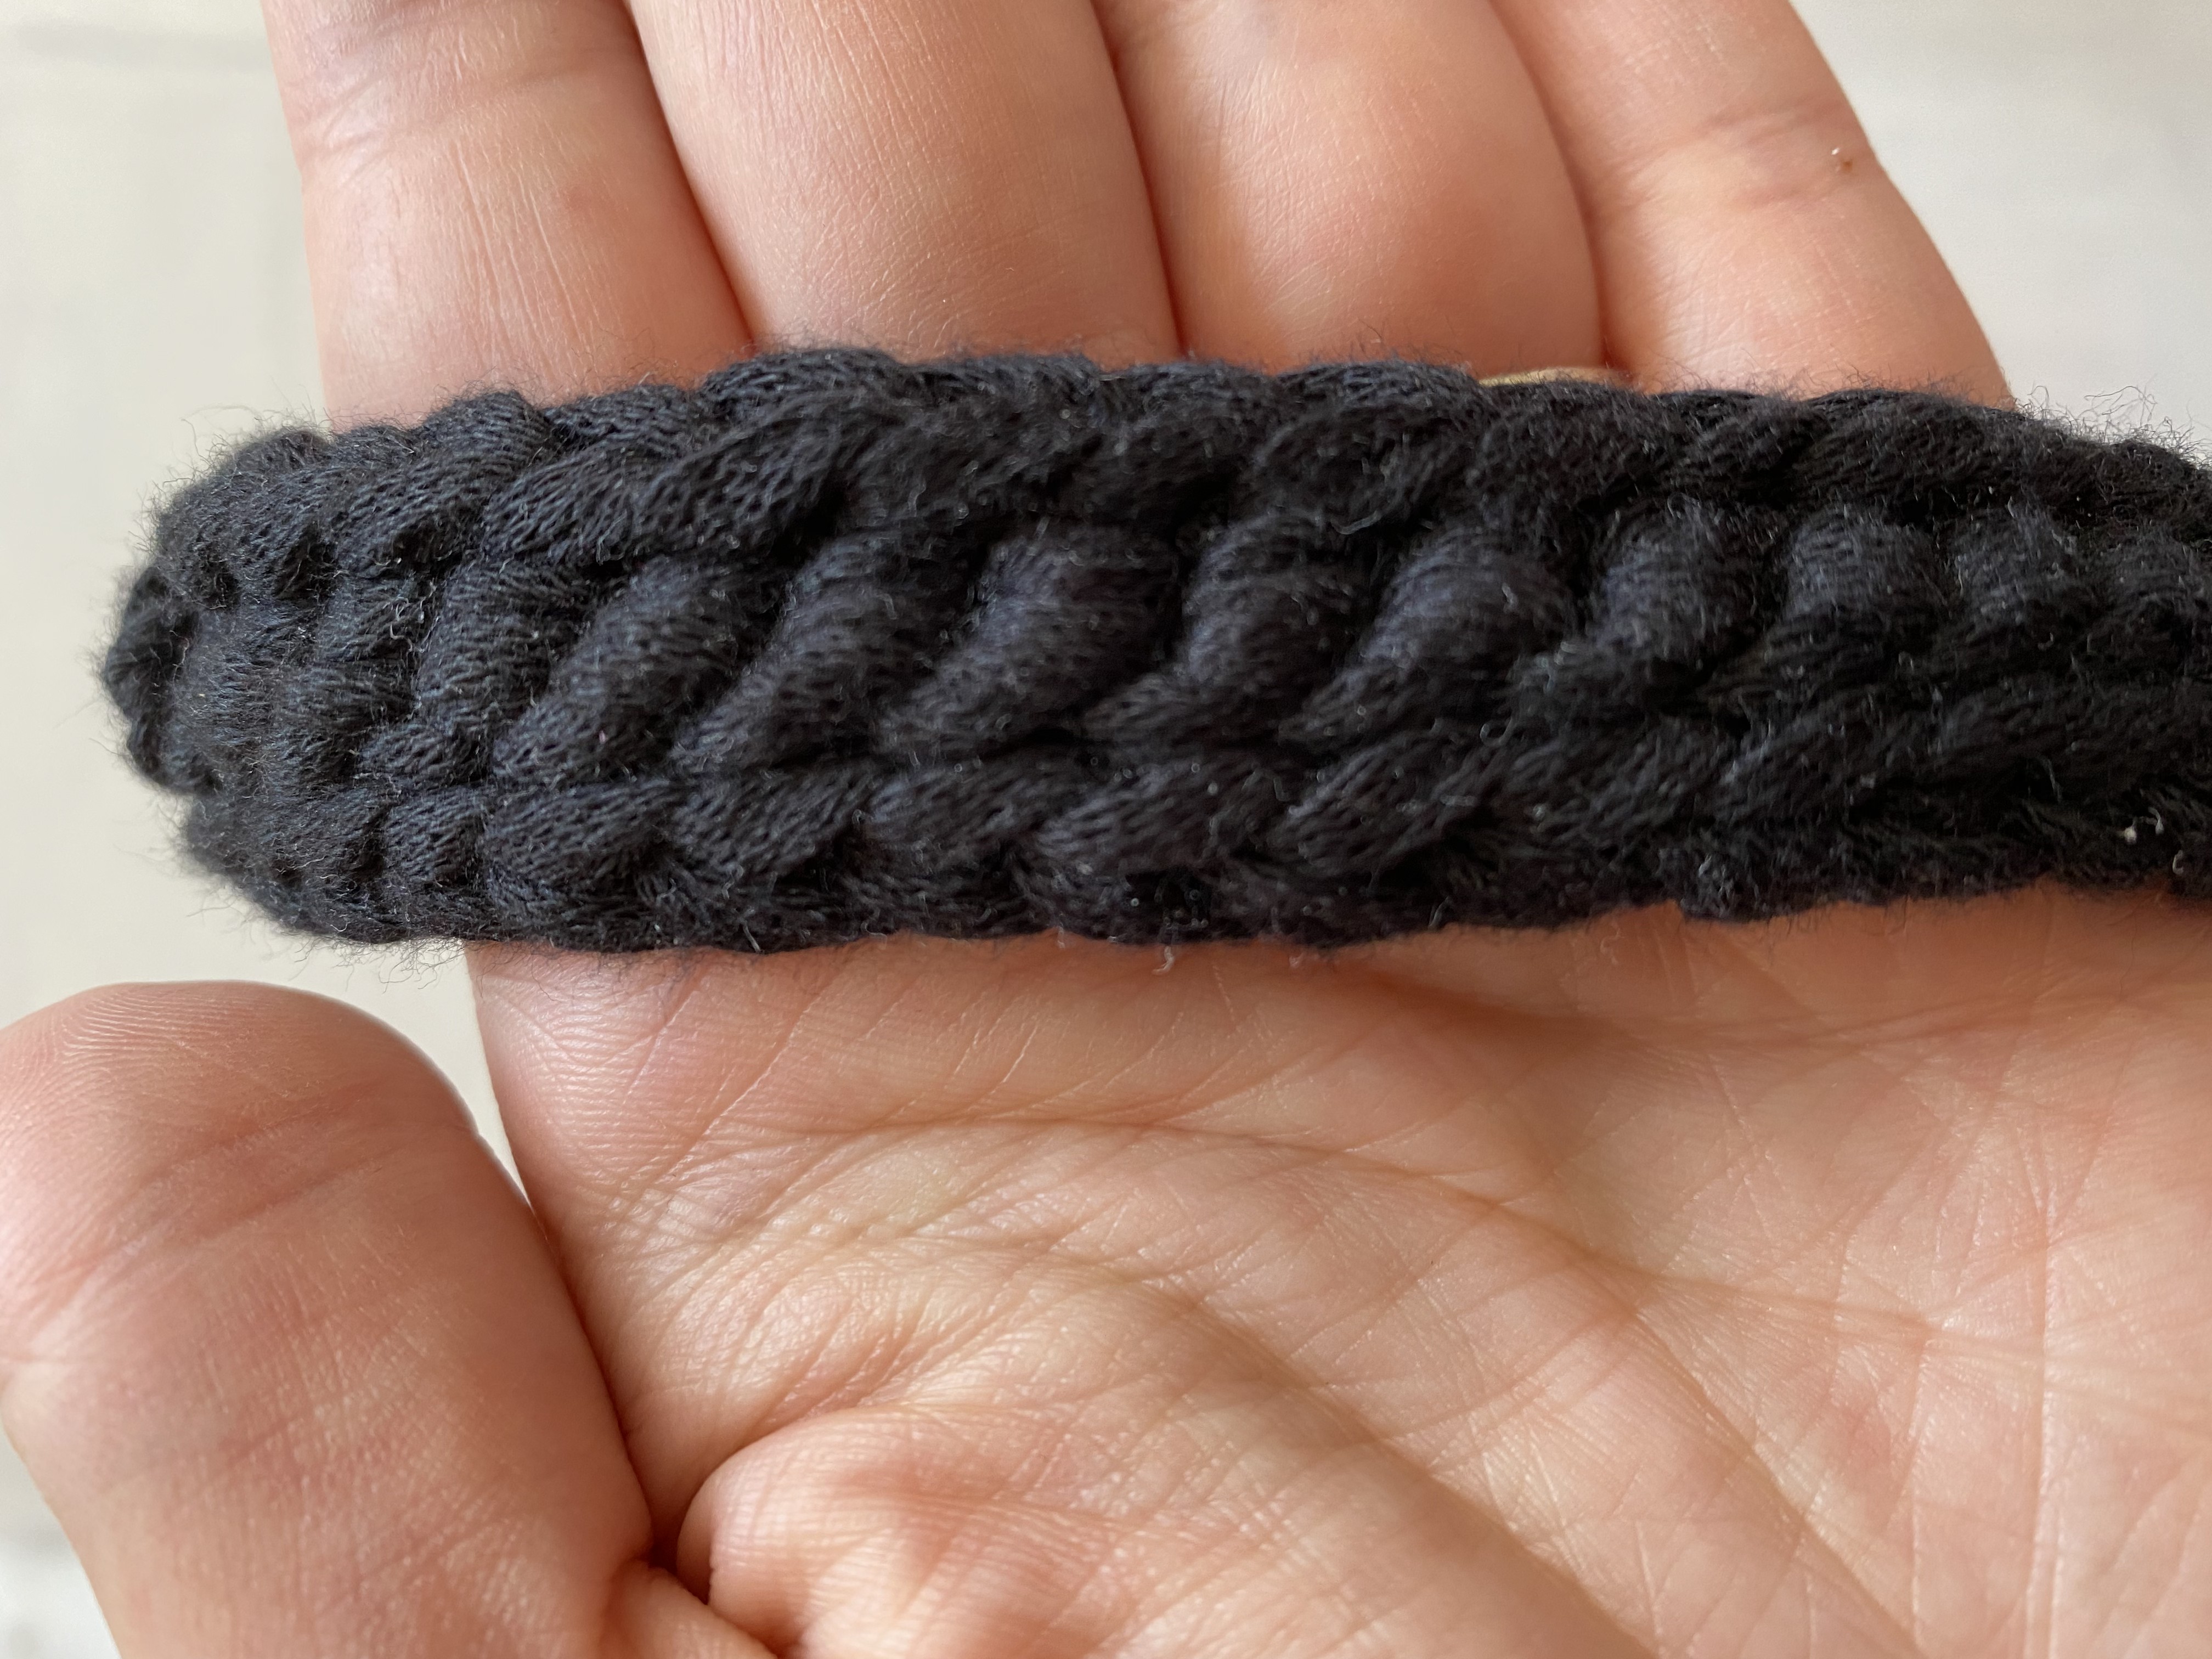
If you want to make an adjustable strap, you will need a slider. I also decided to use some metal hooks for the end of the strap to complete the look. The choice of making an adjustable strap was based on the freedom to wear different ways, but also preference. Some people like their bags longer than other ones. I think it is great that I can make it a lot shorter and my youngest girl that is 16 months can play with it. I bought my ‘bag accessories’ at Amazon. Click here to buy your own slider and hooks for your straps.
How to make these straps:
Use a crochet hook of 6 mm to reduce spring in the strap.
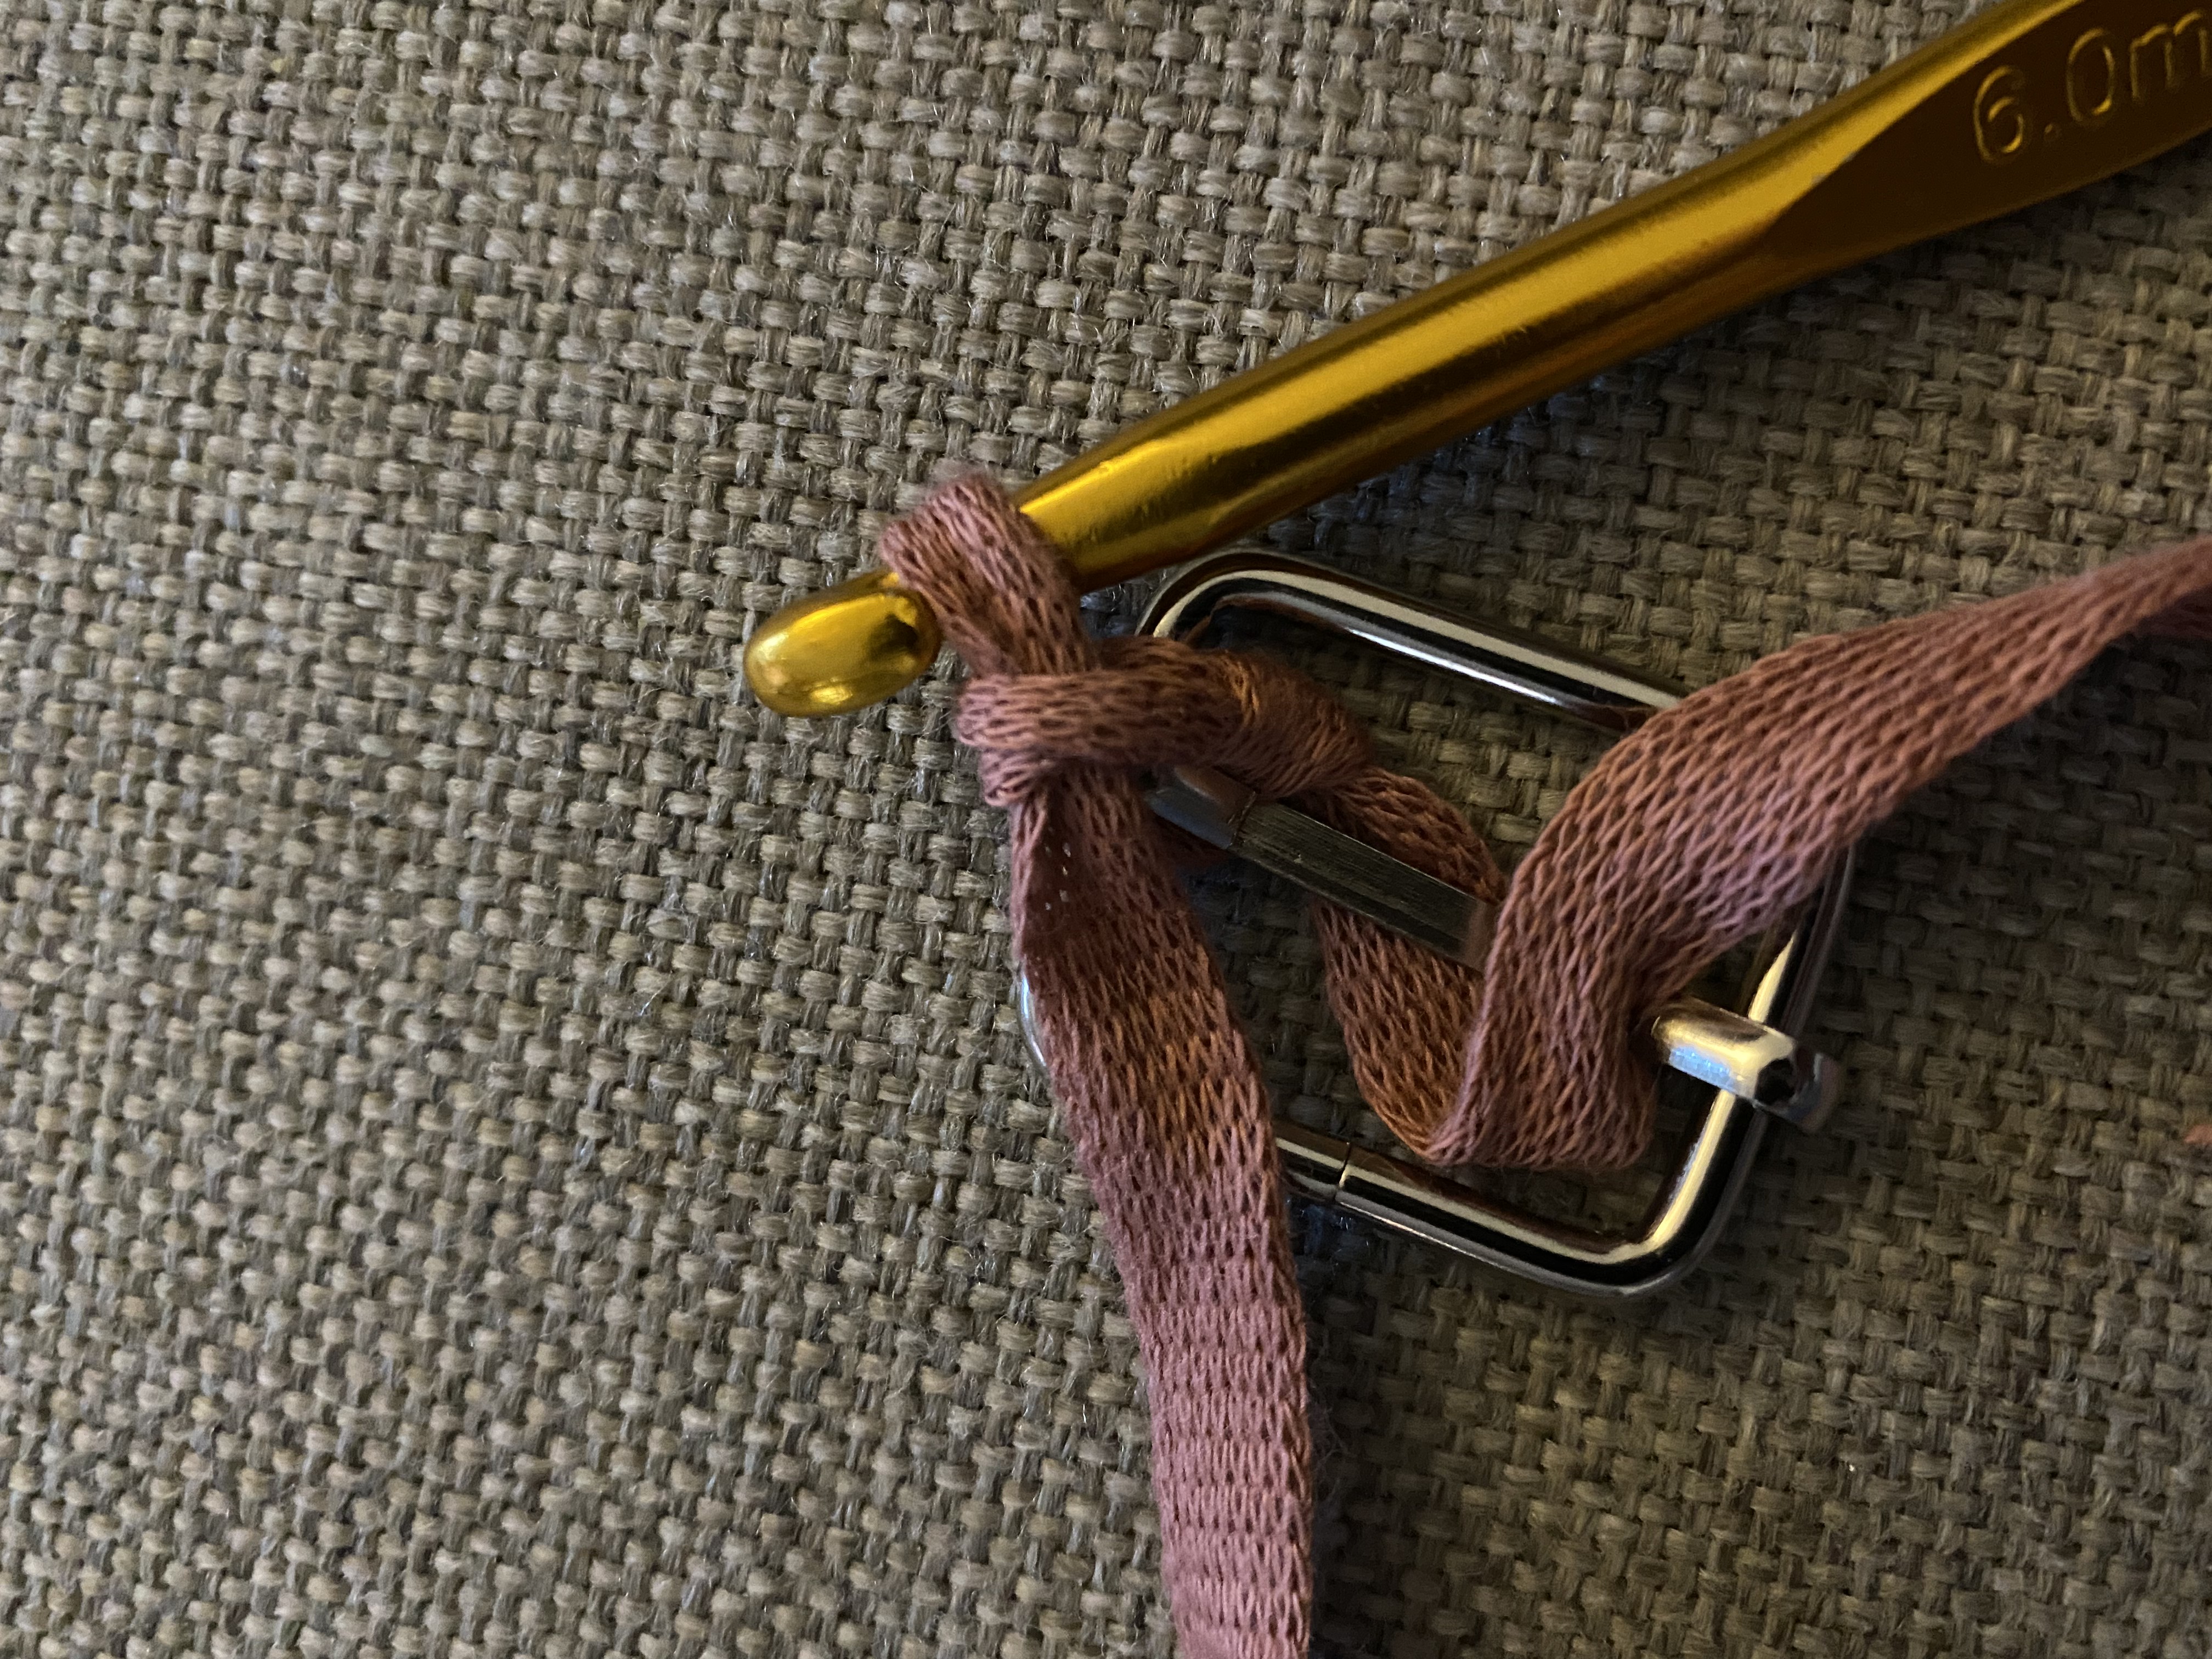
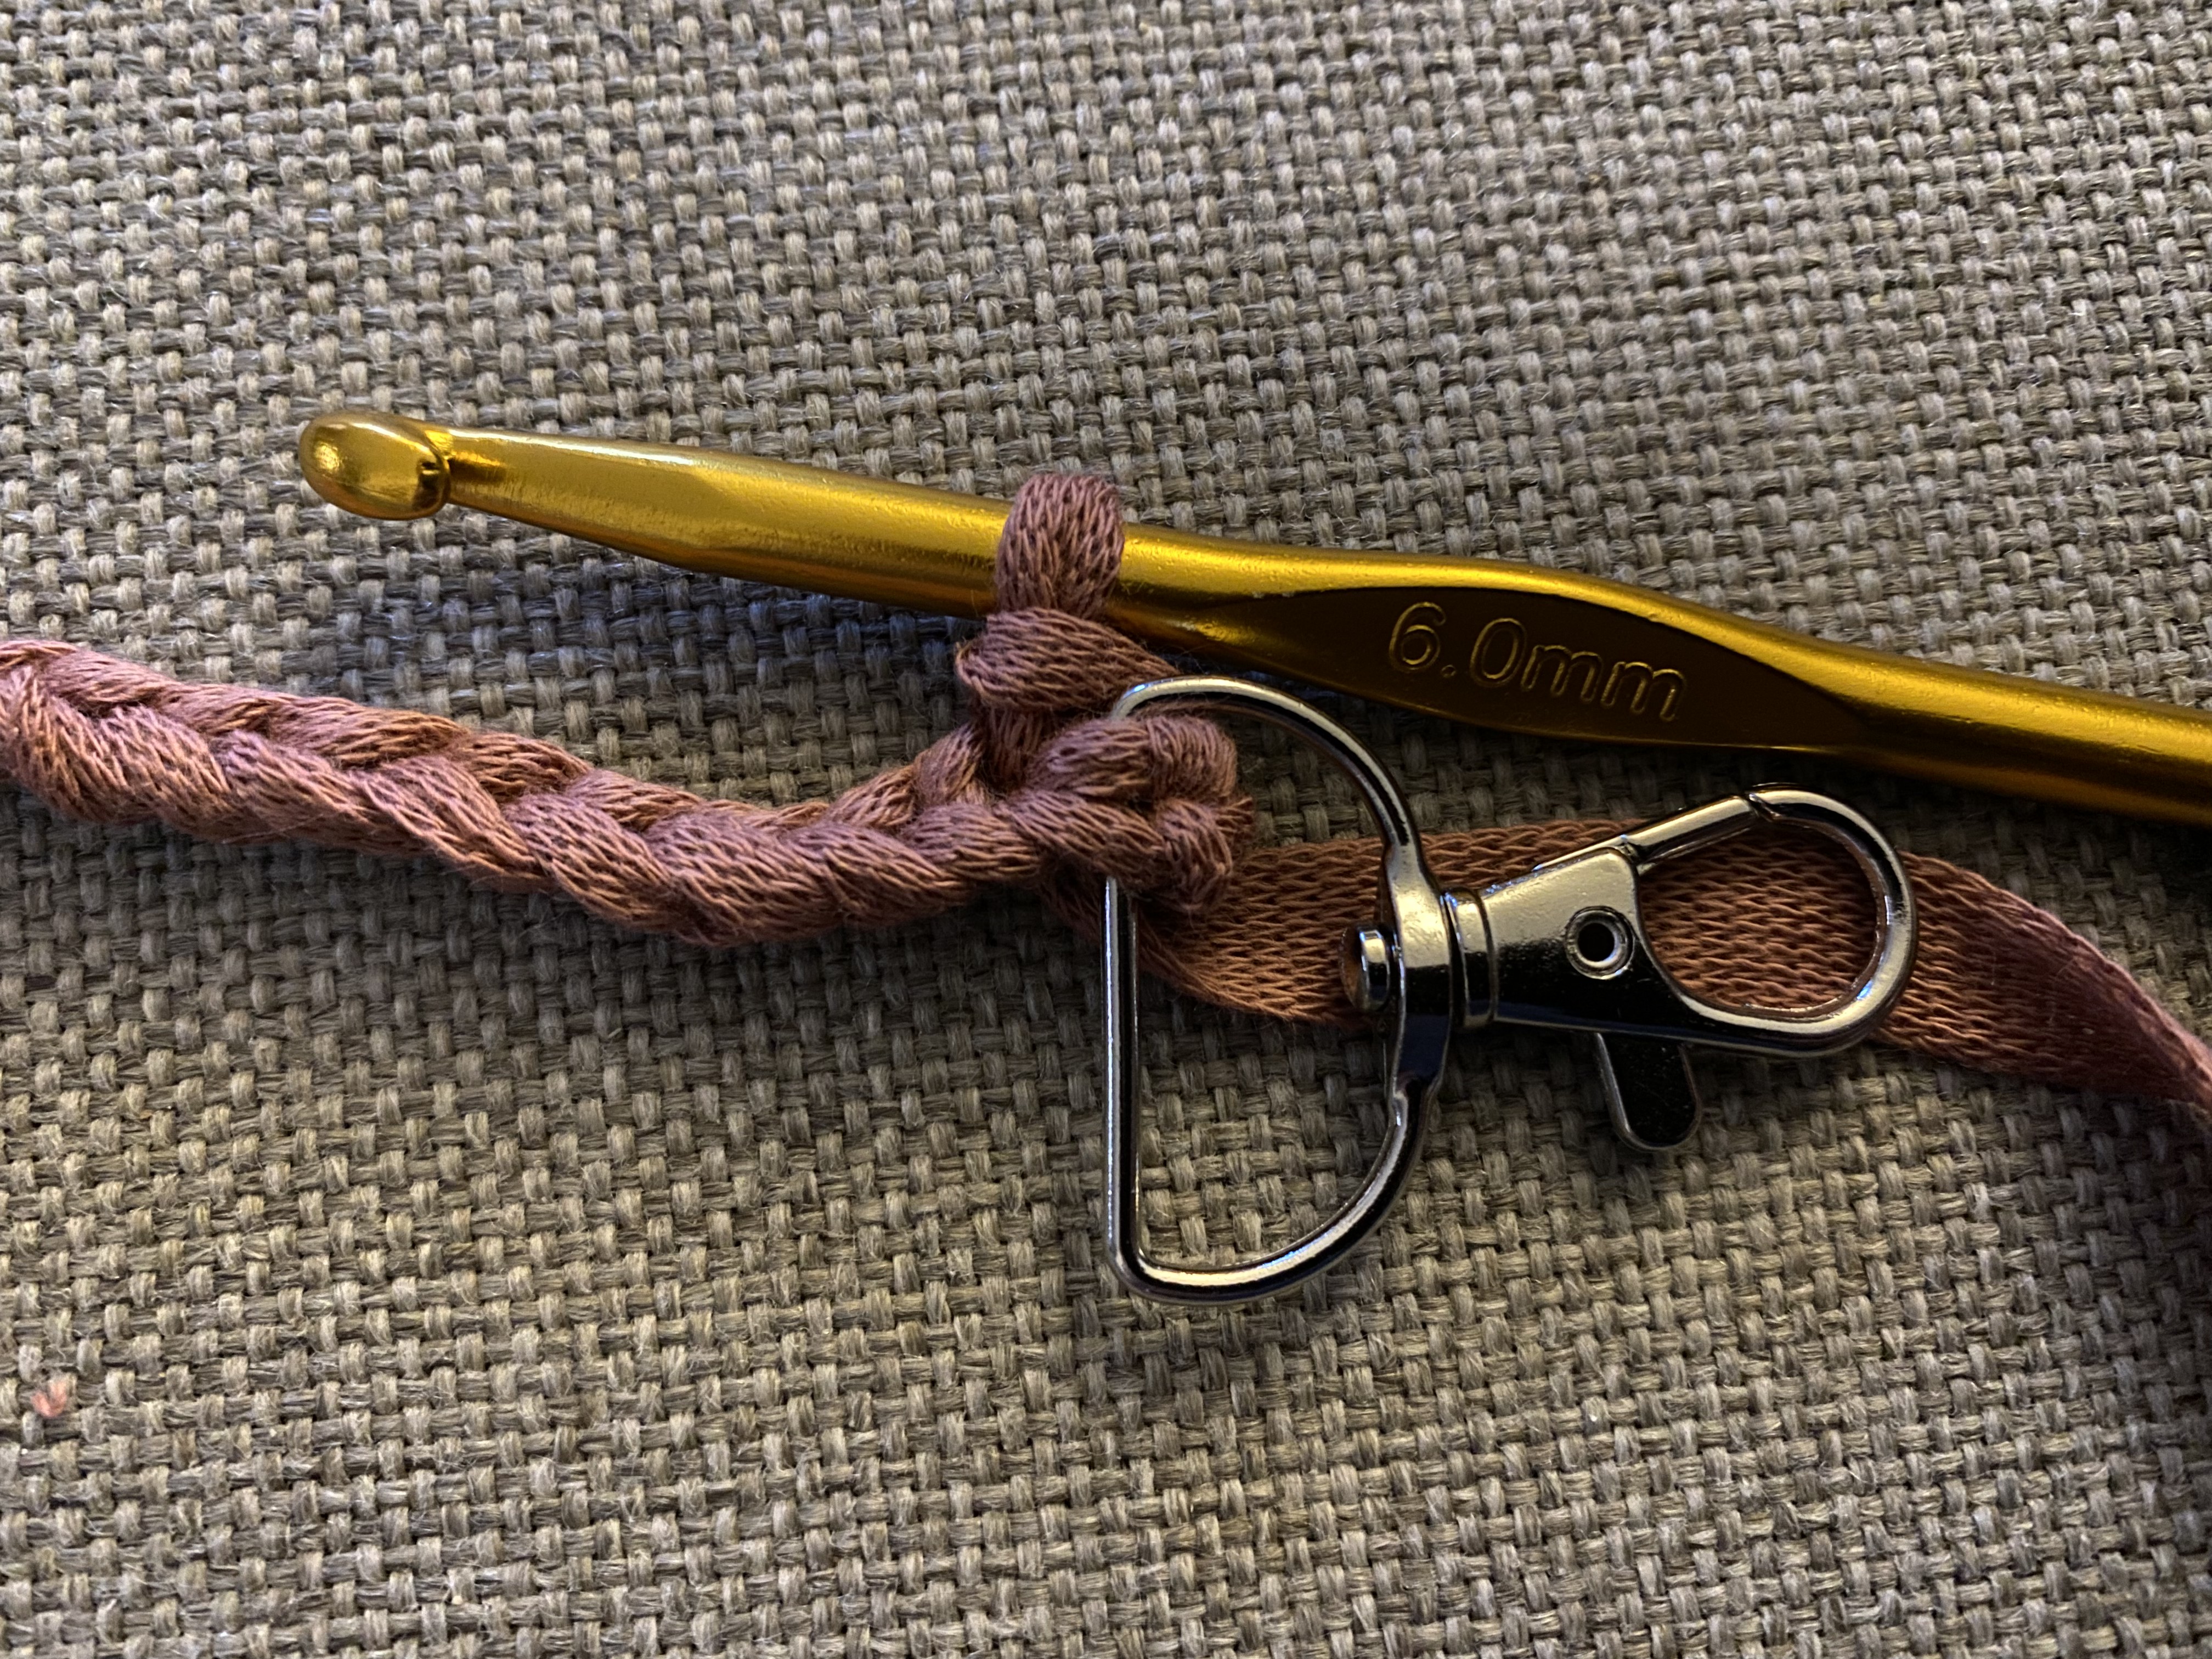
Row 1: Start by making a slip knot and attaching the yarn to your slider in the middle part by putting the yarn around it(1) and make a ch(2). Ch further until you reached the desired length of your strap. In my case this was 215. You end this row by making a ch on the strap hook. Ch another on the strap hook and turn.
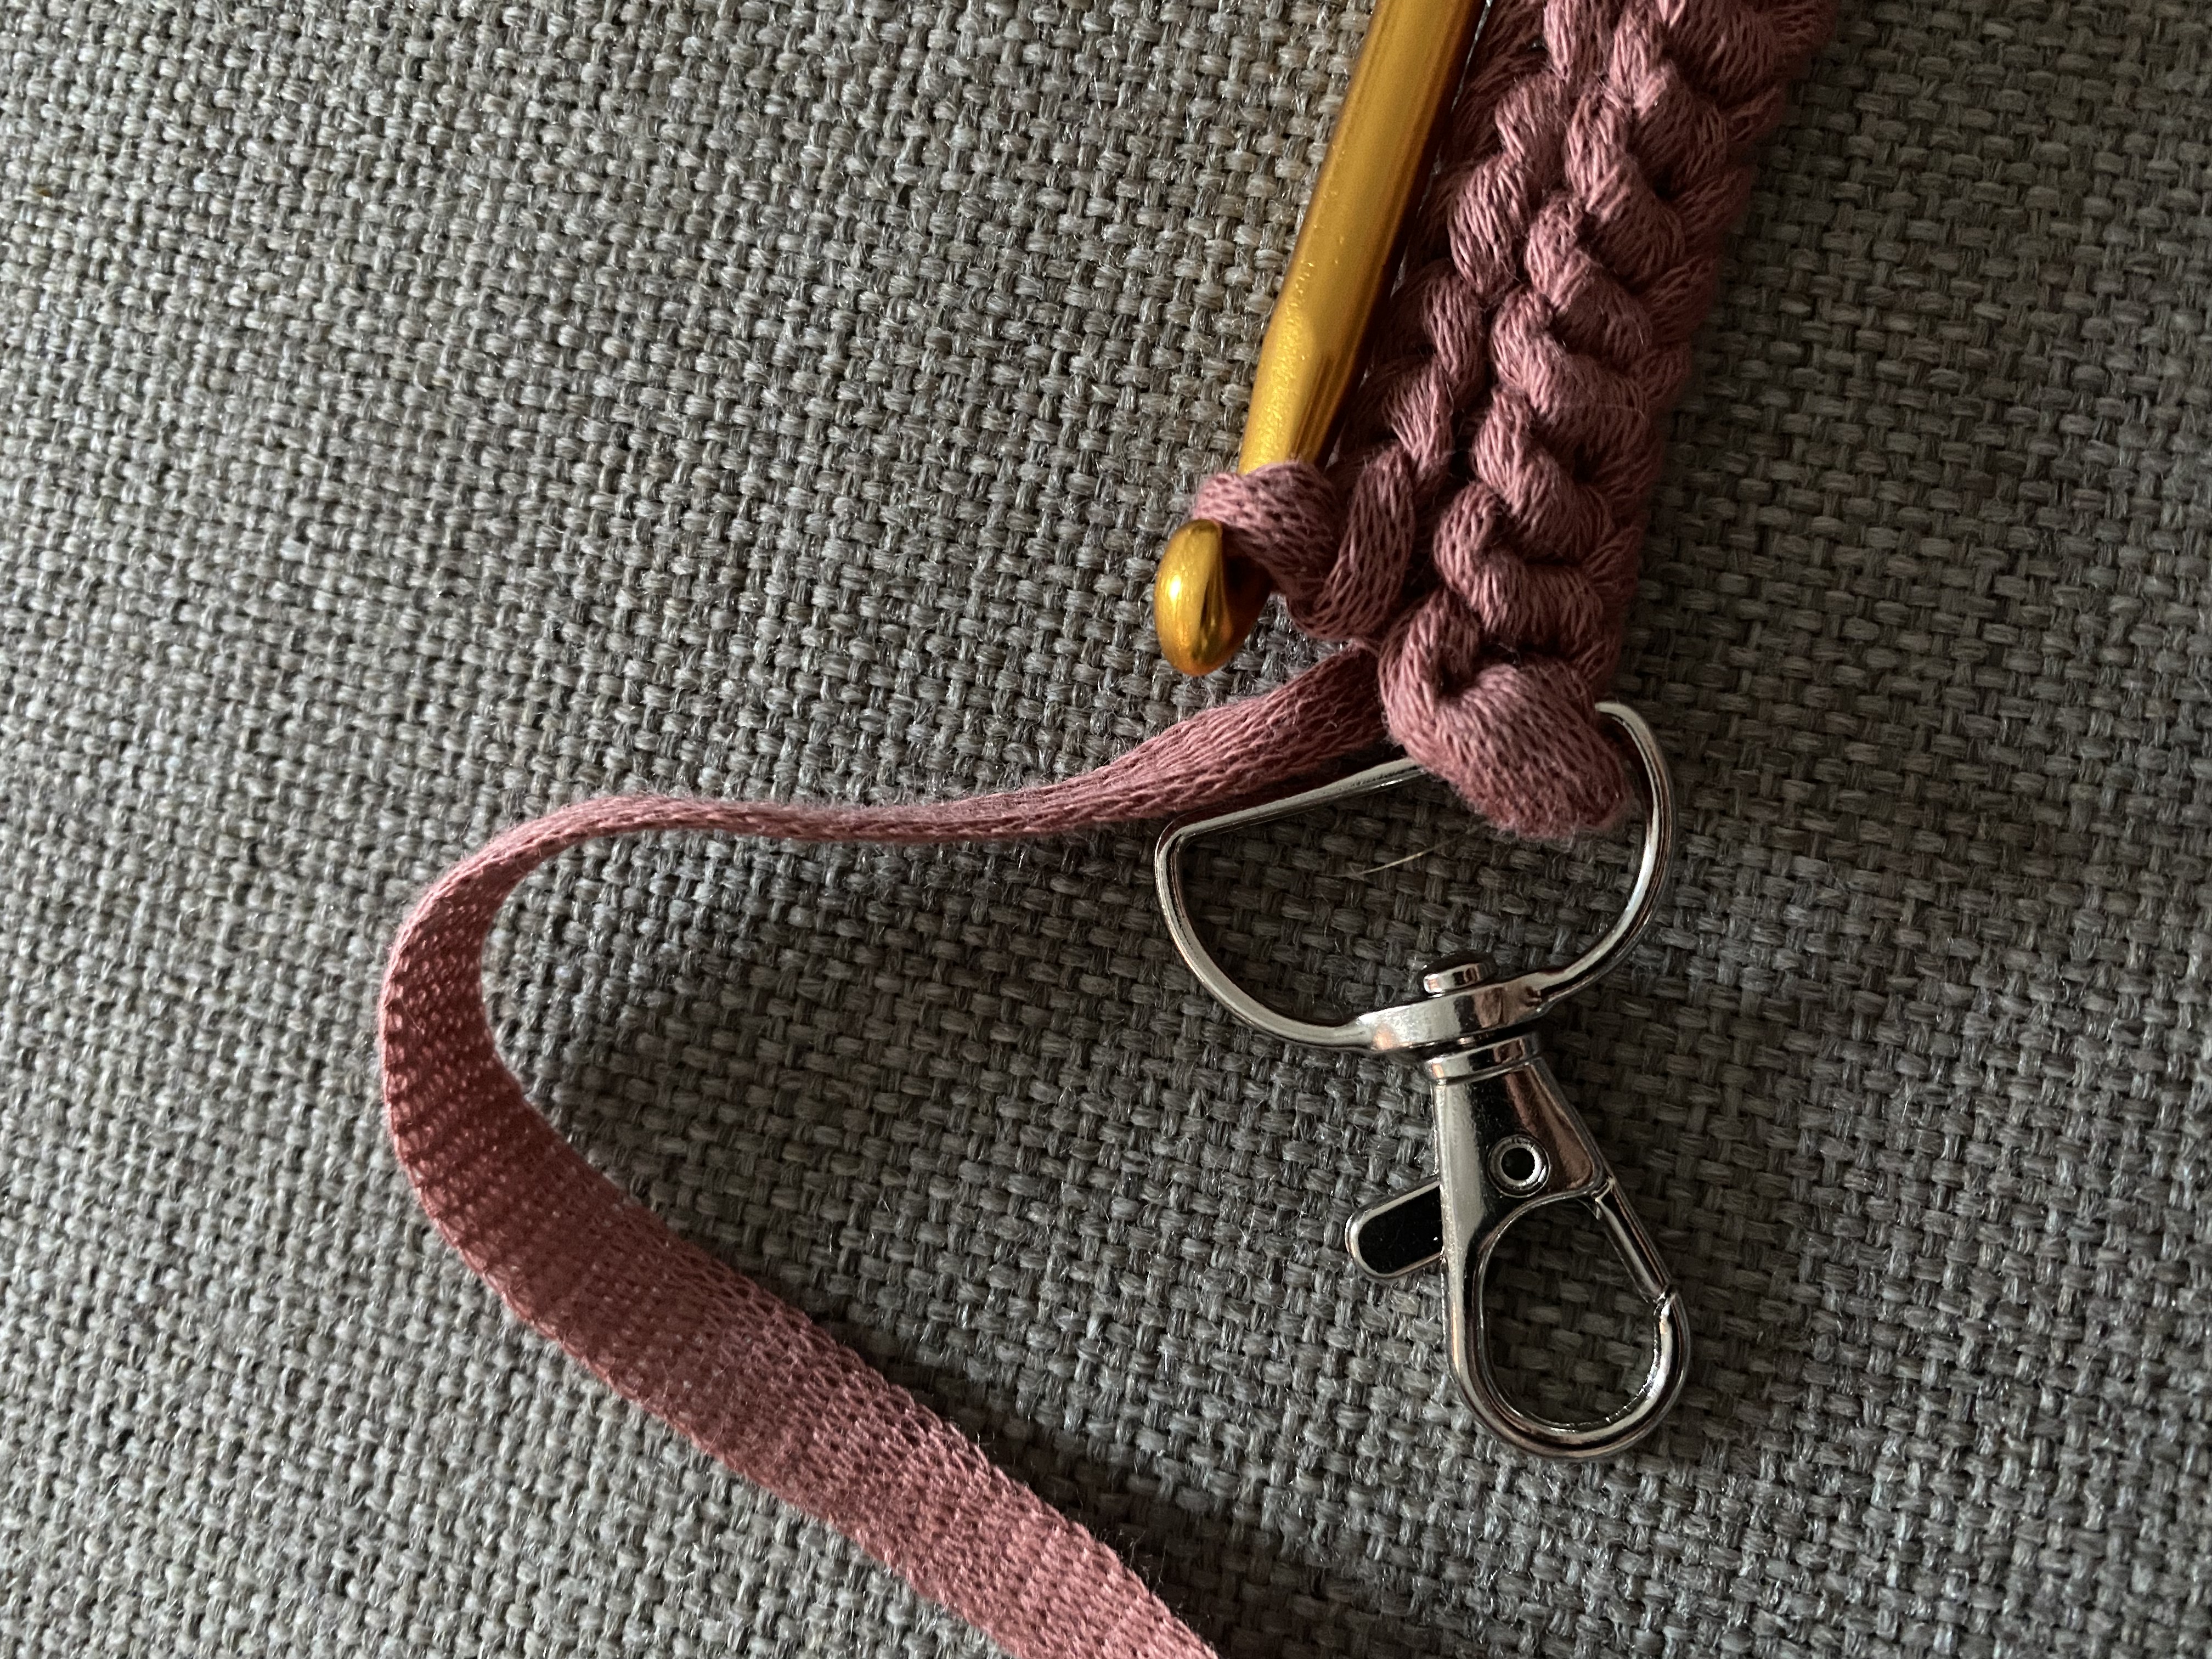
Row 2: Sl st in the first stitch after the hook(3). Sl st all the way back and ch1 on the slider. Turn.
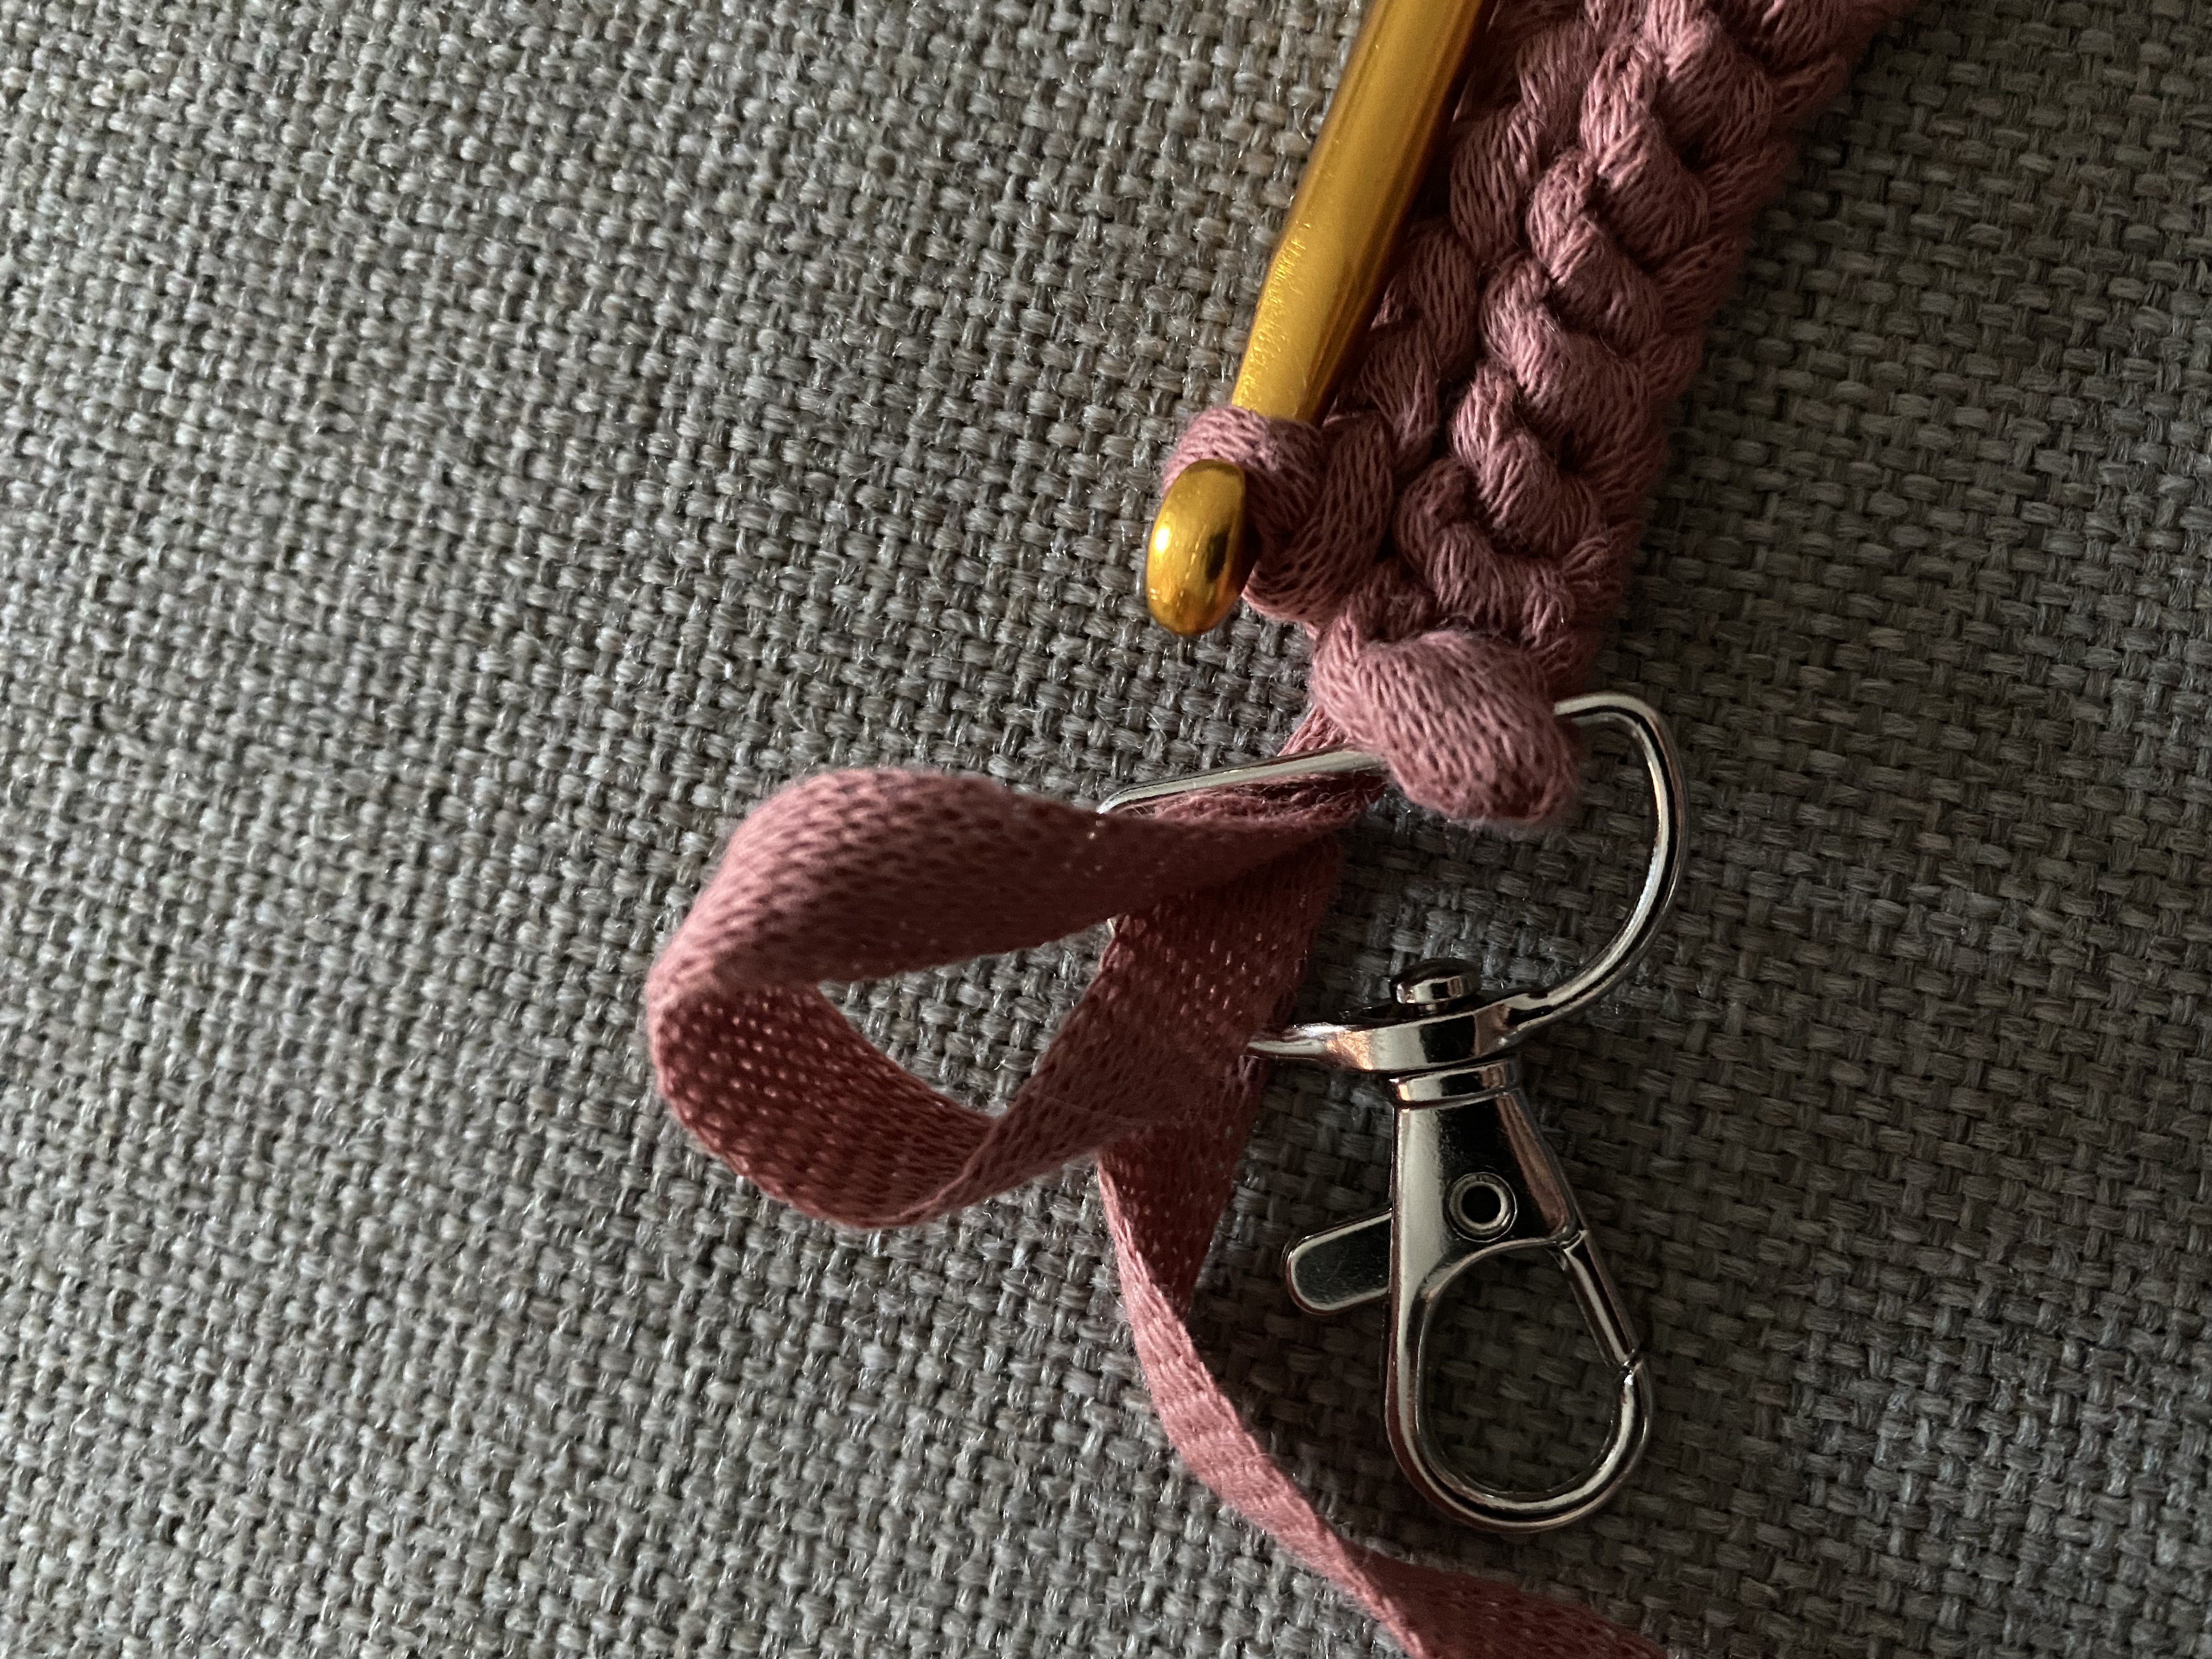
Row 3: Sl st first loop only (FLO) in the first stitch after the slider. Sl st all the way back and ch2 on the hook(4,5). Turn.
Row 4: Sl st FLO in the first stitch after the hook. Sl st all the way back and ch1 on the slider. Fasten off.

There! Your bag is finished :) You now only have to attach this strap to your bag, and it can be worn straight away. If you made this bag and want to use it online, please mention this blog or use #cleverlyhooked.
Enjoy the summery warm days!


